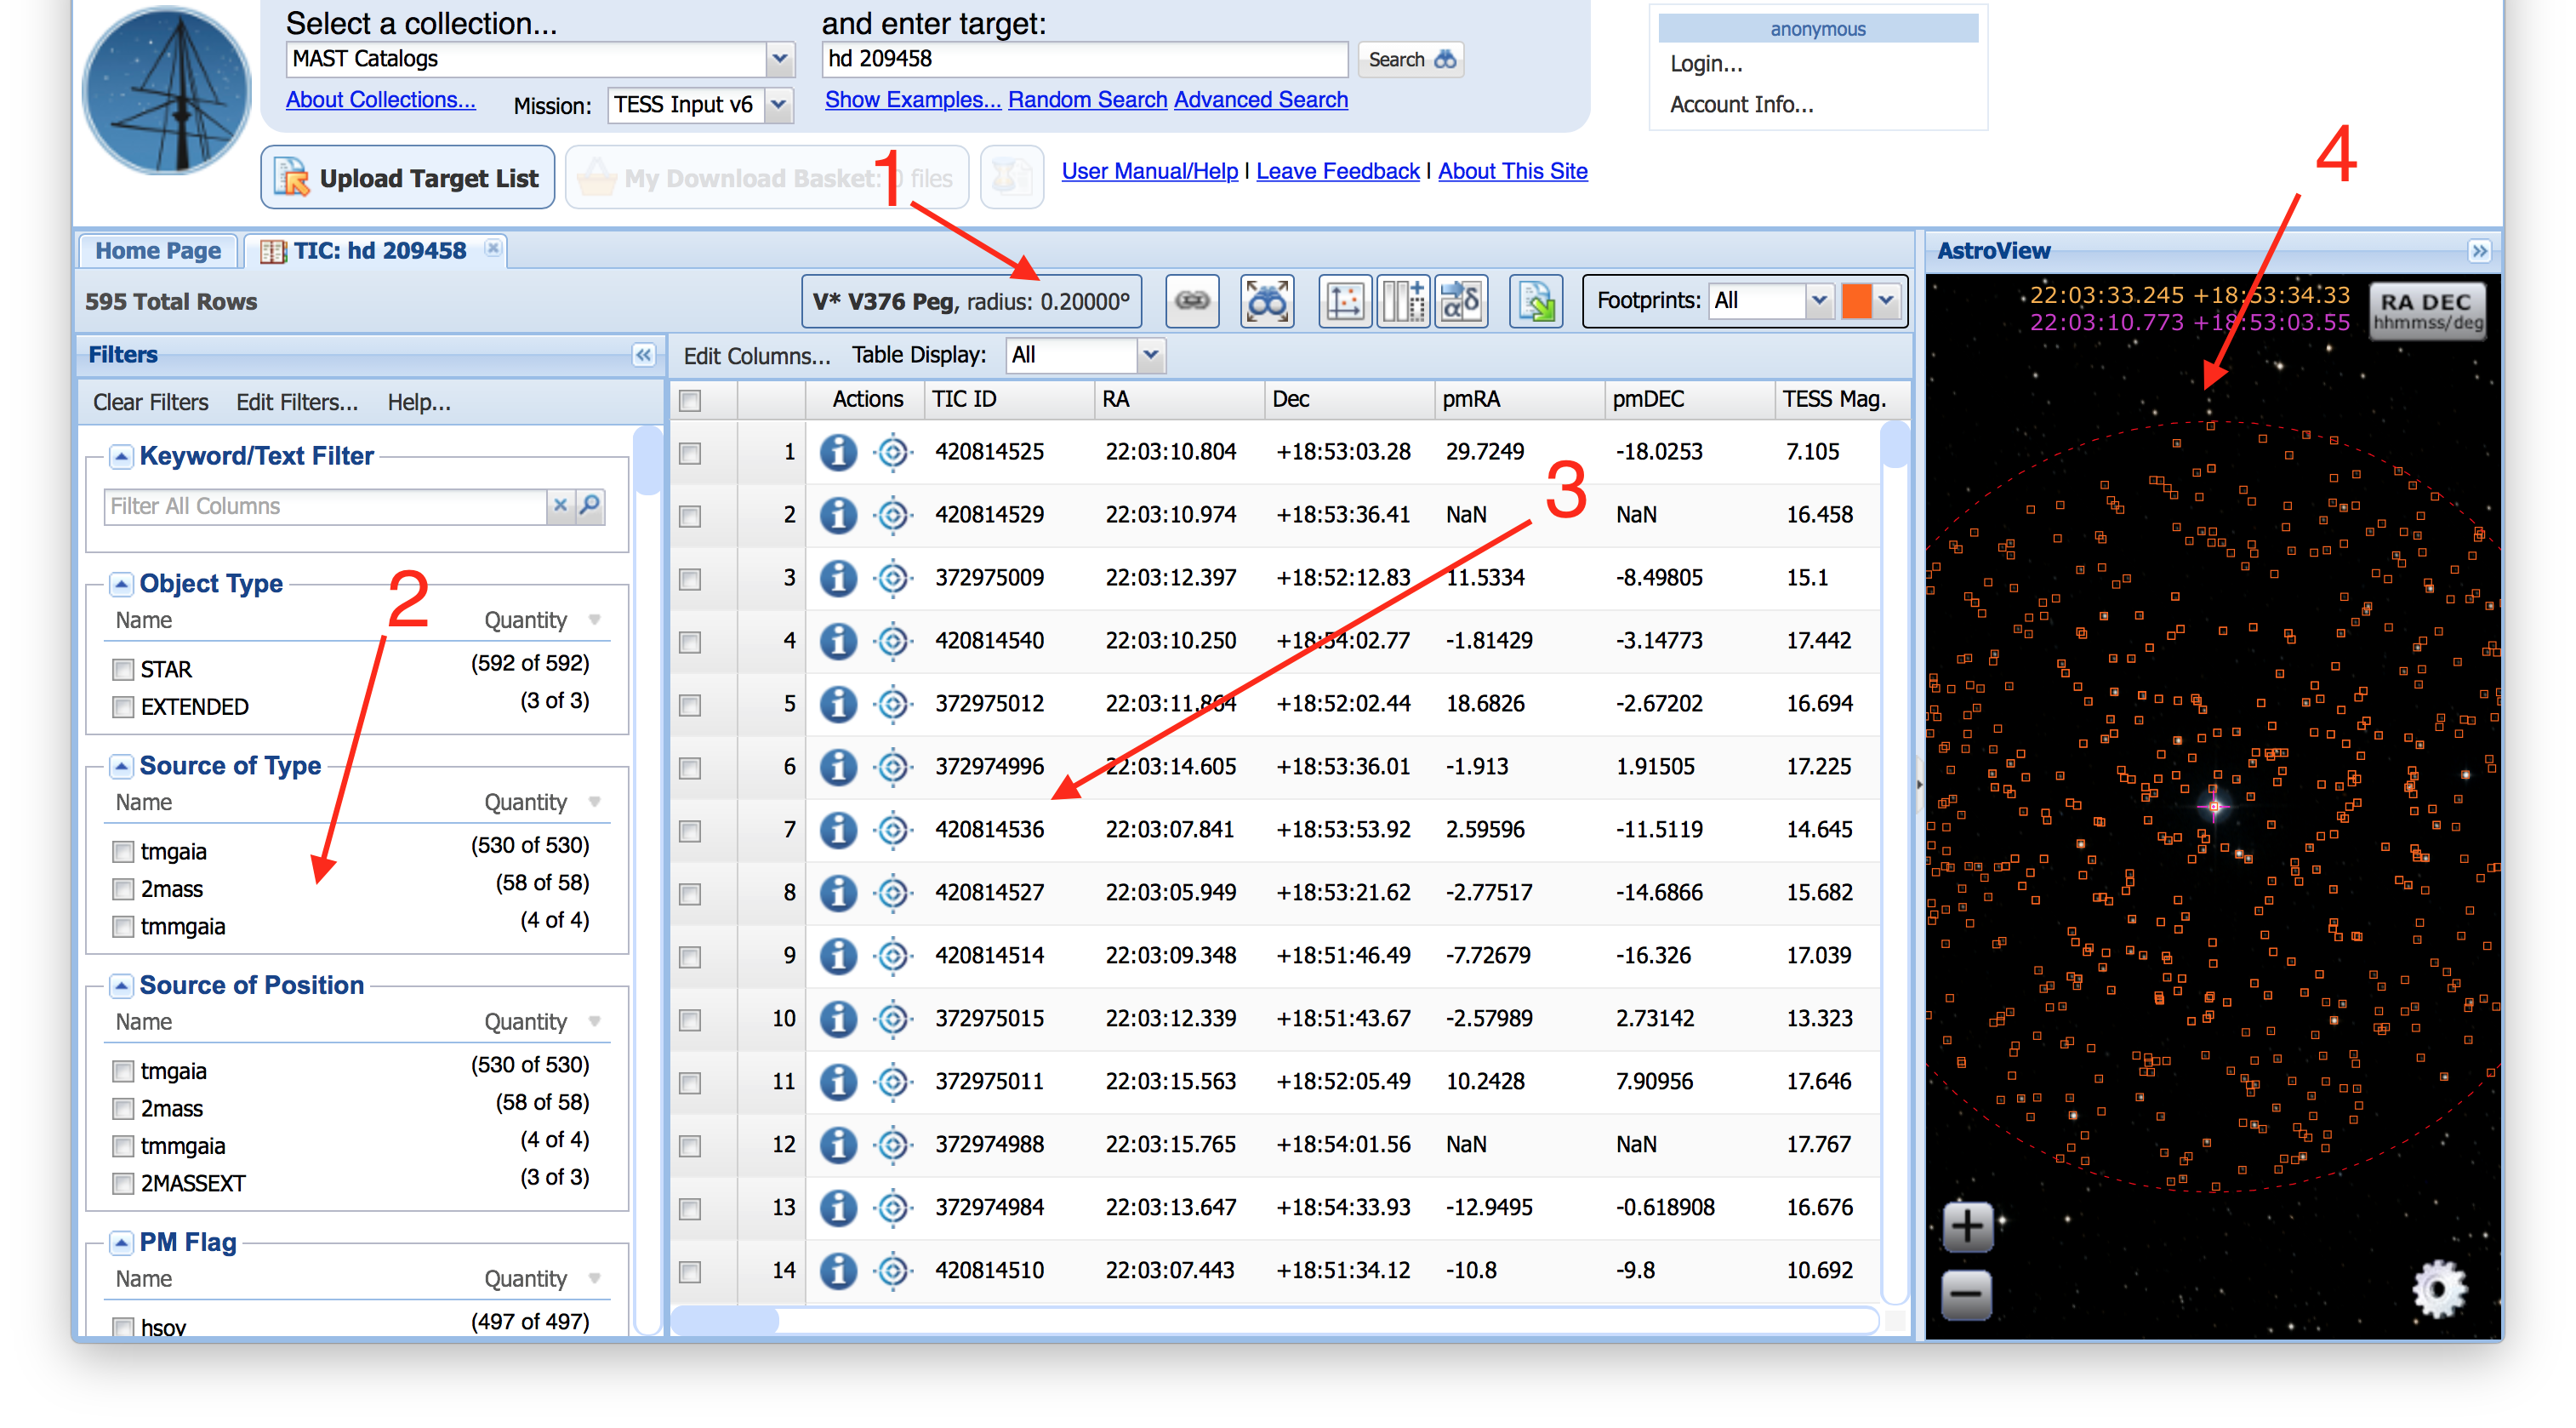
We now see the results of our search. First, note that the default search radius is often assigned to be a 0.2 degree radius (Item #1). Exceptions are for any objects resolved by external services (like NED) that have object radii defined for them, e.g., extended objects like galaxies or clusters. These can always be changed by specifying your search radius (see the Show Examples link below the search box for examples).
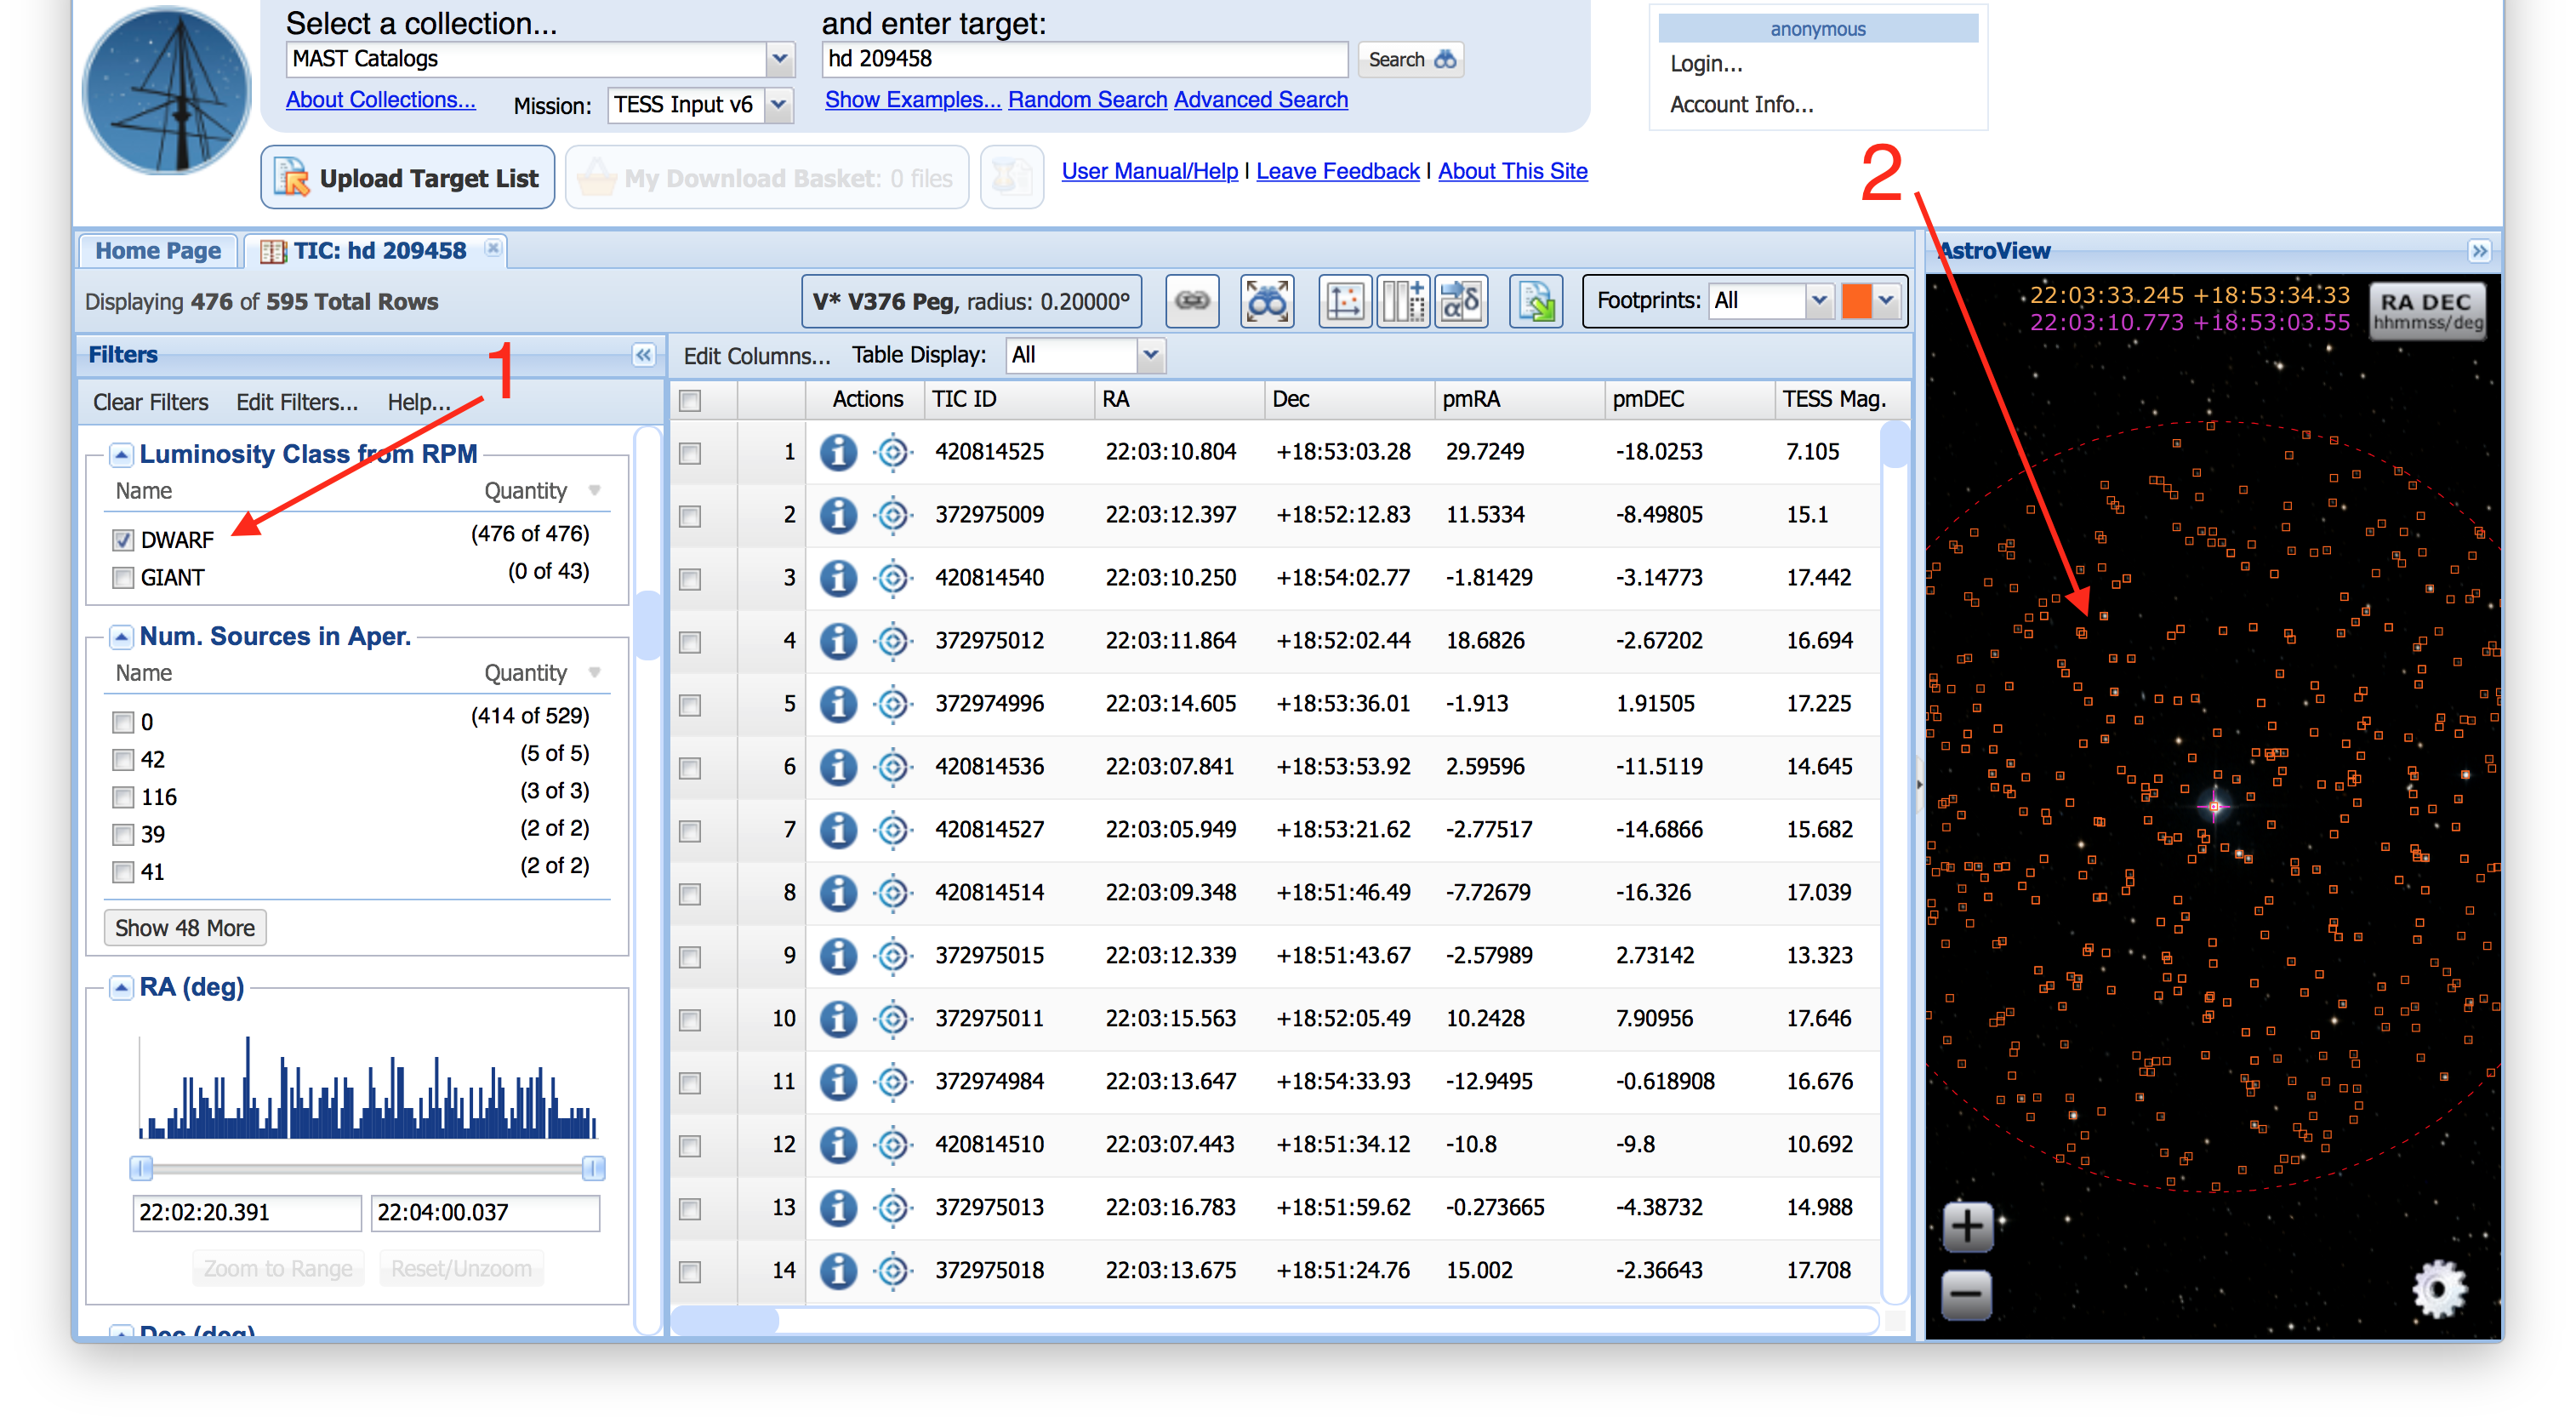
The search results area has three main panels, on the left is the Filters panel (Item #2), where you can select subsets of your returned rows by filtering column values. In the middle is the Search Results Grid (Item #3), which contains the table of results itself (hint: columns can be sorted by clicking on the headers). On the right is the AstroViewer (Item #4), which is a 3D sky map that will overplot the footprints of observations or catalog objects from your search results, and offers a wide range of background images from surveys that span the electromagnetic sepctrum from X-rays to the radio. We can see all the TIC sources in our 0.2 degree search radius quite clearly. |