Page History
| Divbox | ||
|---|---|---|
| ||
This tutorial will show you how to use the Advanced Search capability of the MAST Portal. Specifically, we will be using Advanced Search to pre-select targets in the TESS Candidate Target List (CTL) that have temperatures between 2000-3500 K, declination below 0 degrees, and proper motions greater than 100 mas/year in both RA and Dec. After pre-selecting using these filters, you can either download the results, or conduct a search within that subset of the CTL. |
| Divbox | ||
|---|---|---|
| ||
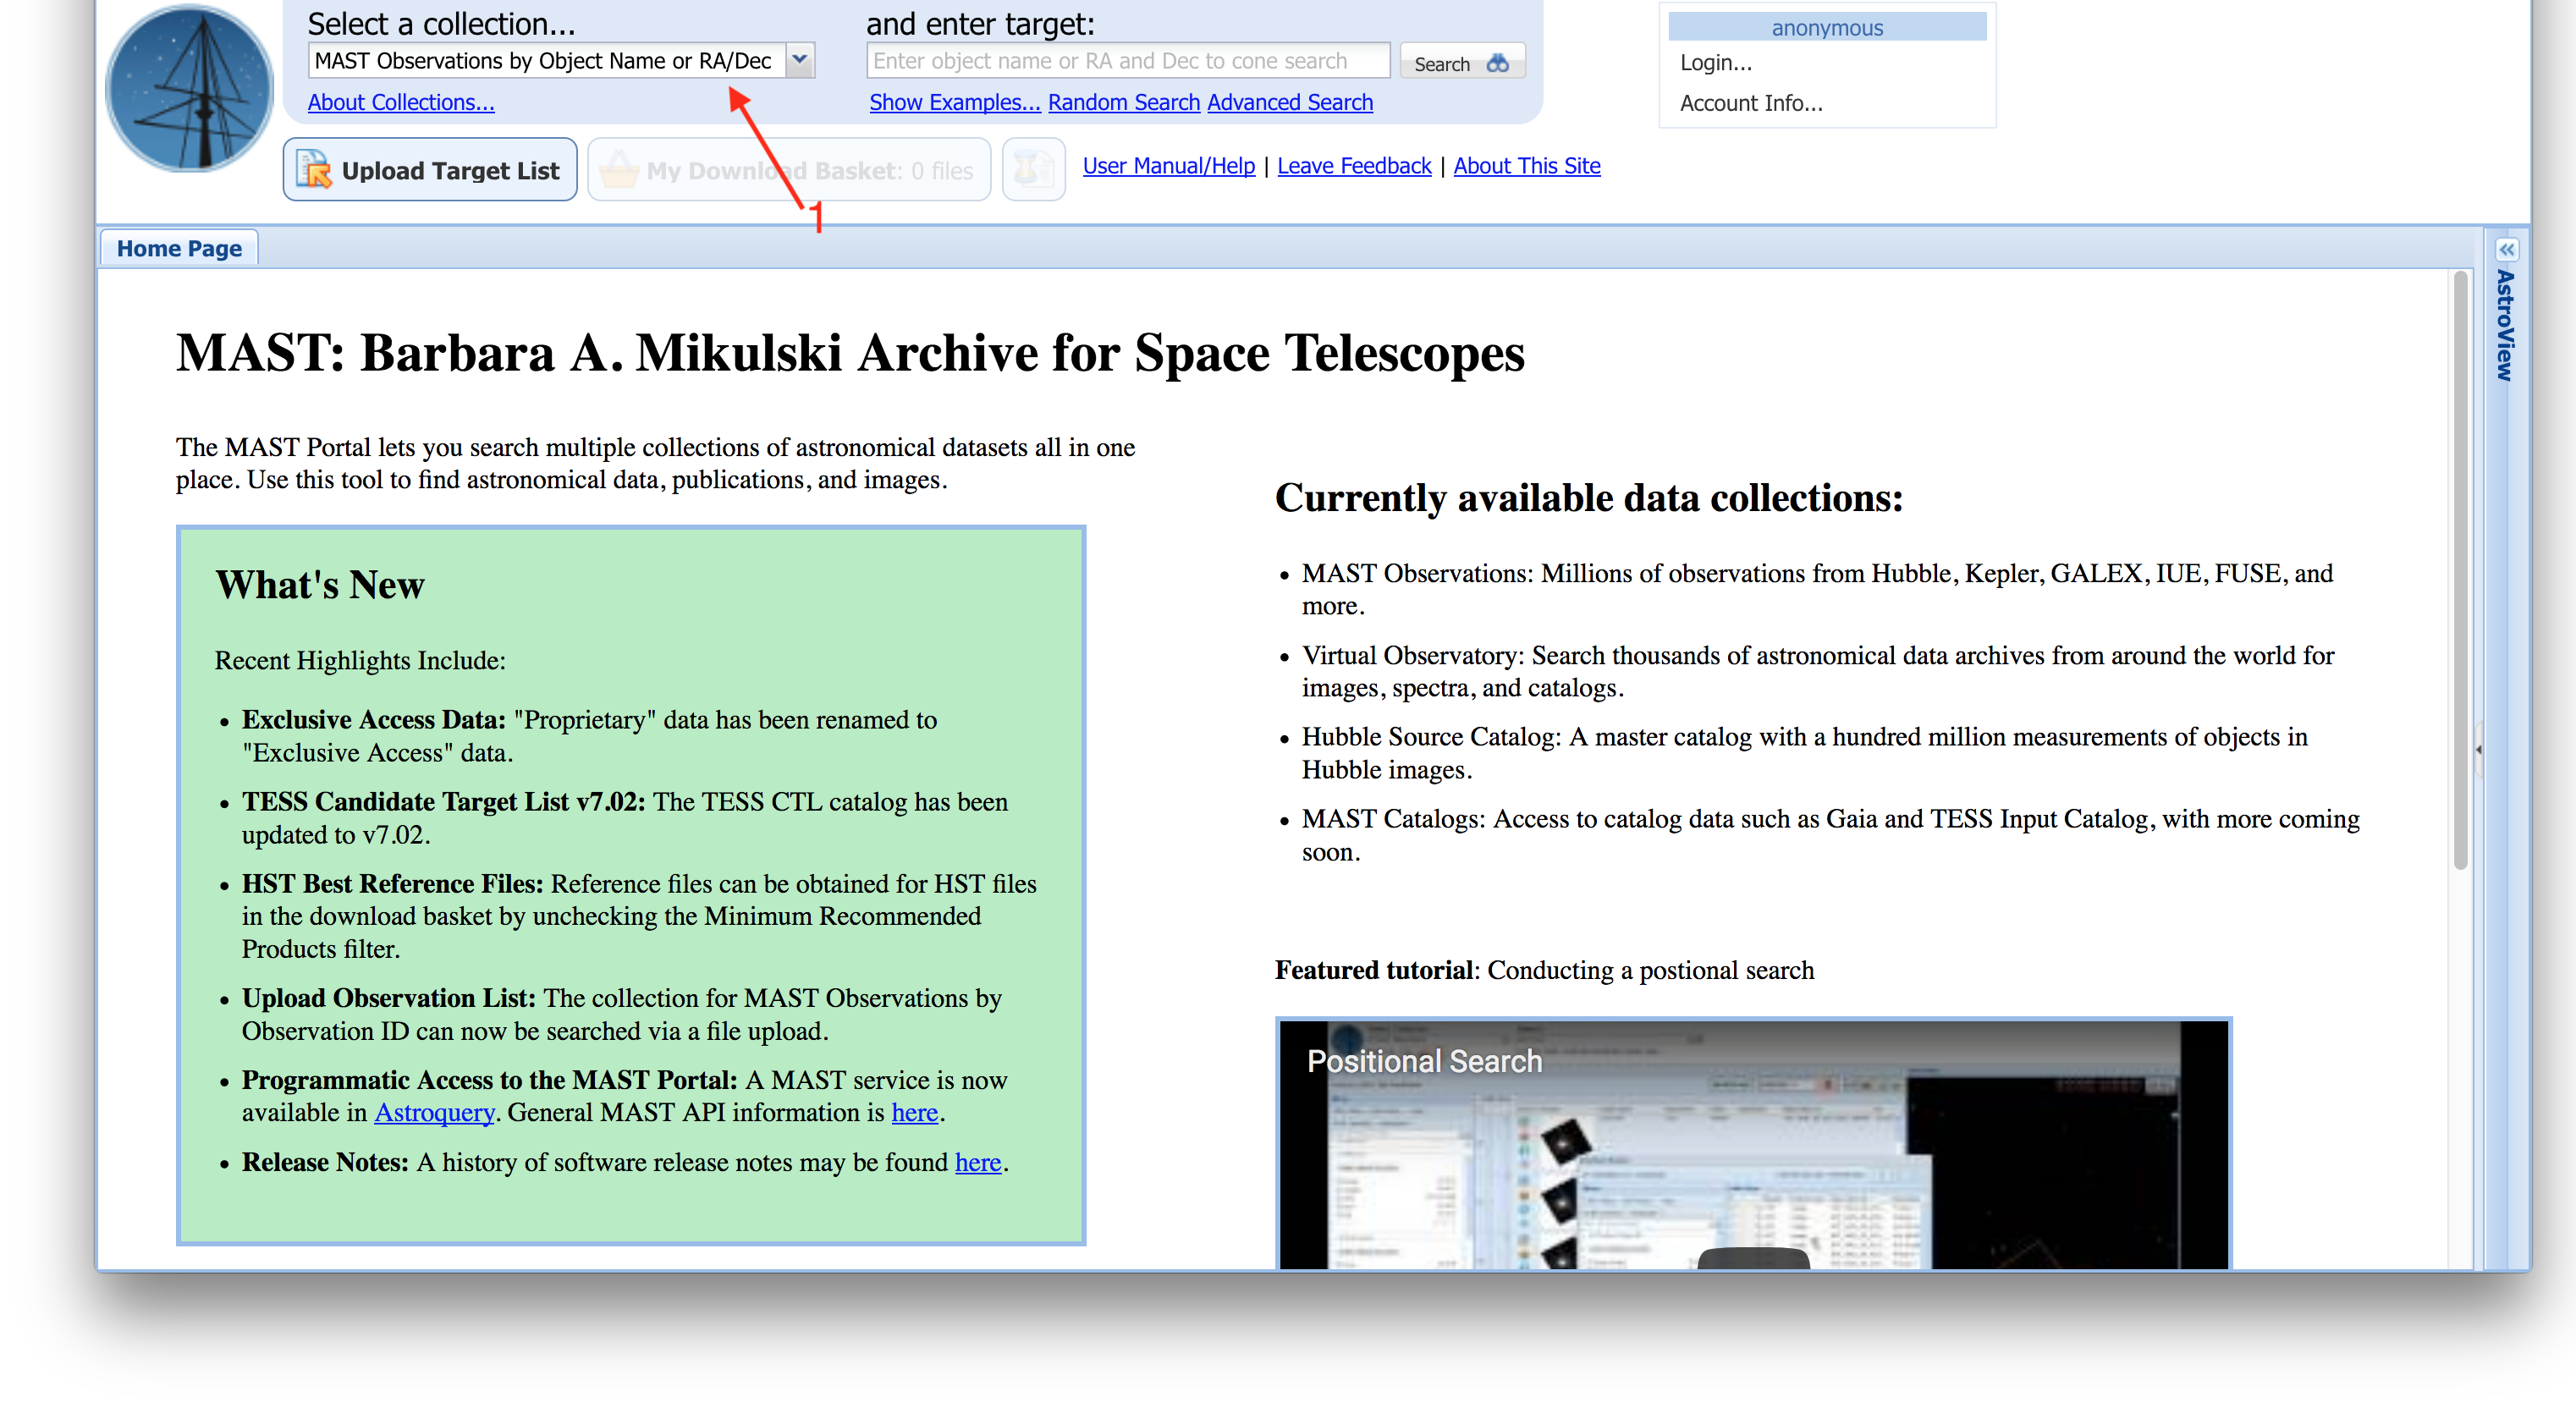
Step 1 - Select Collection: Upon visiting the MAST Portal, the first step is to change the collection of data we are searching in from the Context menu (Item #1) at the top left. |
| Divbox | ||
|---|---|---|
| ||
|
| Divbox | ||
|---|---|---|
| ||
Step 2 - Select CTL Catalog: From the Context drop-down menu, select MAST Catalogs, then, in the Mission drop-down menu that appears (Item #1), select either TESS Input for the TIC, or TESS CTL for the candidate target list. In this example, we'll select TESS CTLeither TESS CTL v7.02 for the exoCTL. Note that the version number will change as newer editions replace older ones in the Portal. |
| Divbox | ||
|---|---|---|
| ||
|

| Divbox | ||
|---|---|---|
| ||
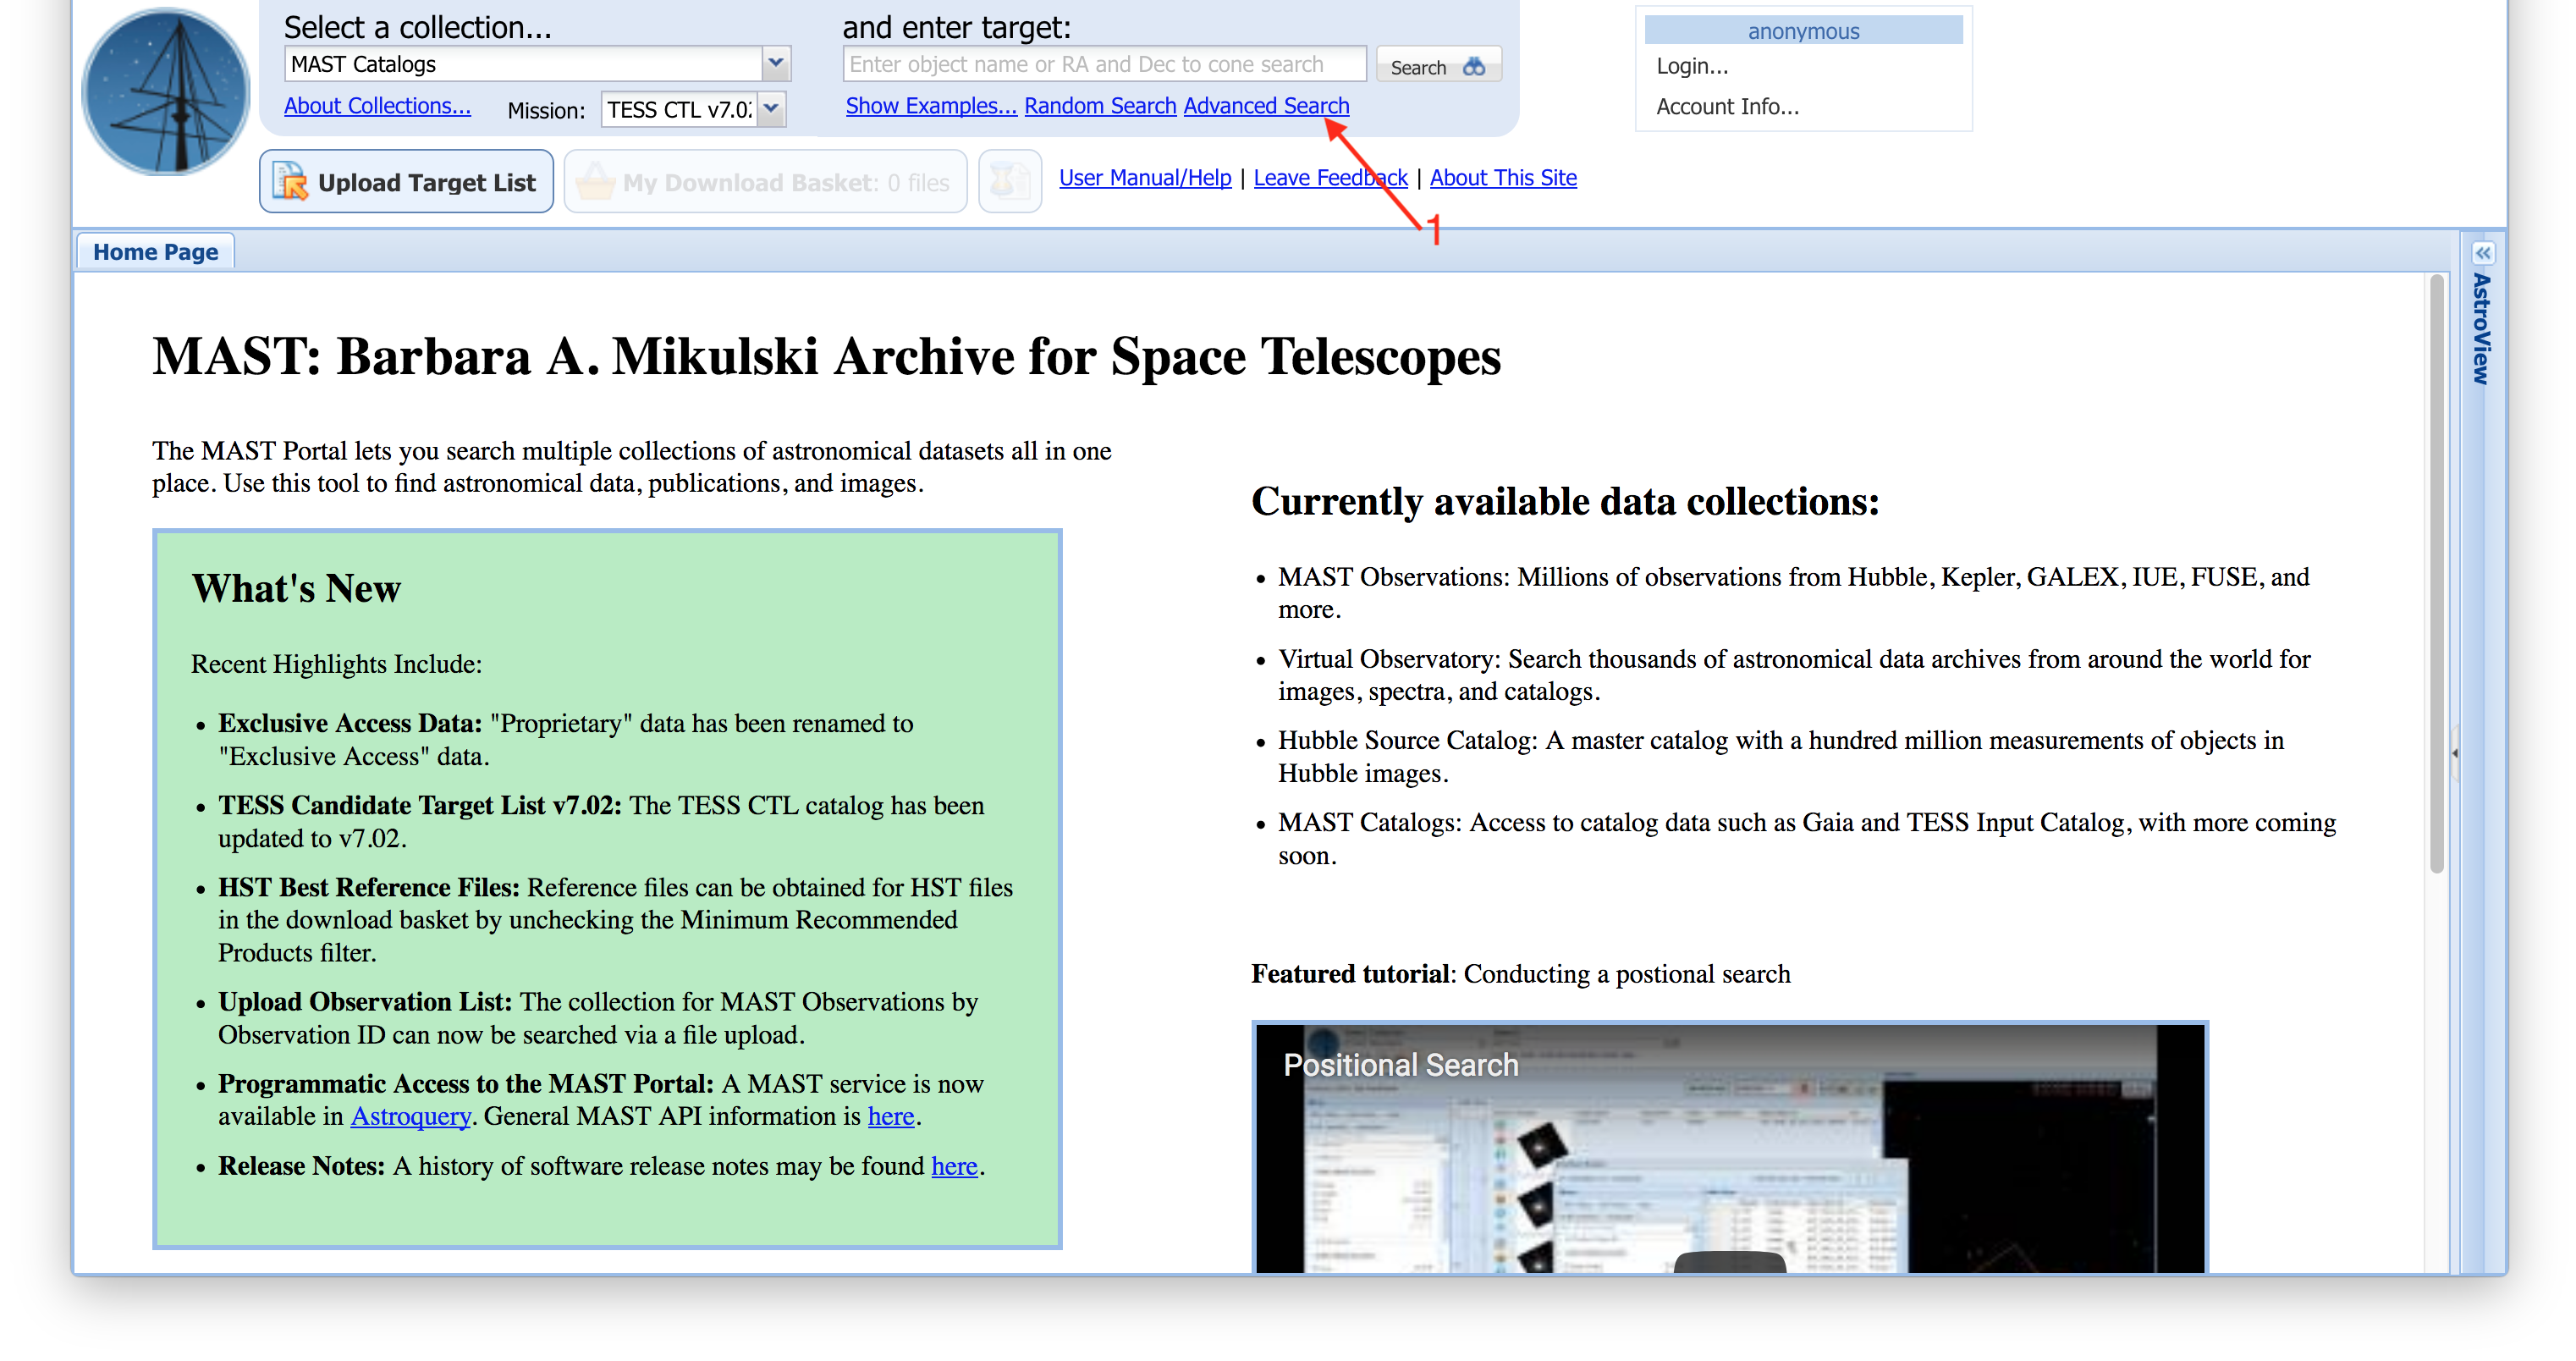
Step 3 - Enter The Advanced Search UI: After selecting the CTL in the Context menu, enter the Advanced Search using the link below the search box (Item #1). Note: you only need to visit the link , at this point, do not enter anything into the Search Box. |
| Divbox | ||
|---|---|---|
| ||
|
| Divbox | ||
|---|---|---|
| ||
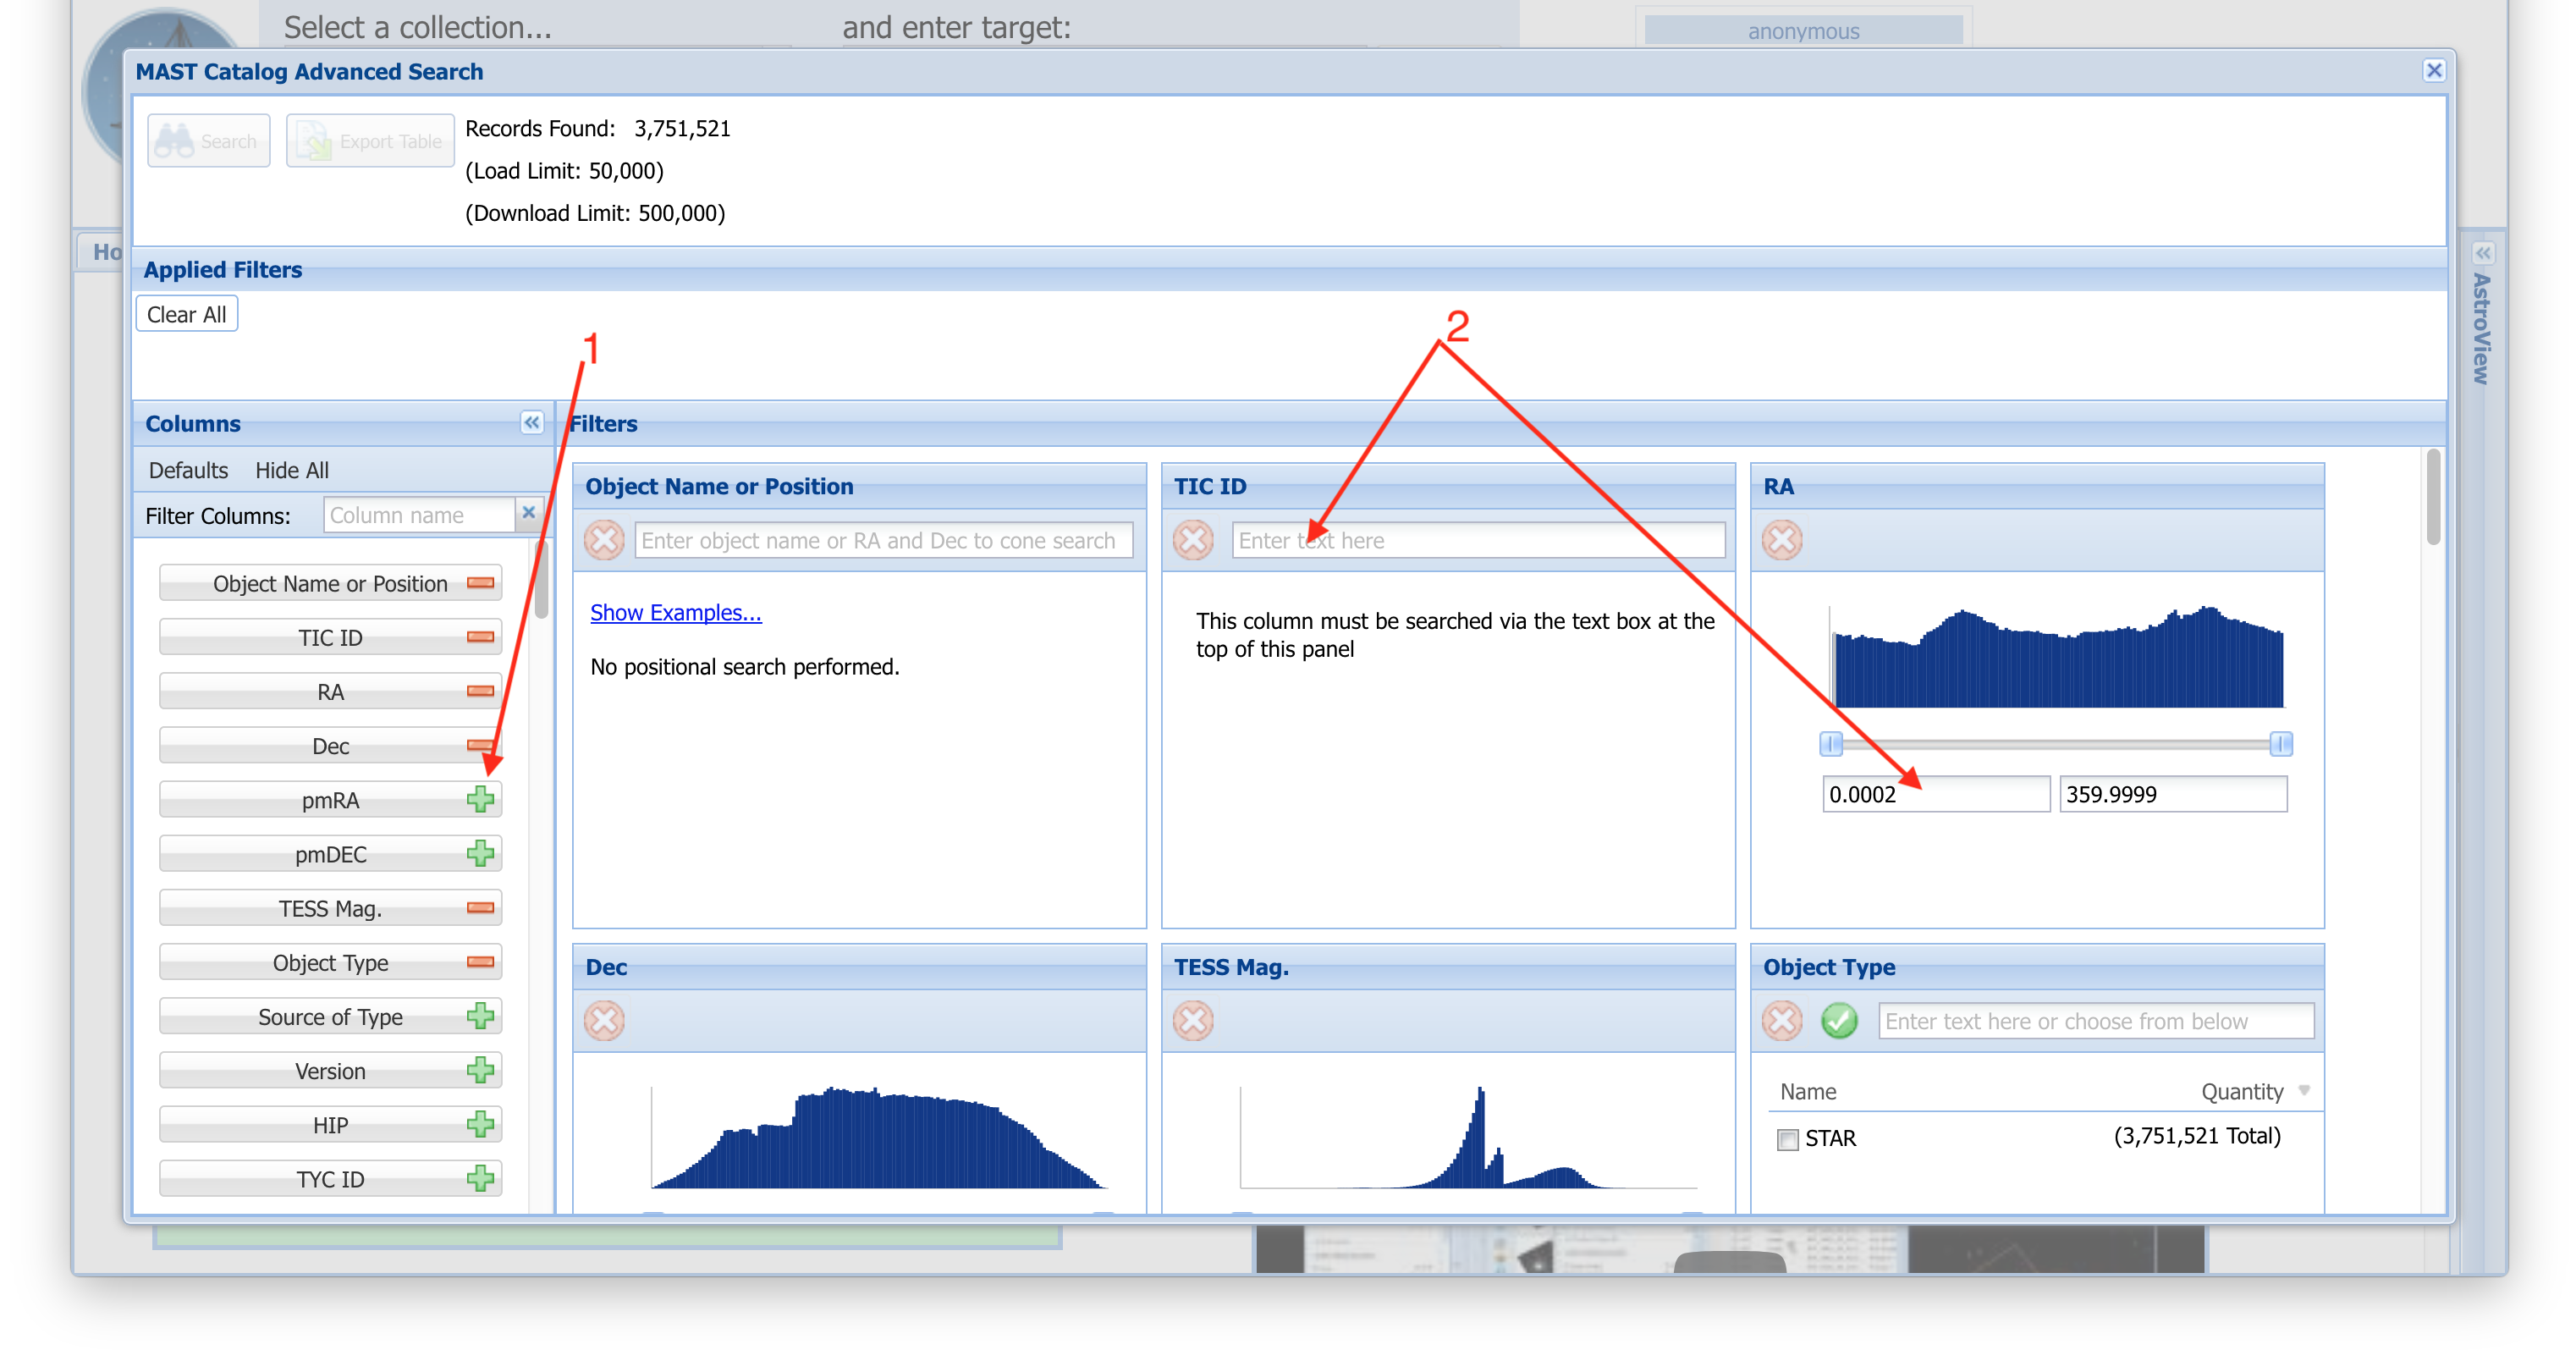
Step 4 - Choose Columns To Filter On: In the Advanced Search screenwindow, you can add (green plus symbols) or remove sub-(red minus symbols) panels that can be used to apply a pre-search filter on any of the available columns (Item #1). When you add a sub- panel, it will show up on the right side of the menuwindow, where you can apply limits on the ranges for numerical columns, or constraints in text fields by entering a valuesome text, including wildcards (Item #2). |
| Divbox | ||
|---|---|---|
| ||
|
| Divbox | ||
|---|---|---|
| ||
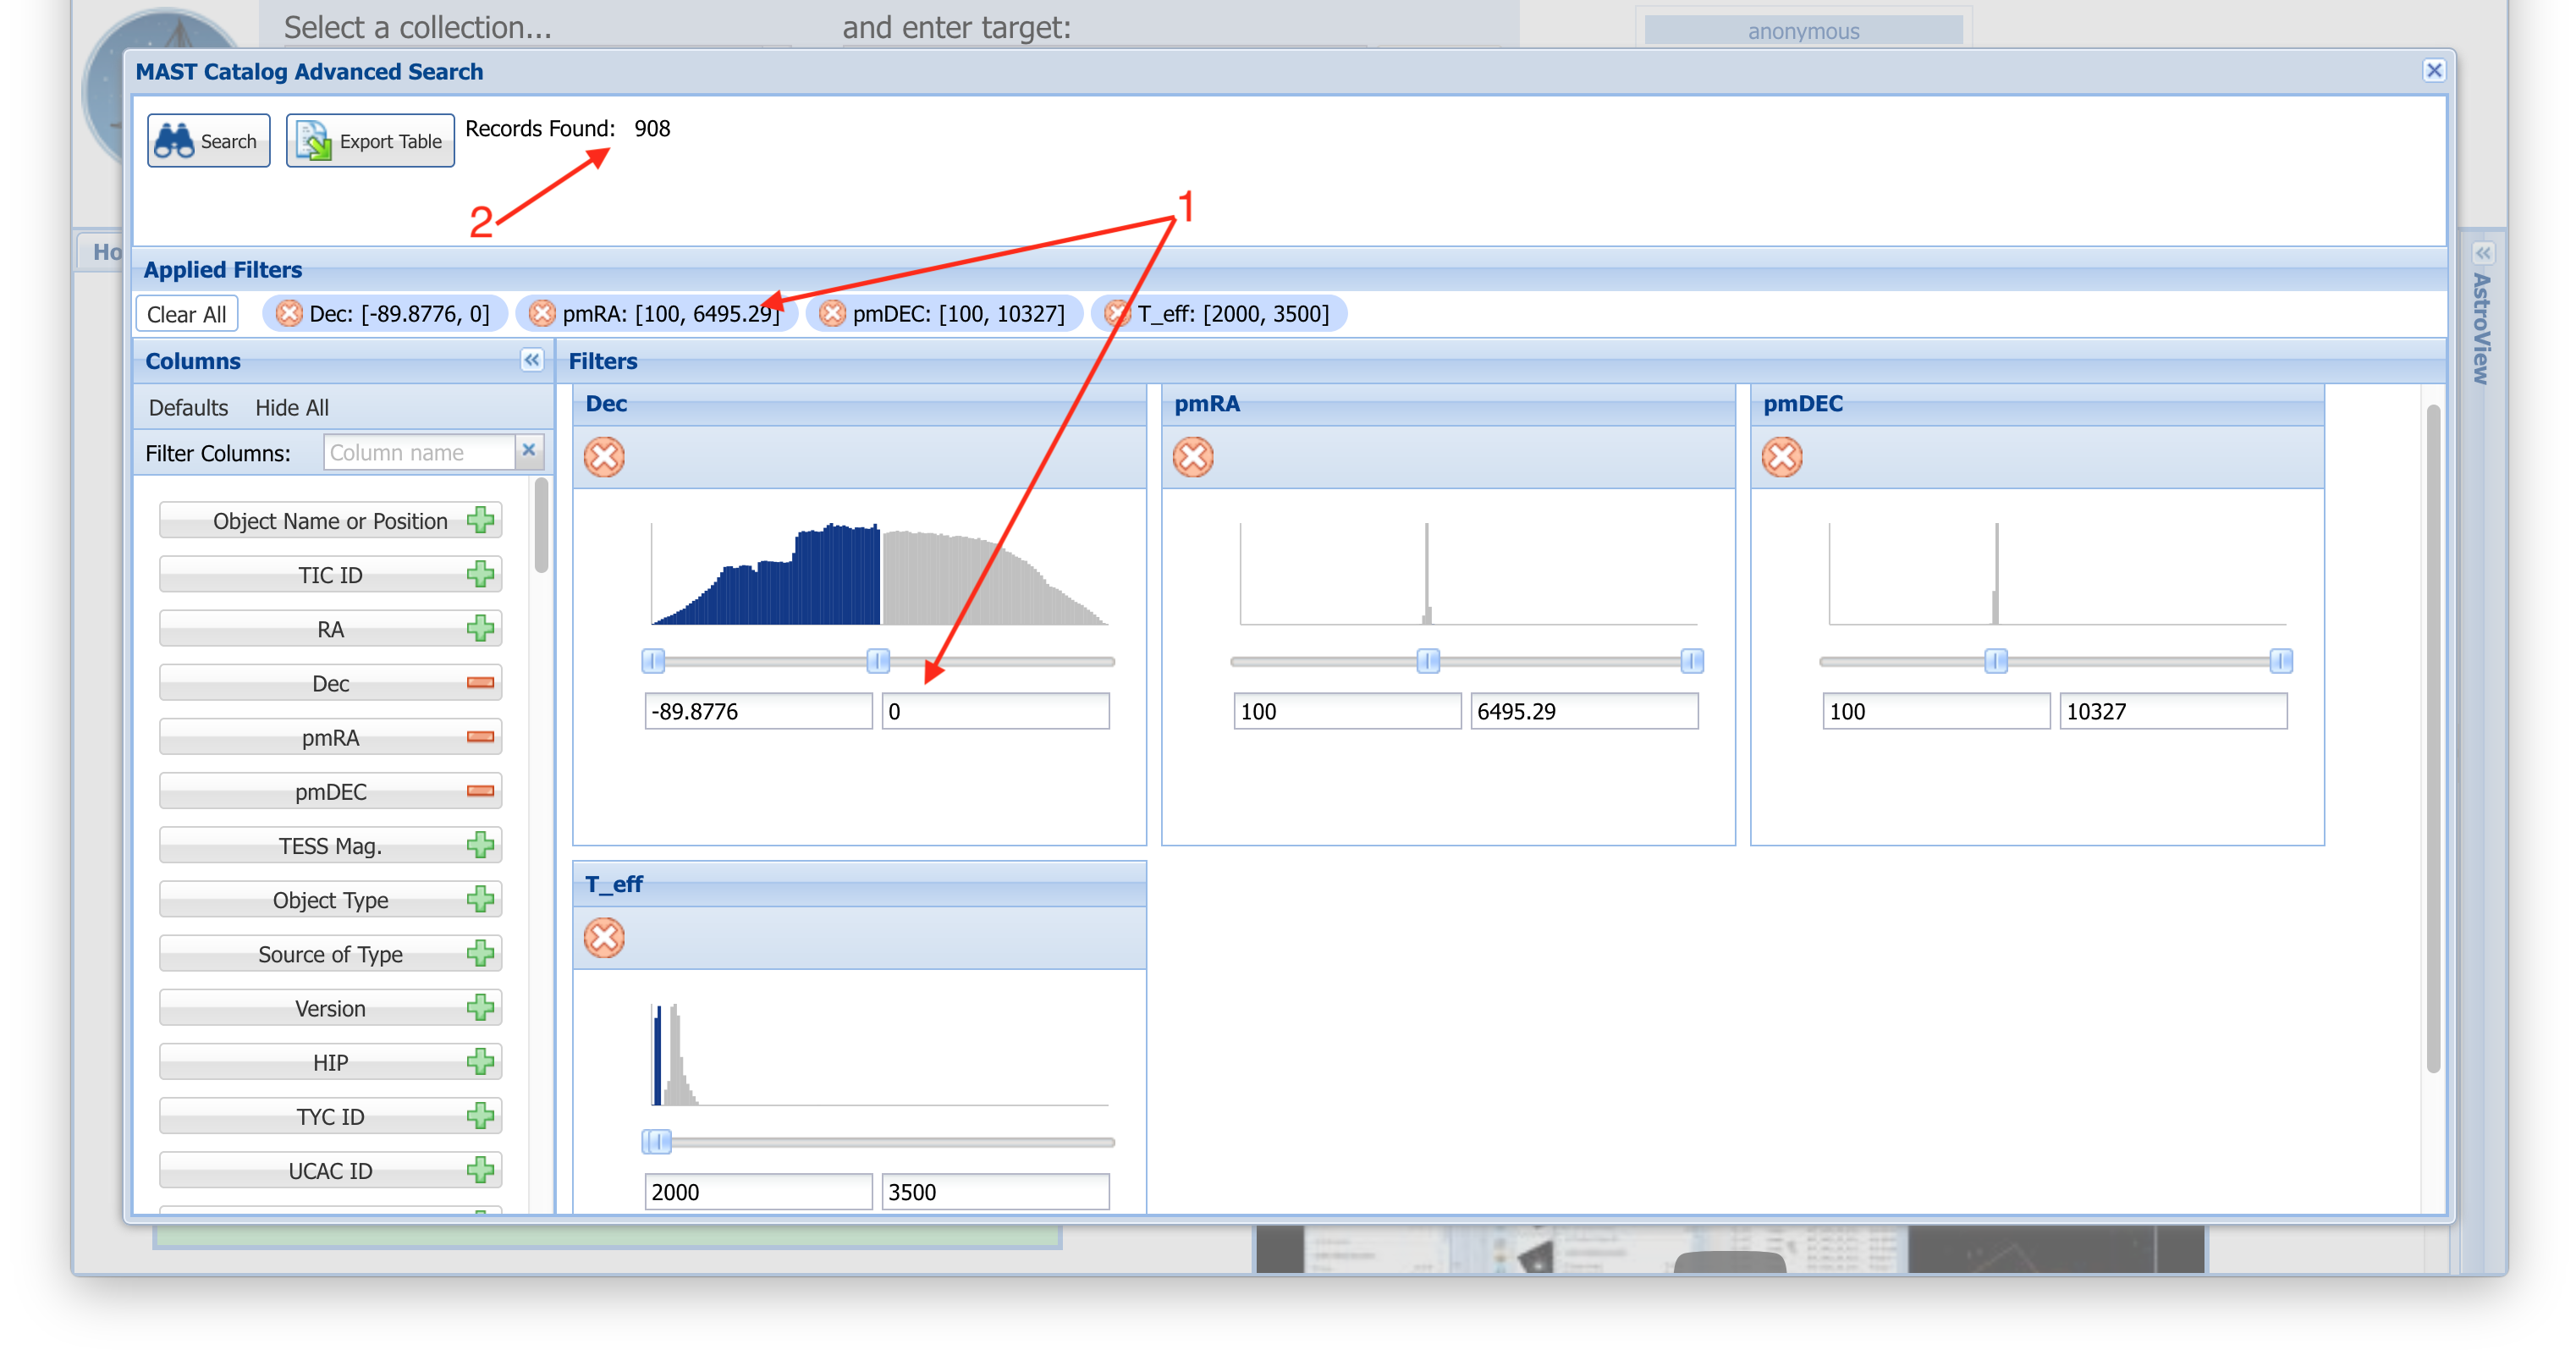
Step 5 - Apply Filters: In our example, we'll remove all the sub-panels except for Dec, pmRA, pmDEC, and T_eff, Luminosity Class From RPM, and Priority. It's not necessary to remove sub- panels if you don't want to filter on them, but we do here for clarity. We filter 2000. < T_eff < 3500. K, ensure only those with a "DWARF" Luminosity Class From RPM are selected, and change the minimum Priority = 0.03declination less than 0 degrees, and require both RA and Dec. proper motions are larger than 100 mas (Item #1). As you apply each filter, the Portal will apply it and keep a running total of the number of return rows in the top-left (Item #2). |
| Divbox | ||
|---|---|---|
| ||
|
| Divbox | ||
|---|---|---|
| ||
Step 6 - Export or Load Your Query Results: Once your filters result in < in less than 500,000 rows, the option to download Export the results will become active (Item #1). You can then specify an output file type and file name and format to save those rows to your local machine. If your filter results in less than 50,000 rows, the option to Search (load into the main Portal window) becomes active (Item #2). Since the number of returned records is small, let's load them back into the main Portal window using the Search button. |
| Divbox | ||
|---|---|---|
| ||
|

| Divbox | ||
|---|---|---|
| ||
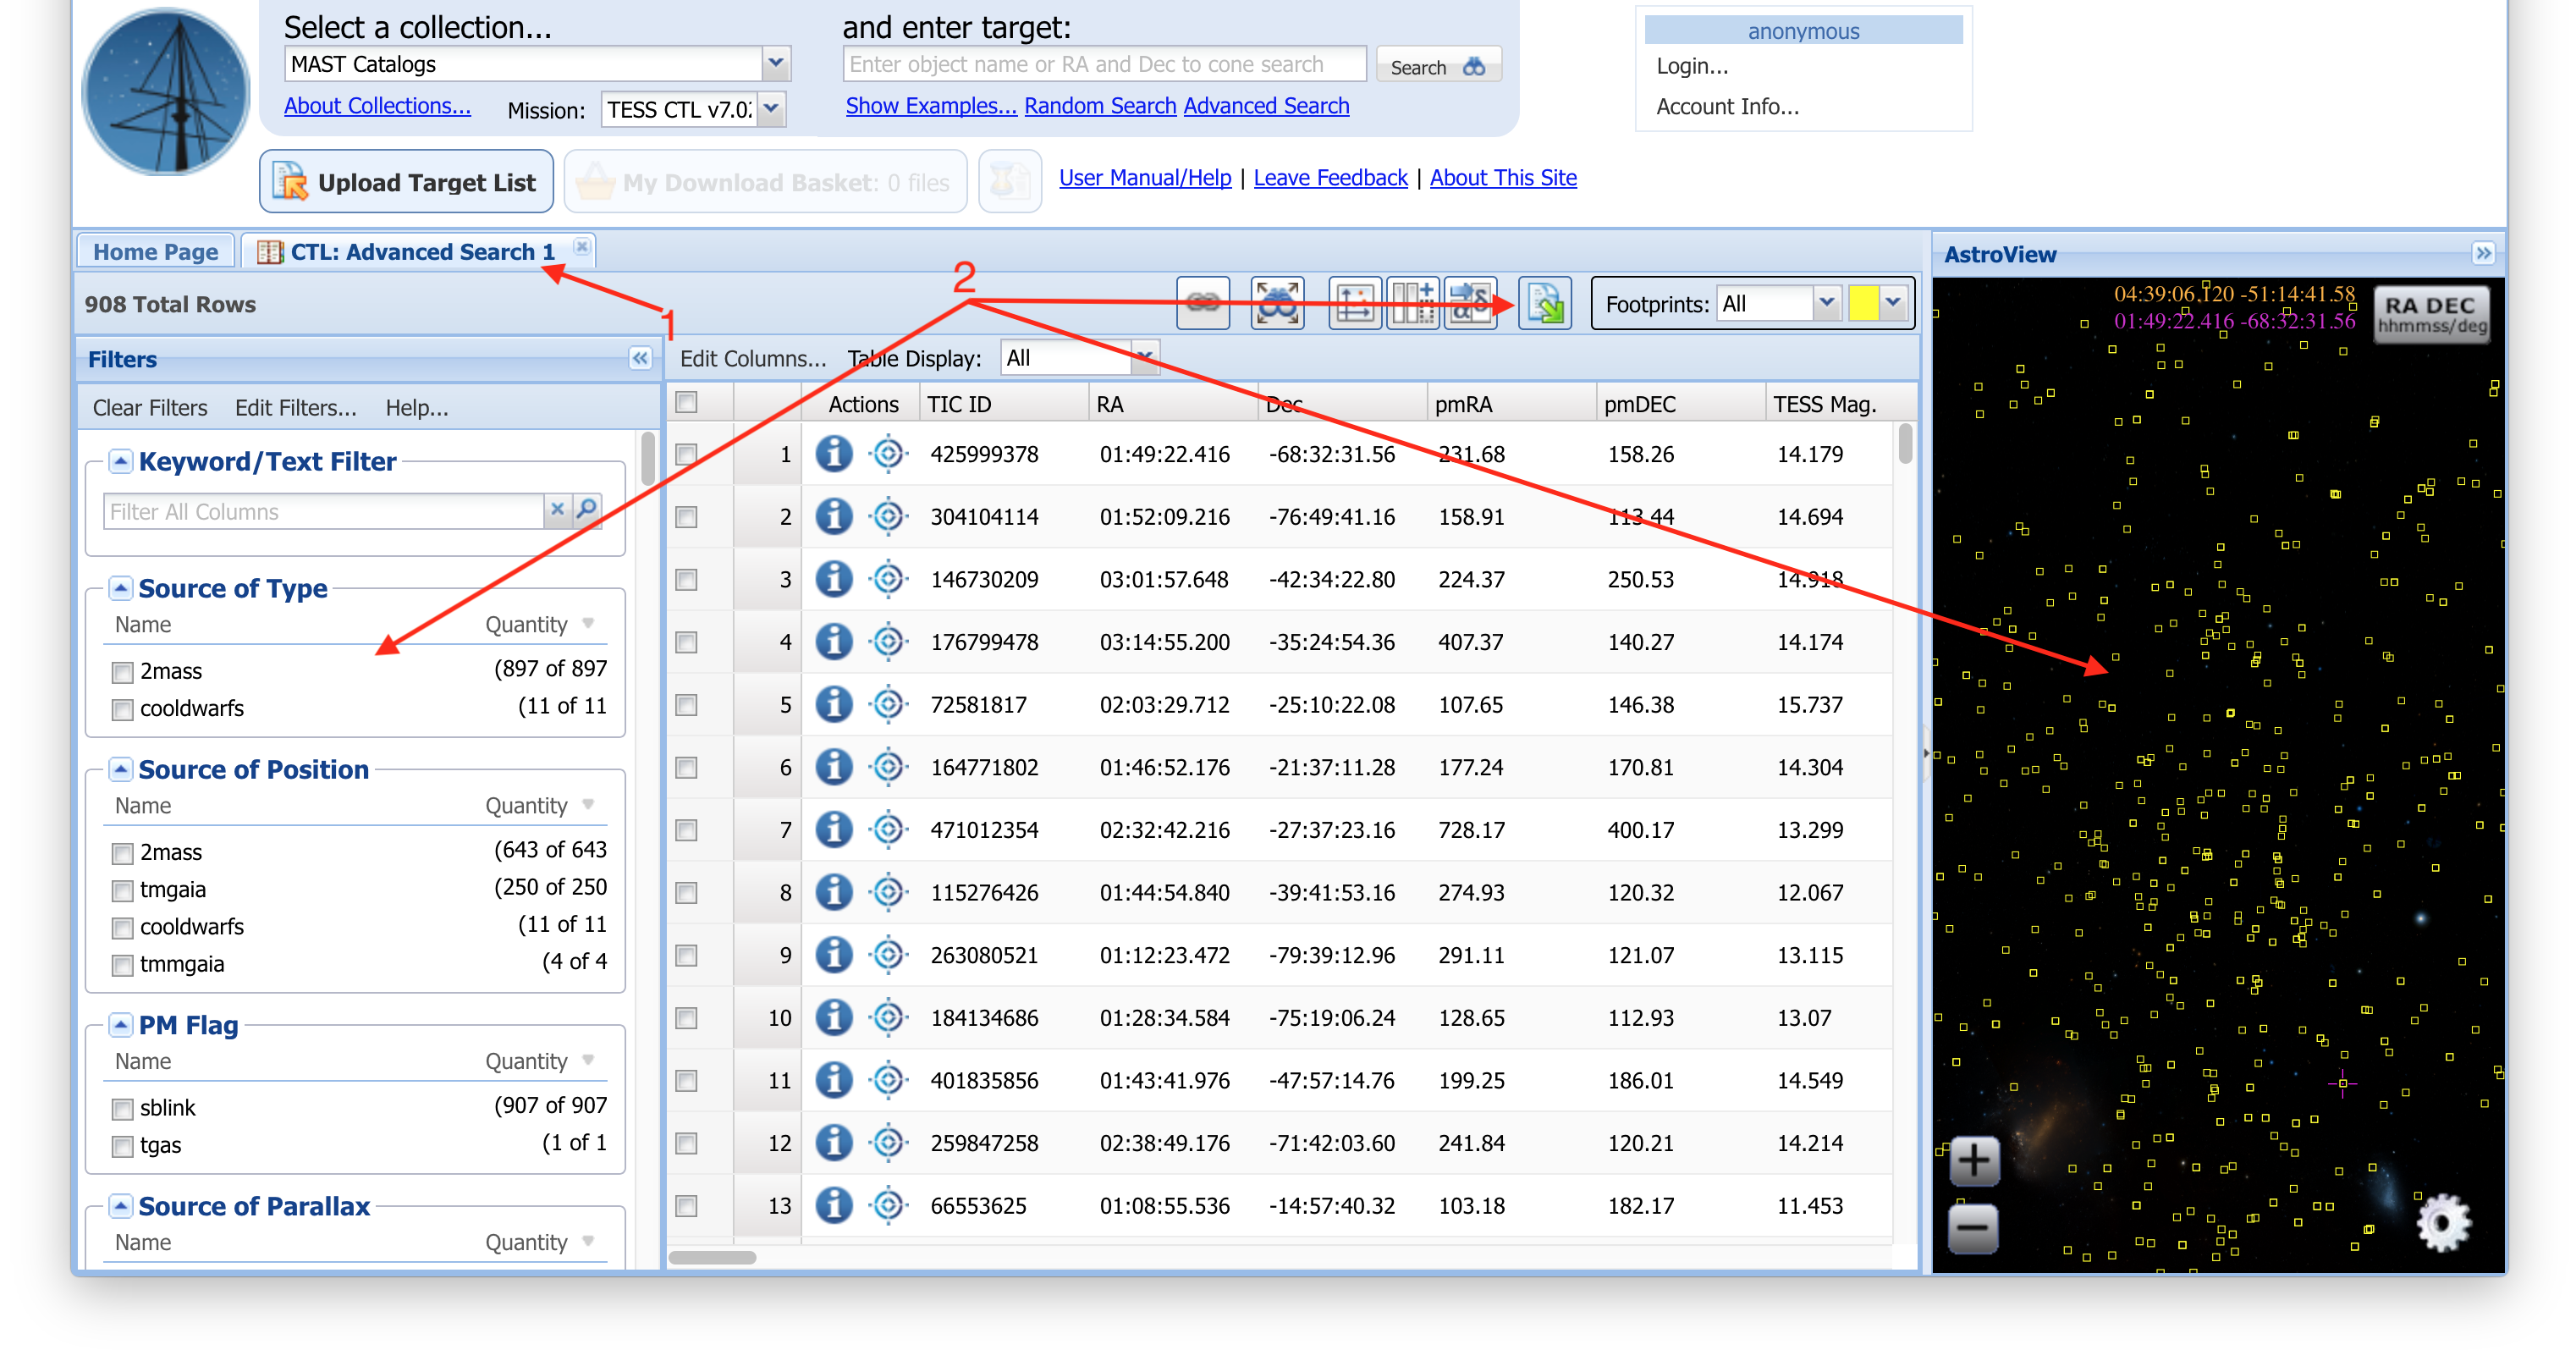
Step 7 - Continue Interacting With Query Results: Having loaded our Advanced Search results into the main Portal, we see they are stored in their own tab (Item #1). IndeedOnce loaded, if we turn on grid lines in the AstroViewer options (gear icon in the lower right of the AstroViewer) and pan down towards the southern pole, we can see a large concentration in the Southern Continuous Viewing Zone, as one might expect given the overall importance of targets in this part of the sky we can continue to interact with the results using all the features of the Portal, including that ability to apply additional filters, save the results to your local machine, and see the footprints of the catalog sources on the sky with AstroView (Item #2). |
| Divbox | ||
|---|---|---|
| ||
|