Page History
| Divbox | ||
|---|---|---|
| ||
This tutorial will show you how to customize which columns are included when you export a table in the MAST Portal. Specifically, we will show how to select only those columns expected by the Goddard Mission Office when submiting target lists for the Guest Investigator Program. |
| Divbox | ||
|---|---|---|
| ||
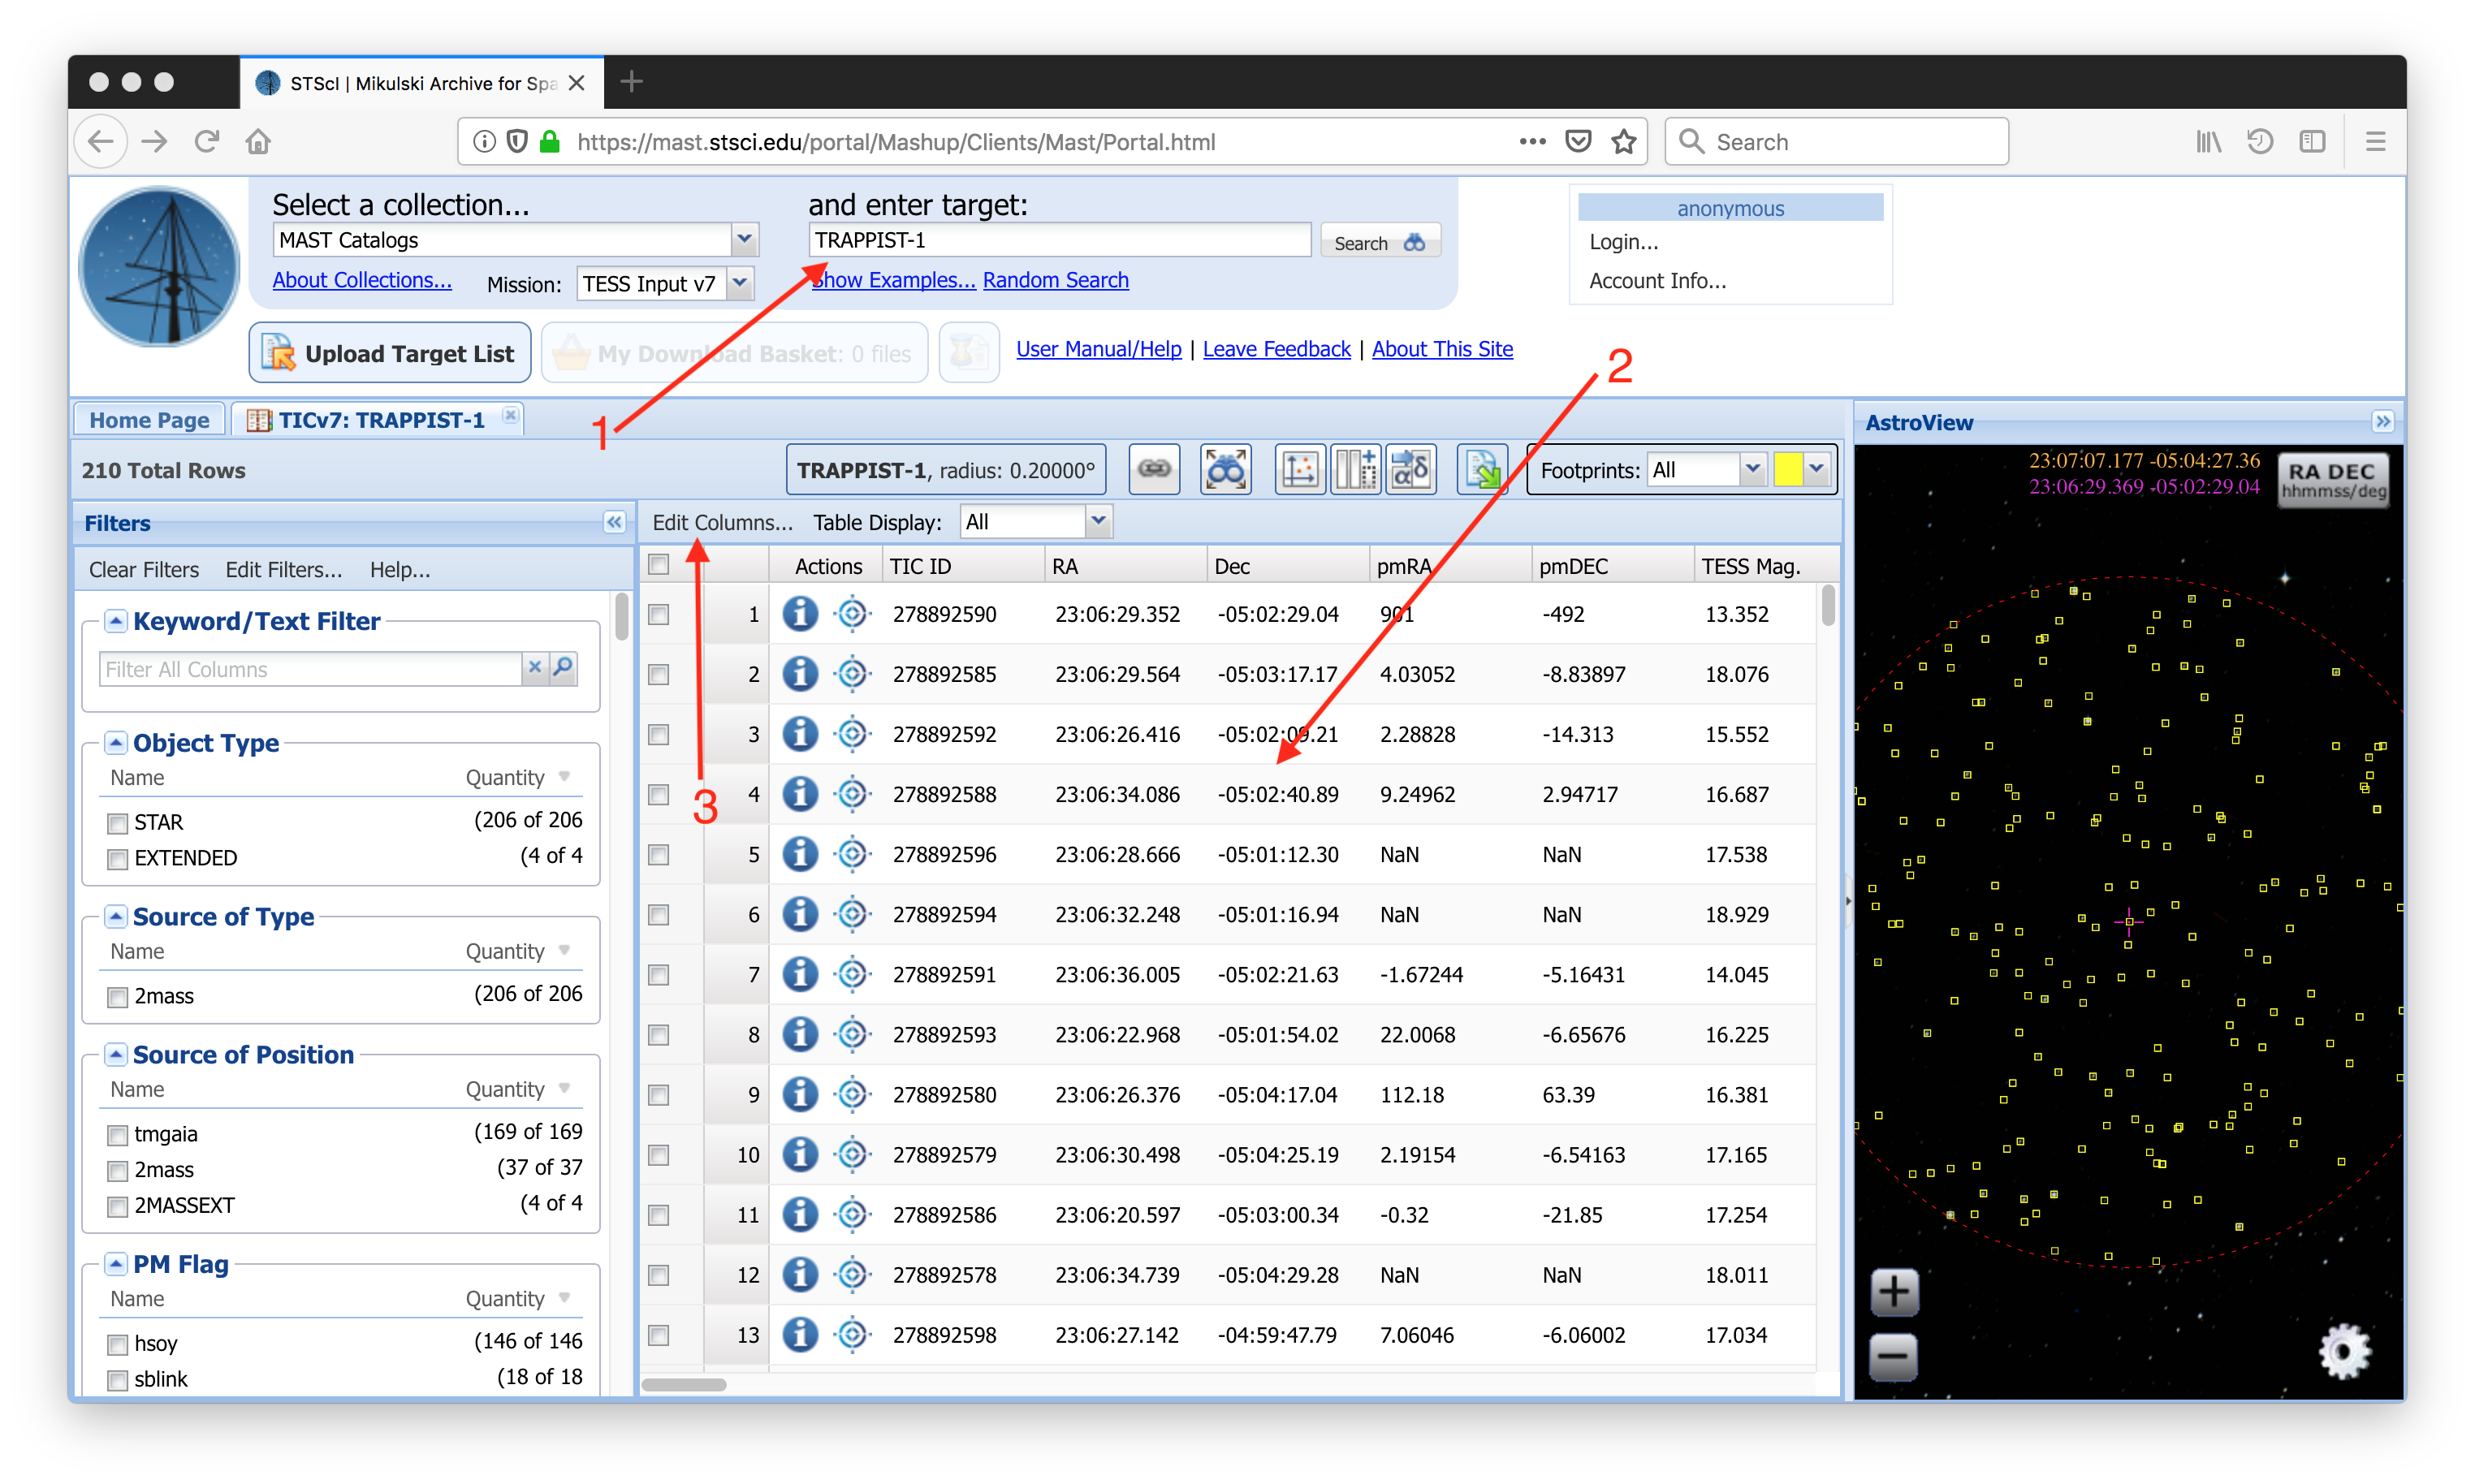
Step 1 - Select Collection: Upon visiting the MAST Portal, the first step is to change the collection of data we are searching in from the Context menu (Item #1) at the top leftSearch On "TRAPPIST-1": We will begin this tutorial having done a search centered on TRAPPIST-1 (Item #1). Our search results show up in the Search Results Grid (Item #2). Now we want to download a specific subset of the available columns. To do this, we will need to make use of the Edit Columns... option (Item #3). |
| Divbox | ||
|---|---|---|
| ||
|
| Divbox | ||
|---|---|---|
| ||
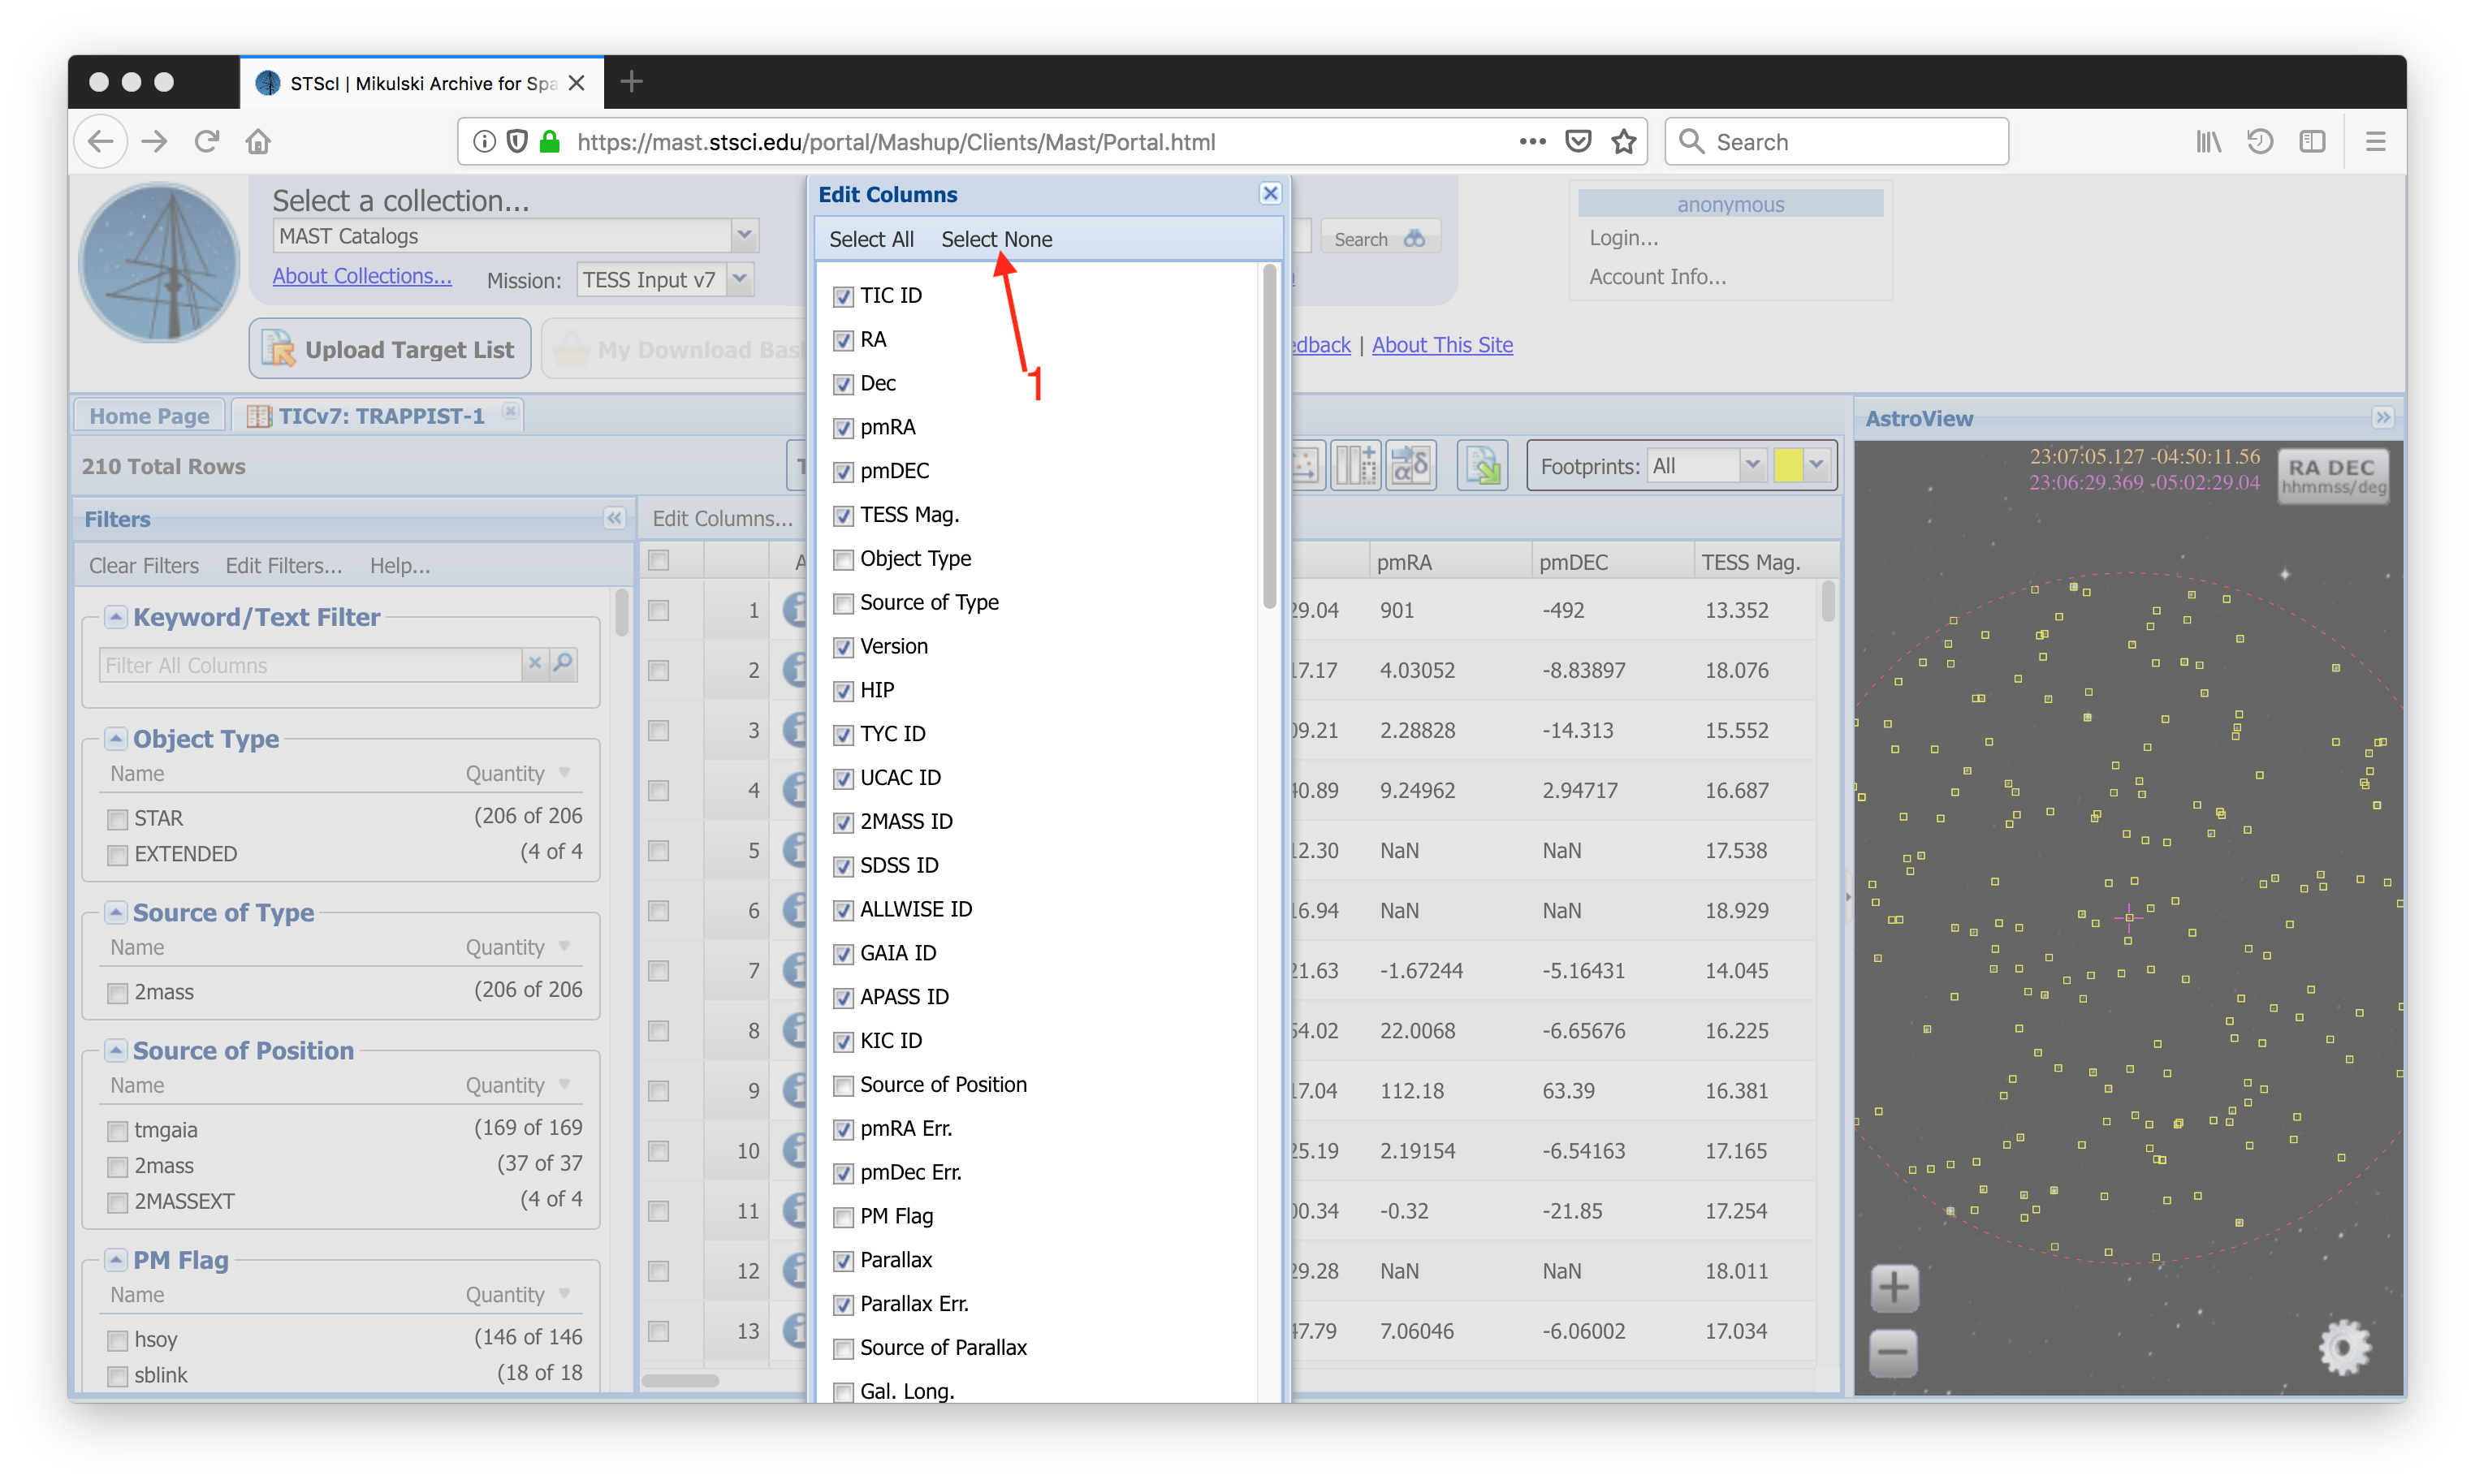
Step 2 - Select CTL Catalog: From the Context drop-down menu, select MAST Catalogs, then, in the Mission drop-down menu that appears (Item #1), select either TESS CTL v7.02 for the exoCTL. Note that the version number will change as newer editions replace older ones in the PortalDeselect All Columns: In the Edit Columns menu, use the Select None option (Item #1) to deselect all the columns. We will add the columns we want next. |
| Divbox | ||
|---|---|---|
| ||
|
| Divbox | ||
|---|---|---|
| ||
Step 3 - Enter The Advanced Search UI:After selecting the CTL in the Context menu, enter the Advanced Search using the link below the search box Select Columns You Want To Keep: Select the columns you will want to download using the checkboxes in the list of available columns (Item #1). Note: you only need to visit the link at this point, do not enter anything into the Search BoxFor this example, we will select the TIC ID, RA, Dec, pmRA, pmDEC, and TESS Mag. columns. |
| Divbox | ||
|---|---|---|
| ||
|

| Divbox | ||
|---|---|---|
| ||
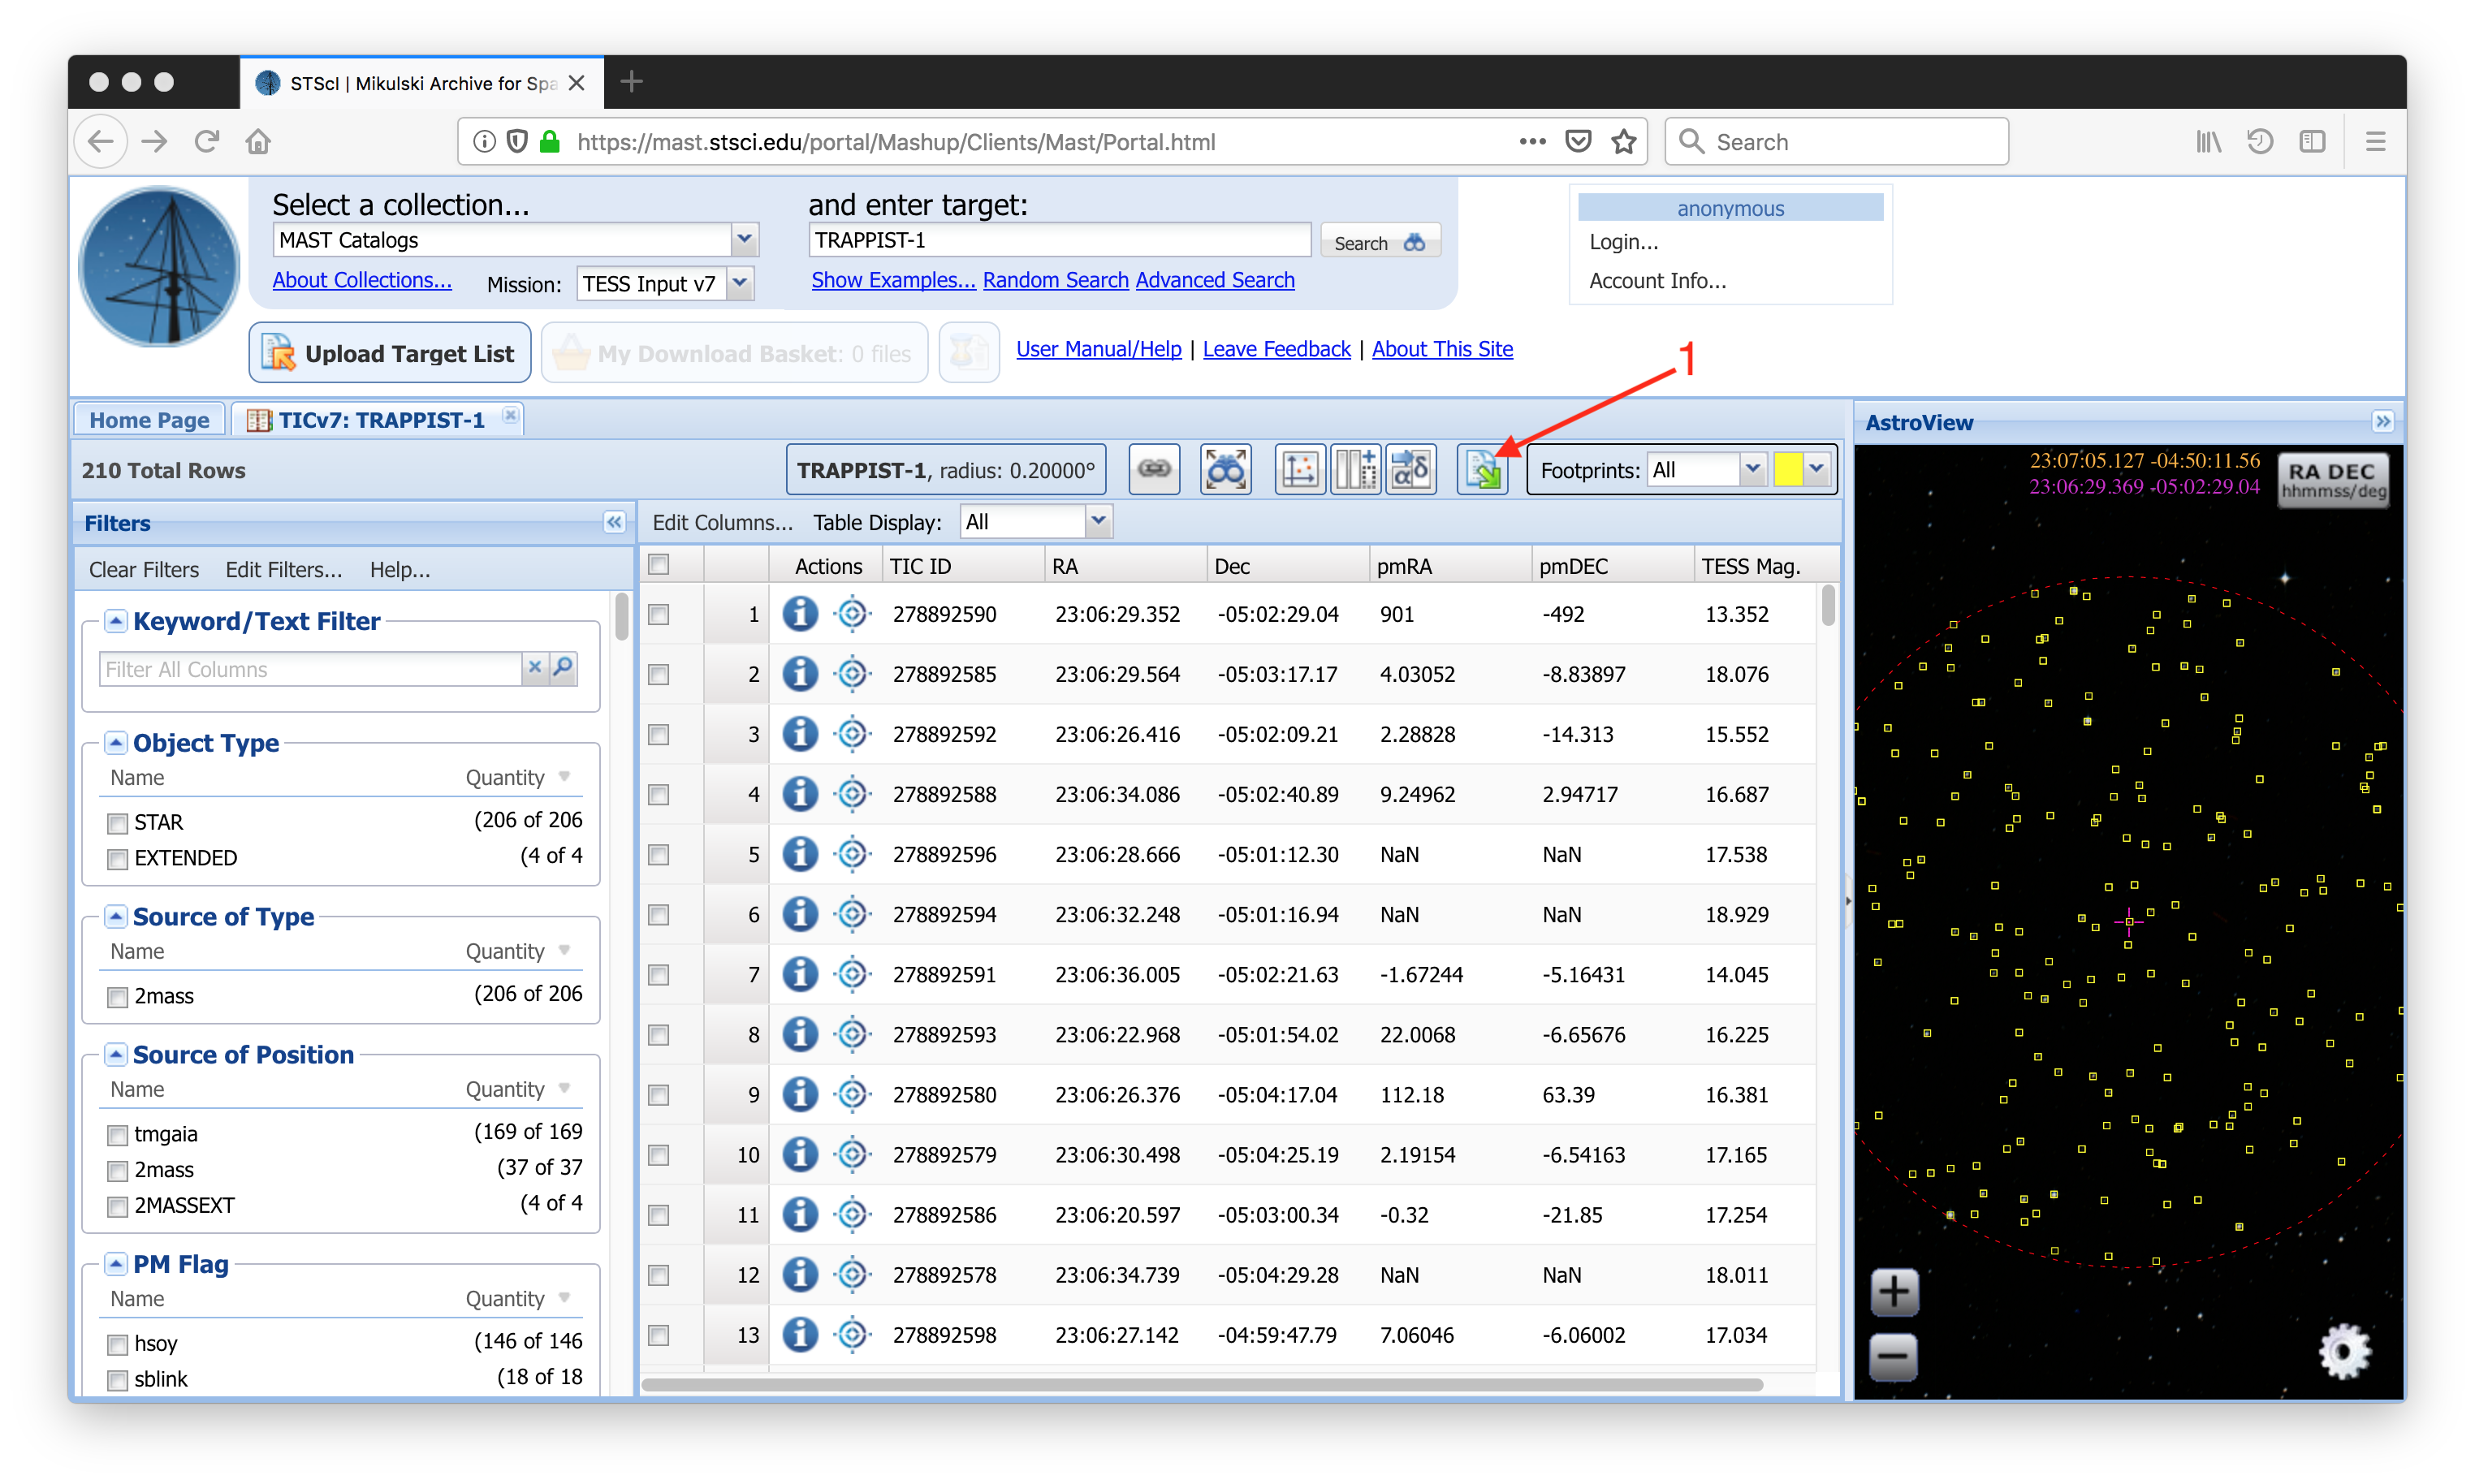
Step 4 - Choose Columns To Filter On: In the Advanced Search window, you can add (green plus symbols) or remove (red minus symbols) panels that can be used to apply a pre-search filter on any of the available columns (Item #1). When you add a panel, it will show up on the right side of the window, where you can apply limits on the ranges for numerical columns, or constraints in text fields by entering some text, including wildcards (Item #2Use The Export Button To Save Results: After you have selected the columns you want to download, close the Edit Columns menu using the 'X' button at the top-right of the menu. You will now see only the columns you selected in the Search Results Grid. We are now ready to download our results using the Export button (Item #1). |
| Divbox | ||
|---|---|---|
| ||
|
| Divbox | ||
|---|---|---|
| ||
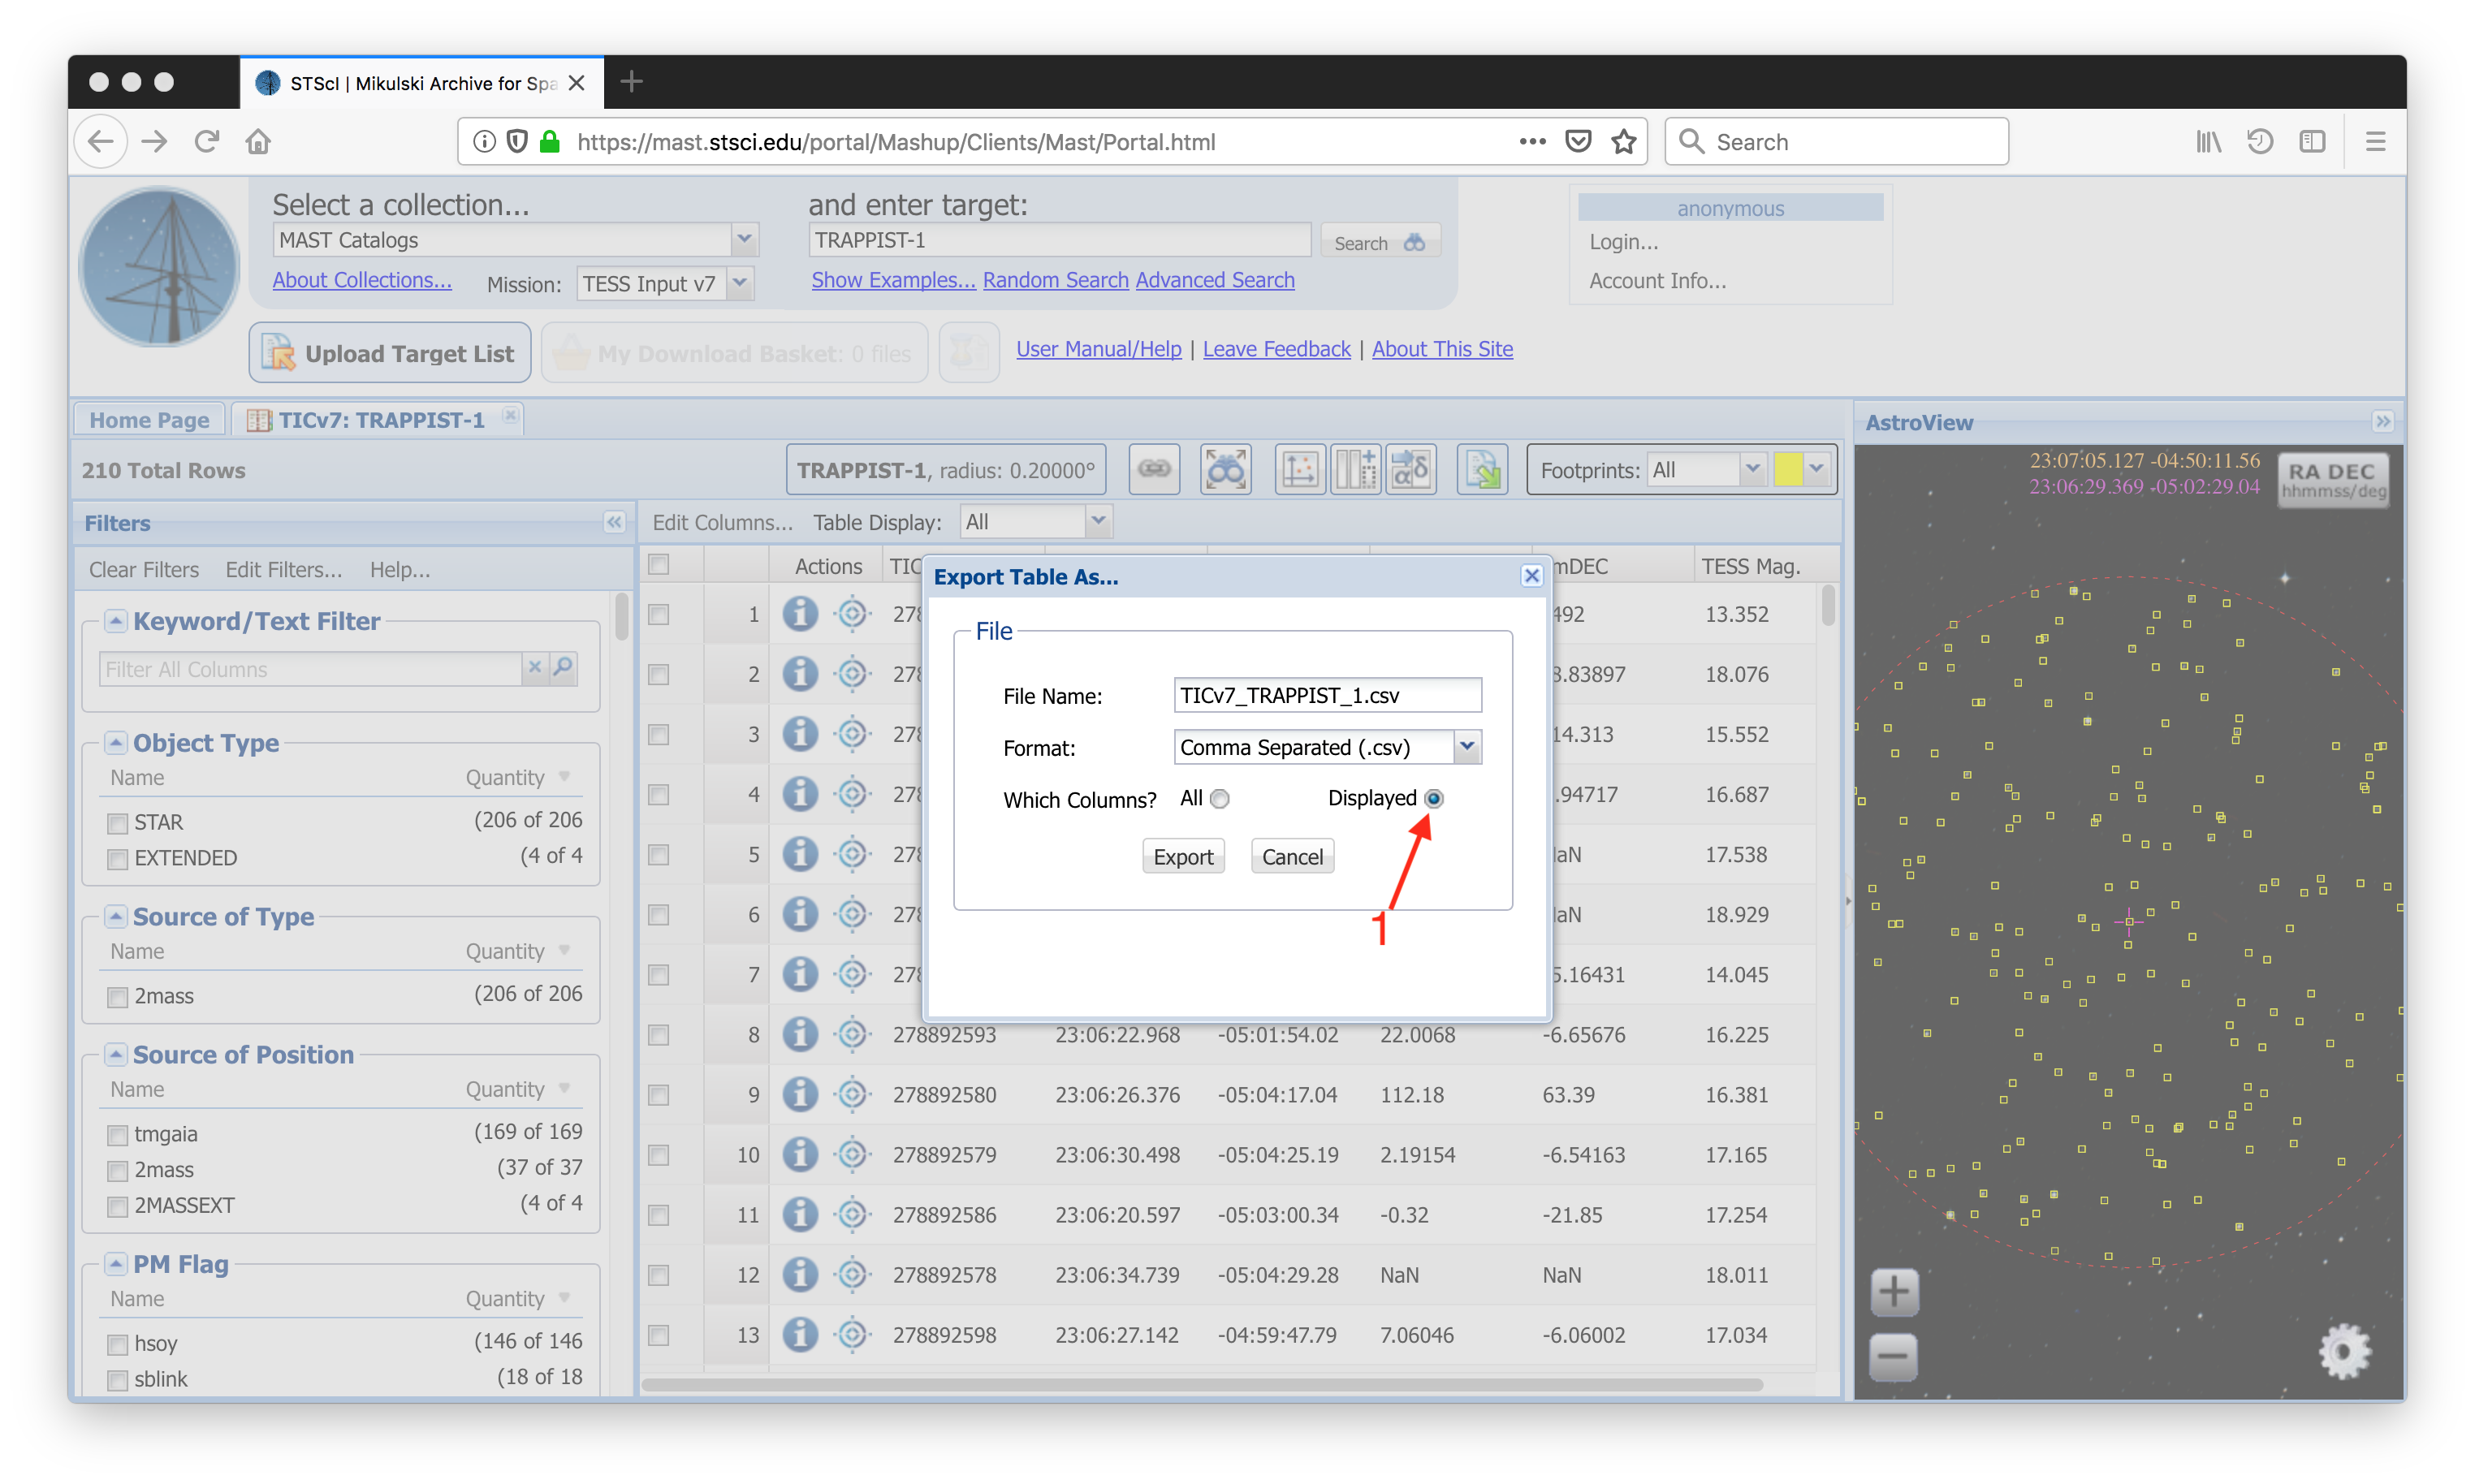
Step 5 - Apply Filters: In our example, we'll remove all the sub-panels except for Dec, pmRA, pmDEC, and T_eff. It's not necessary to remove panels if you don't want to filter on them, but we do here for clarity. We filter 2000. < T_eff < 3500. K, declination less than 0 degrees, and require both RA and Dec. proper motions are larger than 100 mas (Item #1). As you apply each filter, the Portal will apply it and keep a running total of the number of return rows in the top-left (Item #2)Customize Output Options: In the Export Table As... window, you can specify an output file name and choose your output file format. Then, make sure the Displayed option in the Which Columns? section is selected (Item #1), and the table you download will contain only those columns that you specified. |
| Divbox | ||
|---|---|---|
| ||
|