Page History
| Divbox | ||
|---|---|---|
| ||
This tutorial will show you how to do a search on a single coordinate, within the TESS Exoplanet Candidate Target List (exoCTL) in the MAST Portal. Specifically, we will do a search centered on the K2 Campaign 2 field. |
| Divbox | ||
|---|---|---|
| ||
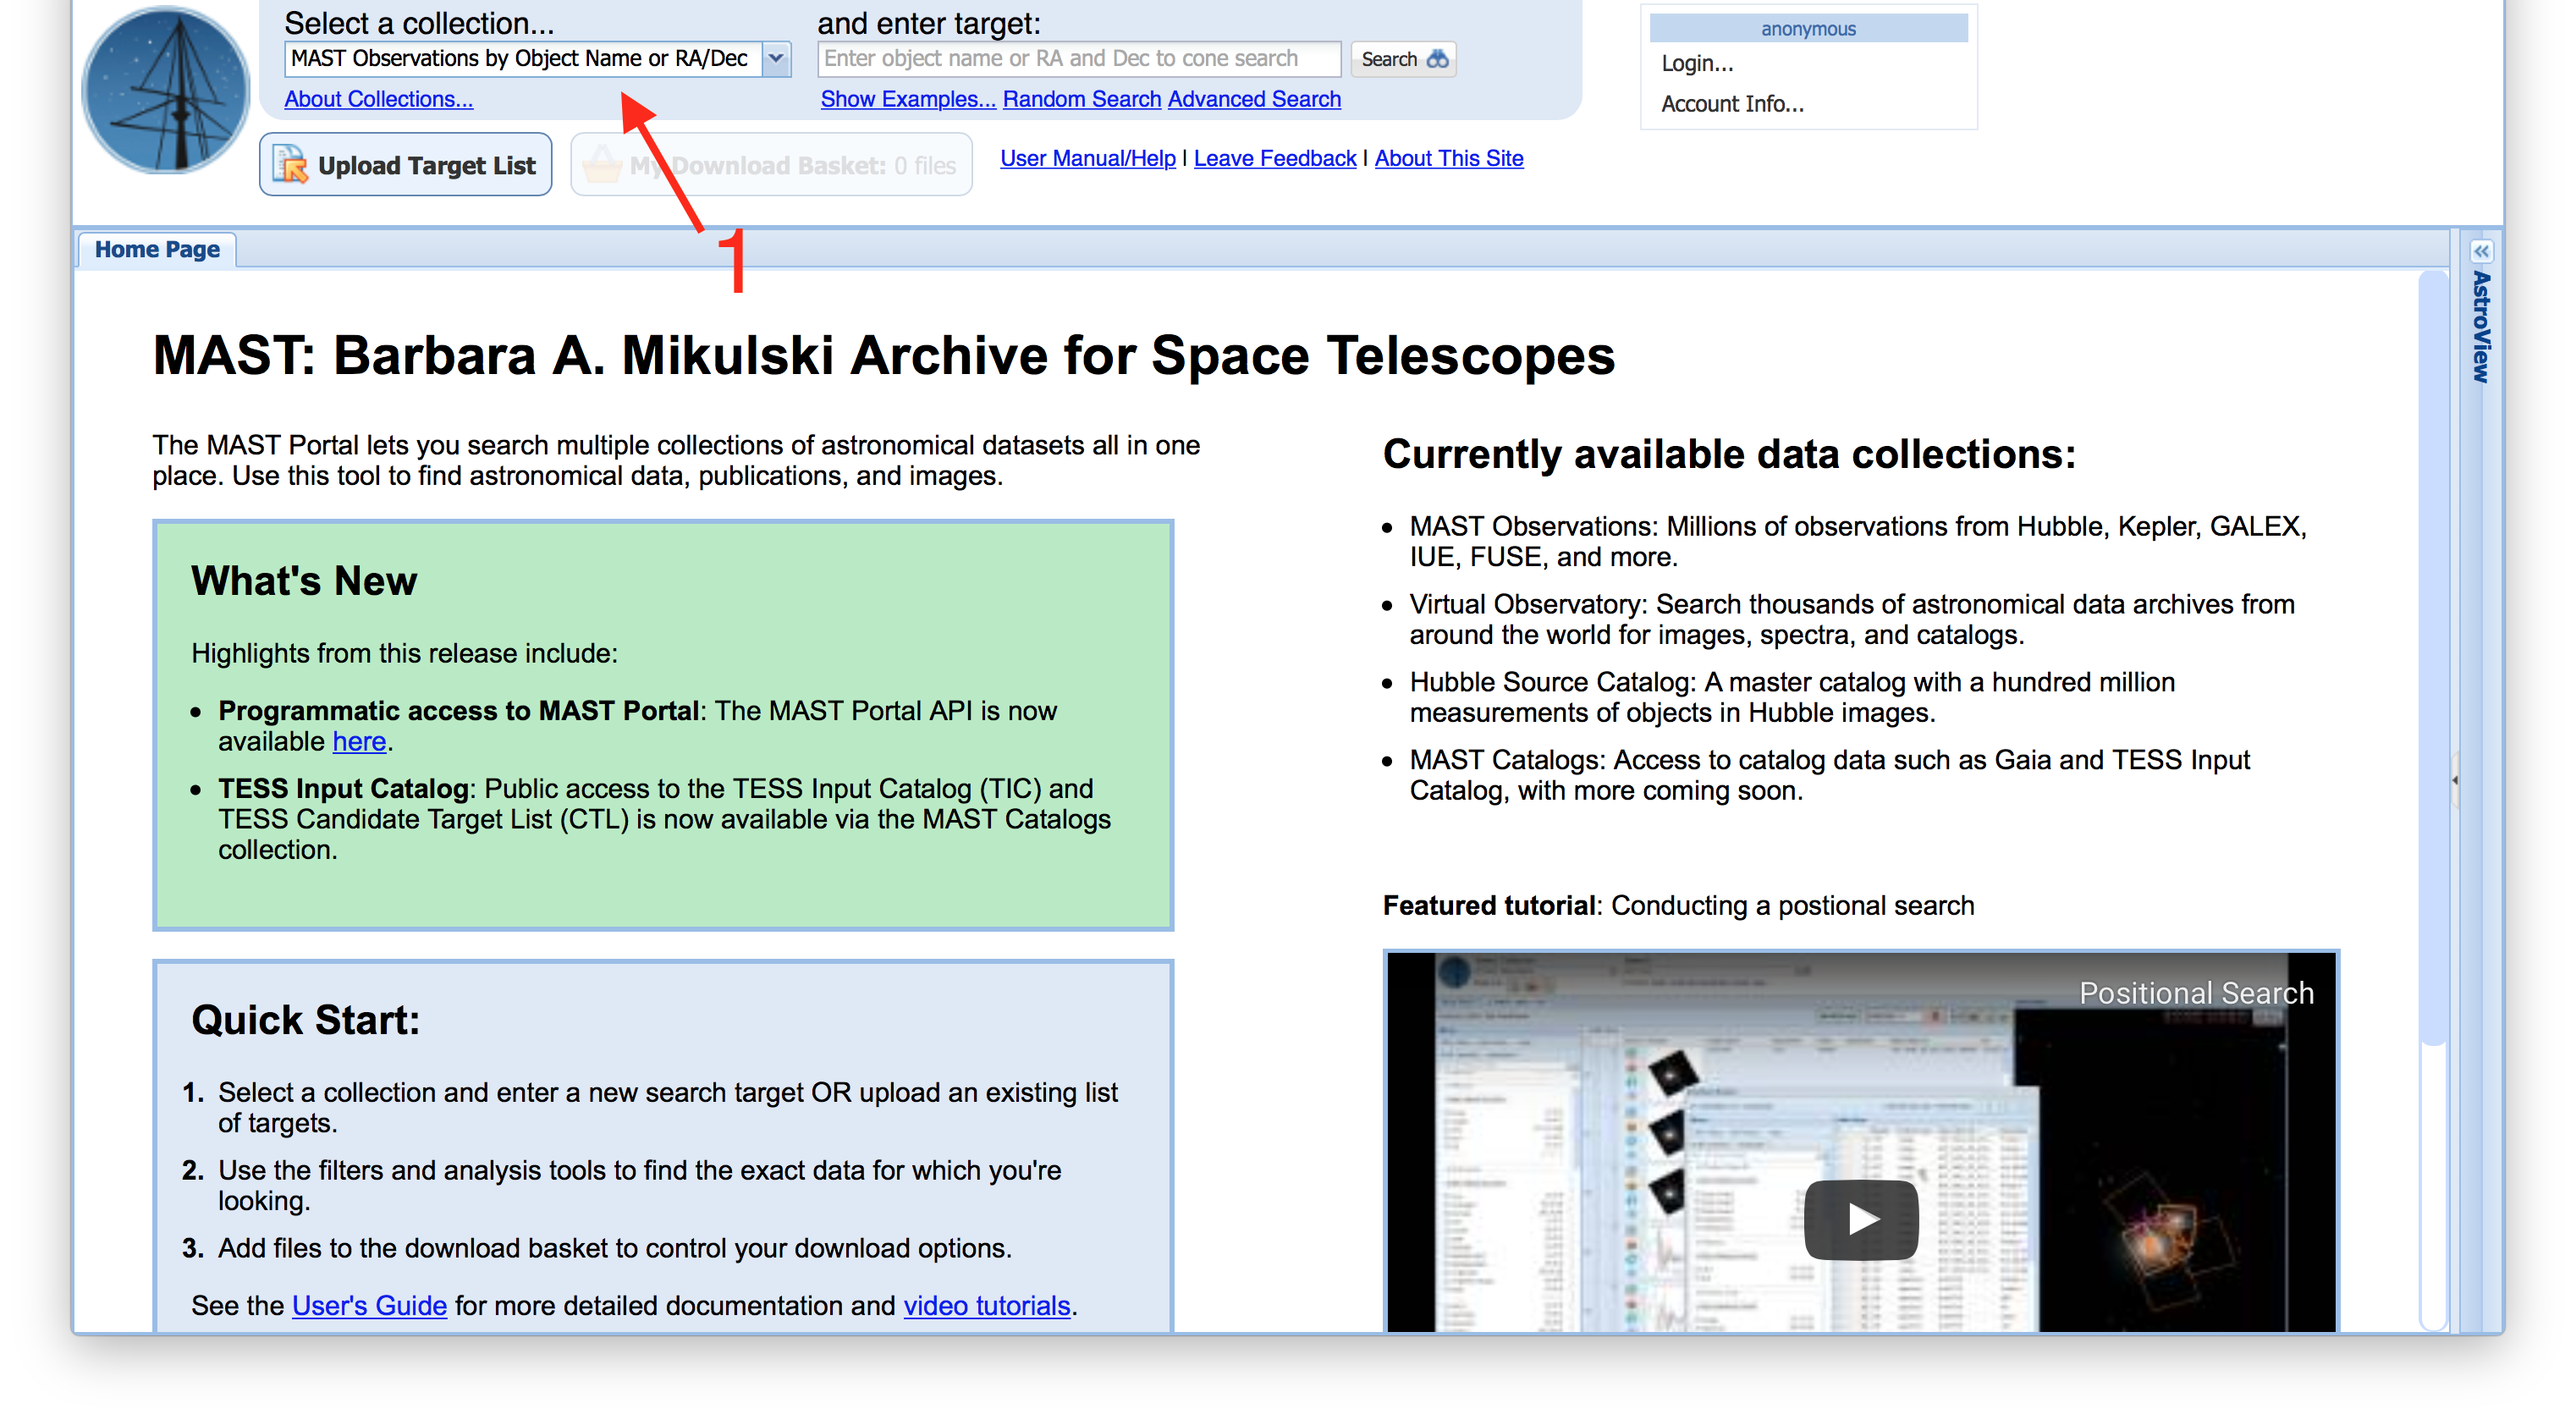
Step 1 - Select Collection: Upon visiting the MAST Portal, the first step is to change the collection of data we are searching in from the Context menu (Item #1) at the top left. |
| Divbox | ||
|---|---|---|
| ||
|
| Divbox | ||
|---|---|---|
| ||
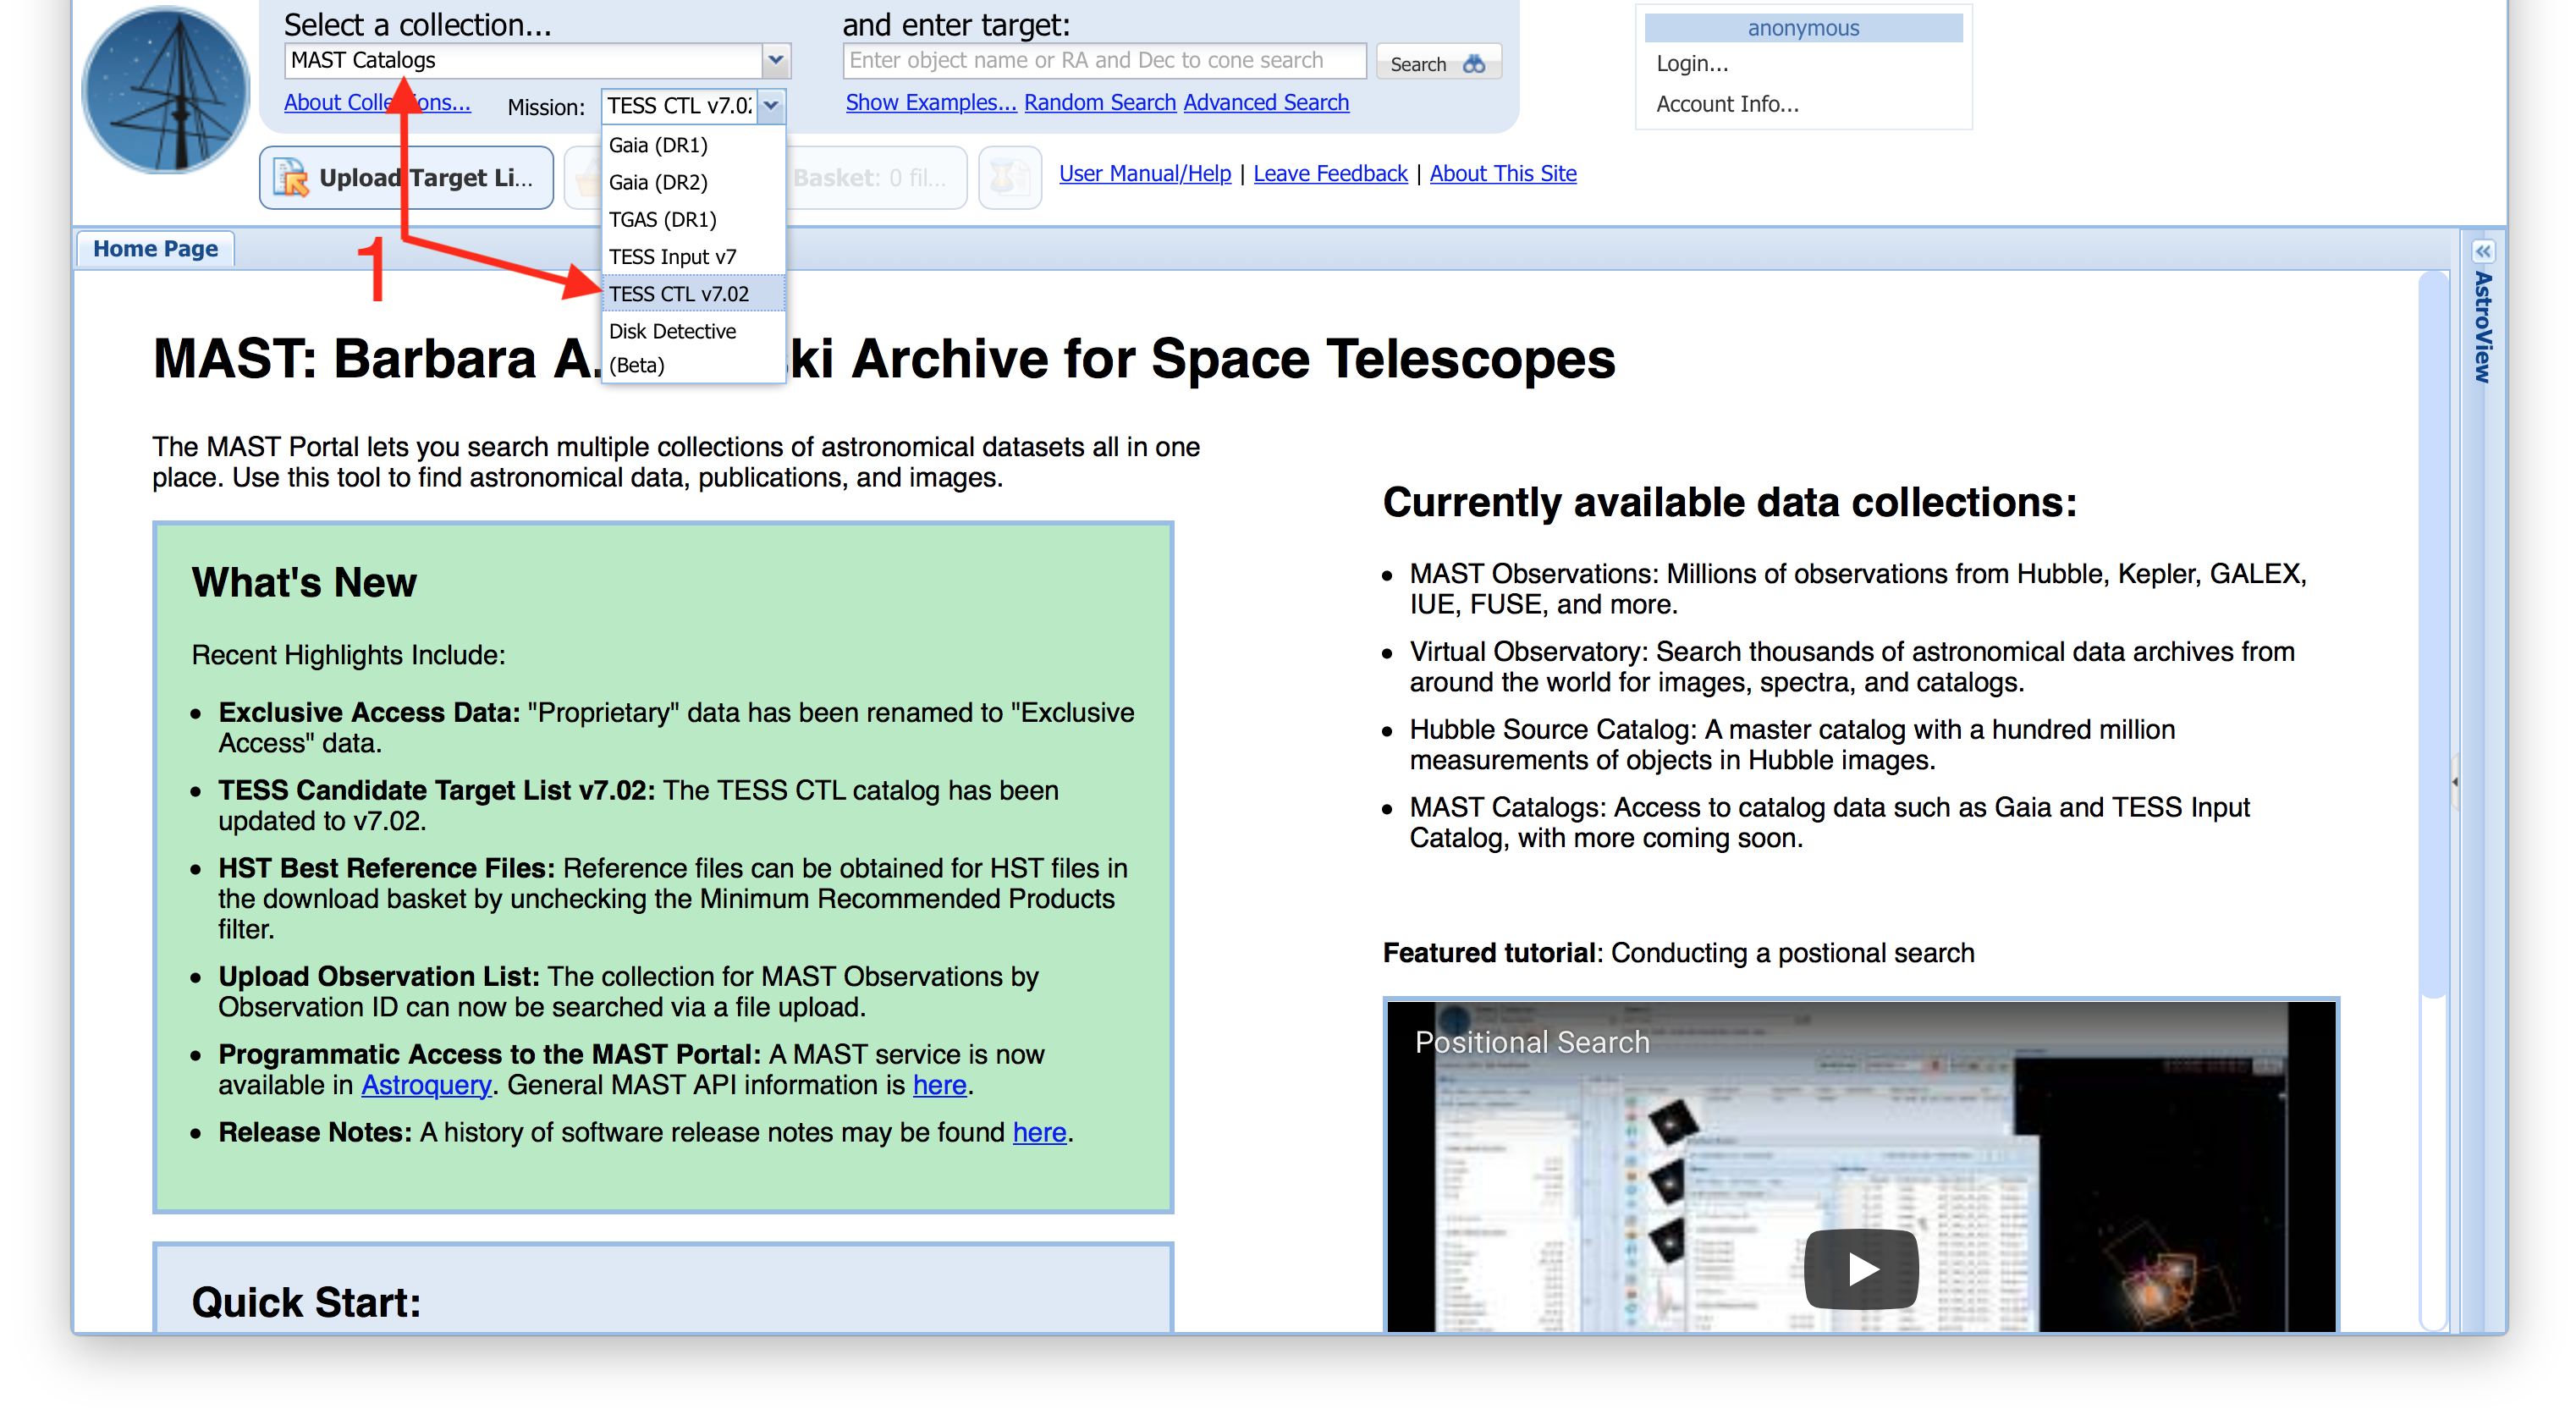
Step 2 - Select TESS xCTL: From the Context drop-down menu, select MAST Catalogs, then, in the Mission drop-down menu that appears (Item #1), select TESS CTL v7.02 for the exoCTL list. Note that the version number will change as newer editions replace older ones in the Portal. |
| Divbox | ||
|---|---|---|
| ||
 |
| Divbox | ||
|---|---|---|
| ||
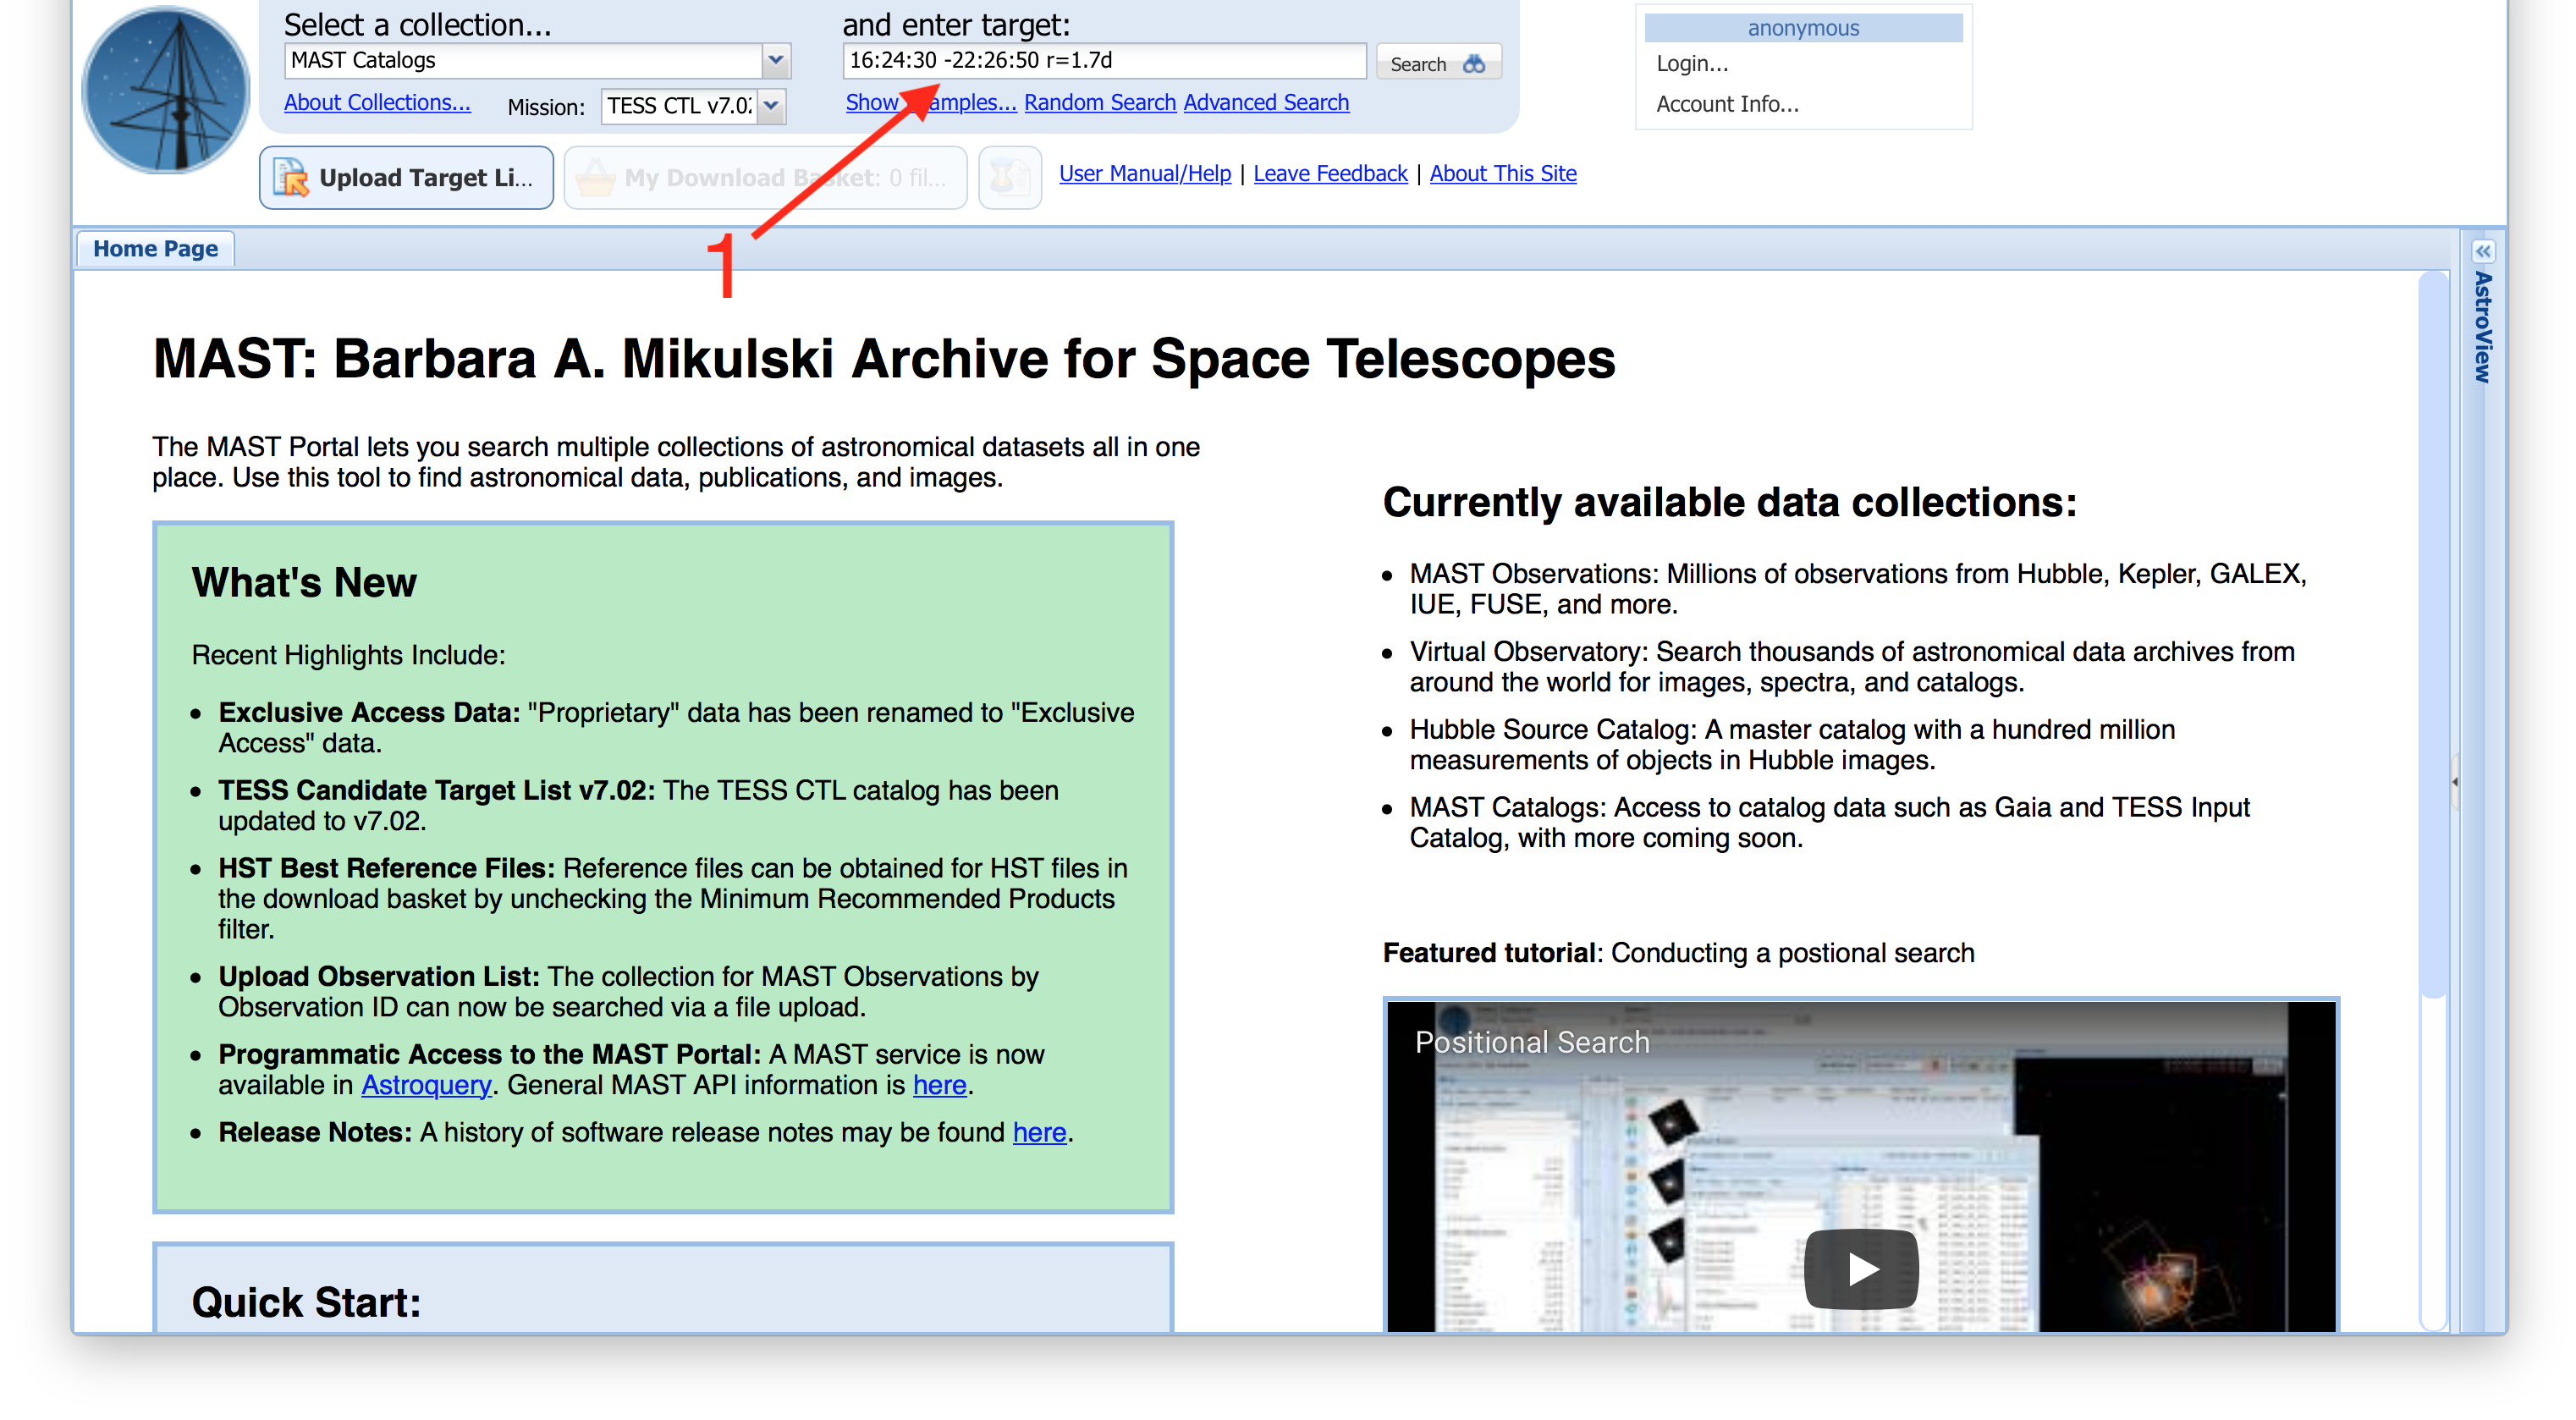
Step 3 - Enter Coordinates For Query: We are now ready to do a target search by entering text into the Search Box (Item #1). The Search Box can accept coordinates in either decimal degrees or in sexagesimal format. You can specify a search radius by adding r = and then your desired radius. For example, r = 0.3d is a 0.3 degree search radius, r = 5m is a 5 arcminute search radius, and r = 3s is a 3 arcsecond search radius. For our example, we'll search on the K2 Campaign 2 field center located at 16:24:30 -22:26:50 with a search radius of 1.7d, which is roughly the size of a Kepler module. Note that this search may take a while, since searches with radii larger than a degree typically return a lot of rows. |
| Divbox | ||
|---|---|---|
| ||
 |
| Divbox | ||
|---|---|---|
| ||
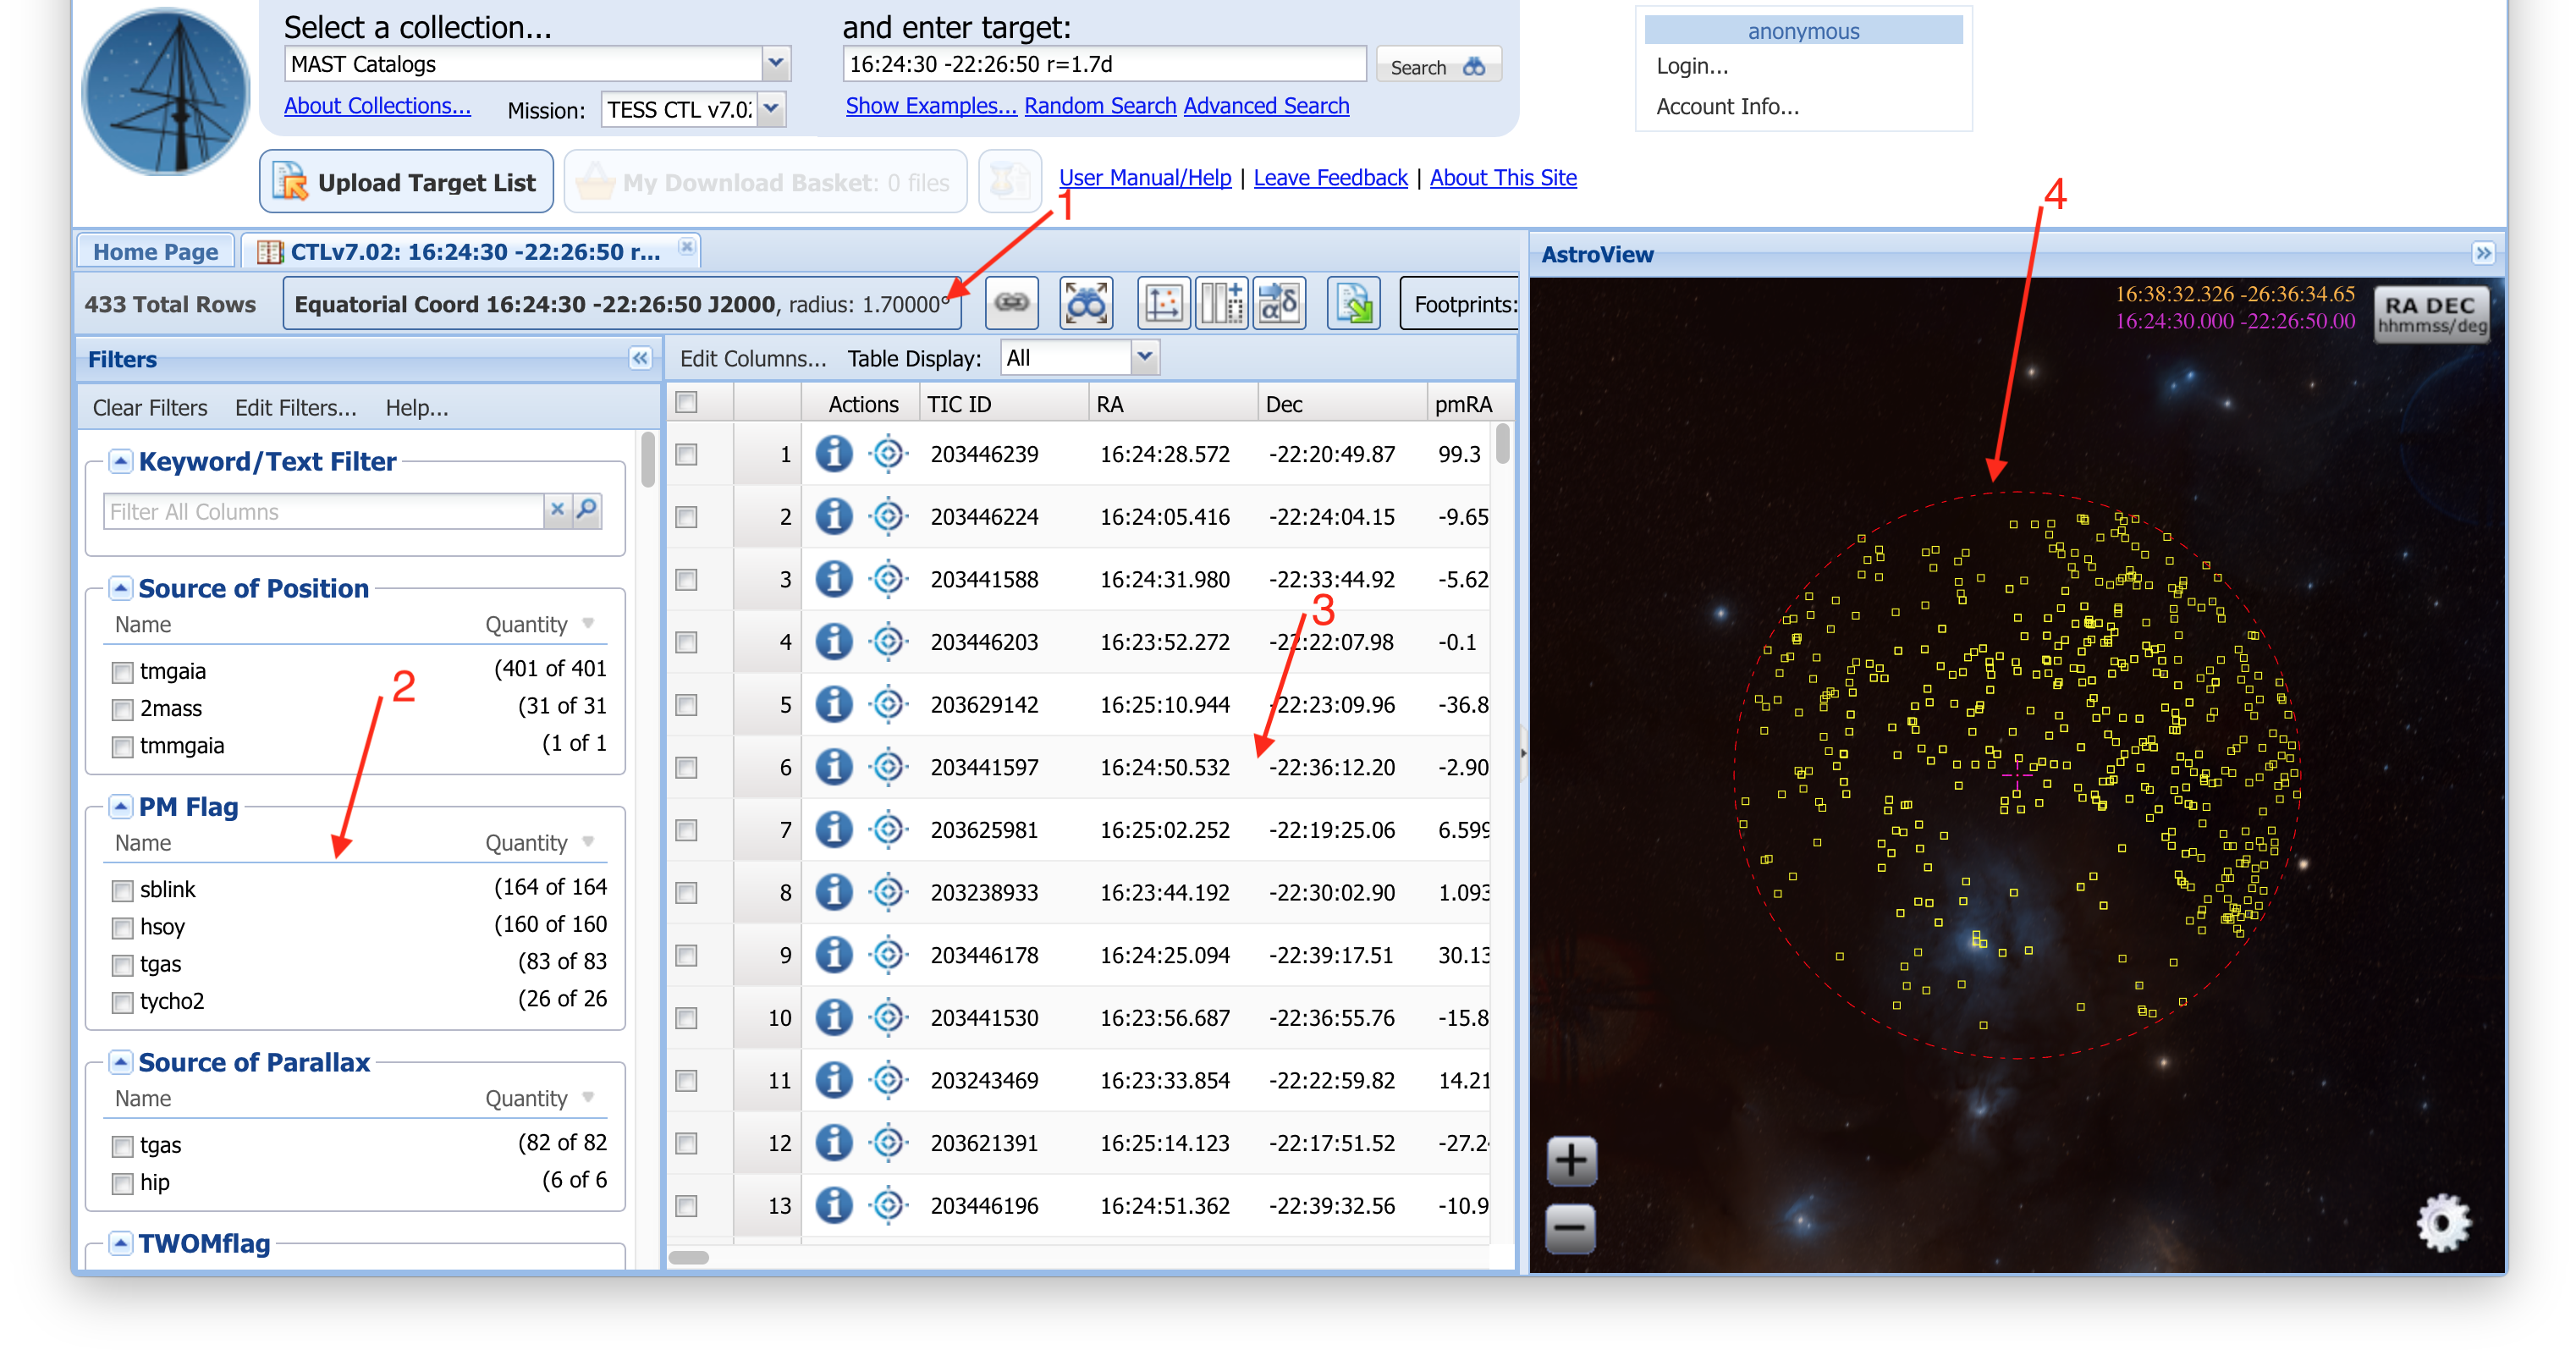
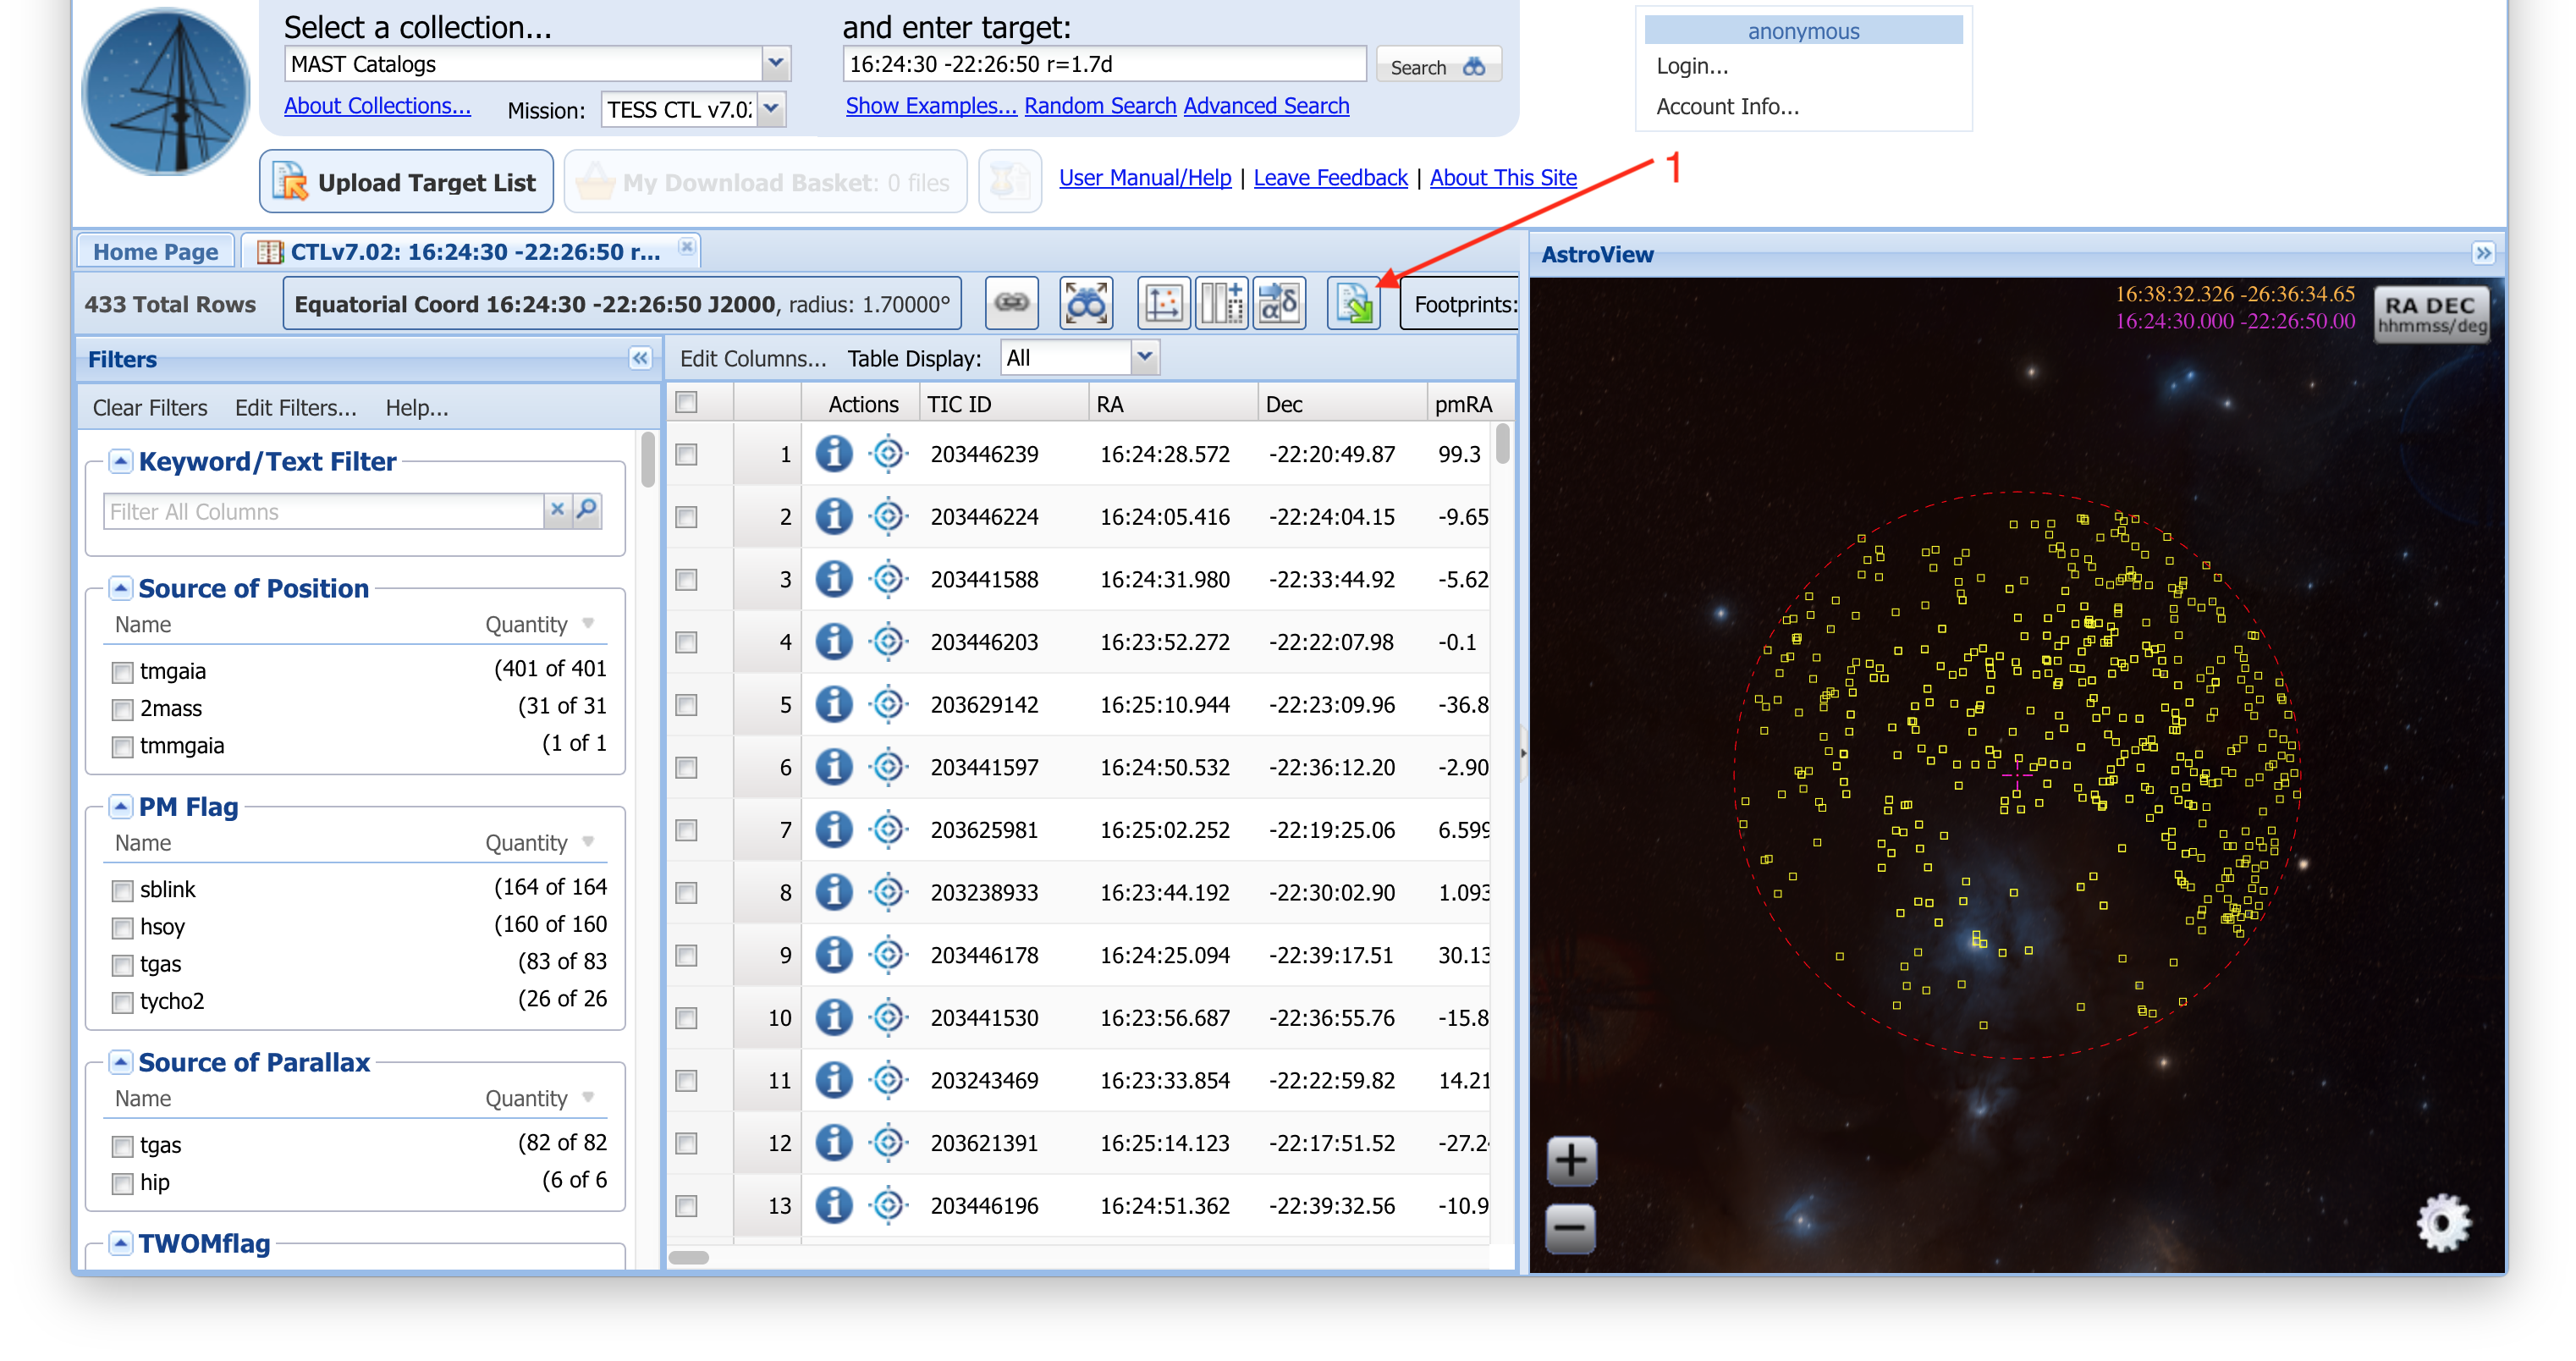
Step 4 - Understanding The Search Results: We now see the results of our search. First, note that the search radius we specified is reported back to us in the query translation button (Item #1). The search results area has three main panels, on the left is the Filters panel (Item #2), where you can select subsets of your returned rows by filtering column values. In the middle is the Search Results Grid (Item #3), which contains the table of results itself (hint: columns can be sorted by clicking on the headers). On the right is the AstroViewer (Item #4), which is a 3D sky map that will overplot the footprints of observations or catalog objects from your search results, and offers a wide range of background images from surveys that span the electromagnetic sepctrum from X-rays to the radio. We can see all the TIC sources in our 1.7 degree search radius quite clearly. |
| Divbox | ||
|---|---|---|
| ||
 |
| Divbox | ||
|---|---|---|
| ||
Step 5 - Save Your Results: You can save the search results at any time using the Export Button (Item #1). From the dialog menu that appears, you'll be able to select the format of your output file and whether you want to export all the available columns in the catalog, or only those that are currently displayed in the Search Results Grid. |
| Divbox | ||
|---|---|---|
| ||
 |