Page History
| Divbox | ||
|---|---|---|
| ||
This tutorial will show you how to use MAST CasJobs to conduct a large query that will select all dwarf stars with temperatures comparable to K dwarfs in the southern hemisphere from the TIC. We'll also show off some of the main areas of CasJobs and how to download your tables once you run a query. Note that in addition to the TIC and CTL, tables from other missions like Kepler, K2, GALEX, and PanSTARRS, as well as several catalogs from High Level Science Products, are all available. |
| Divbox | ||
|---|---|---|
| ||
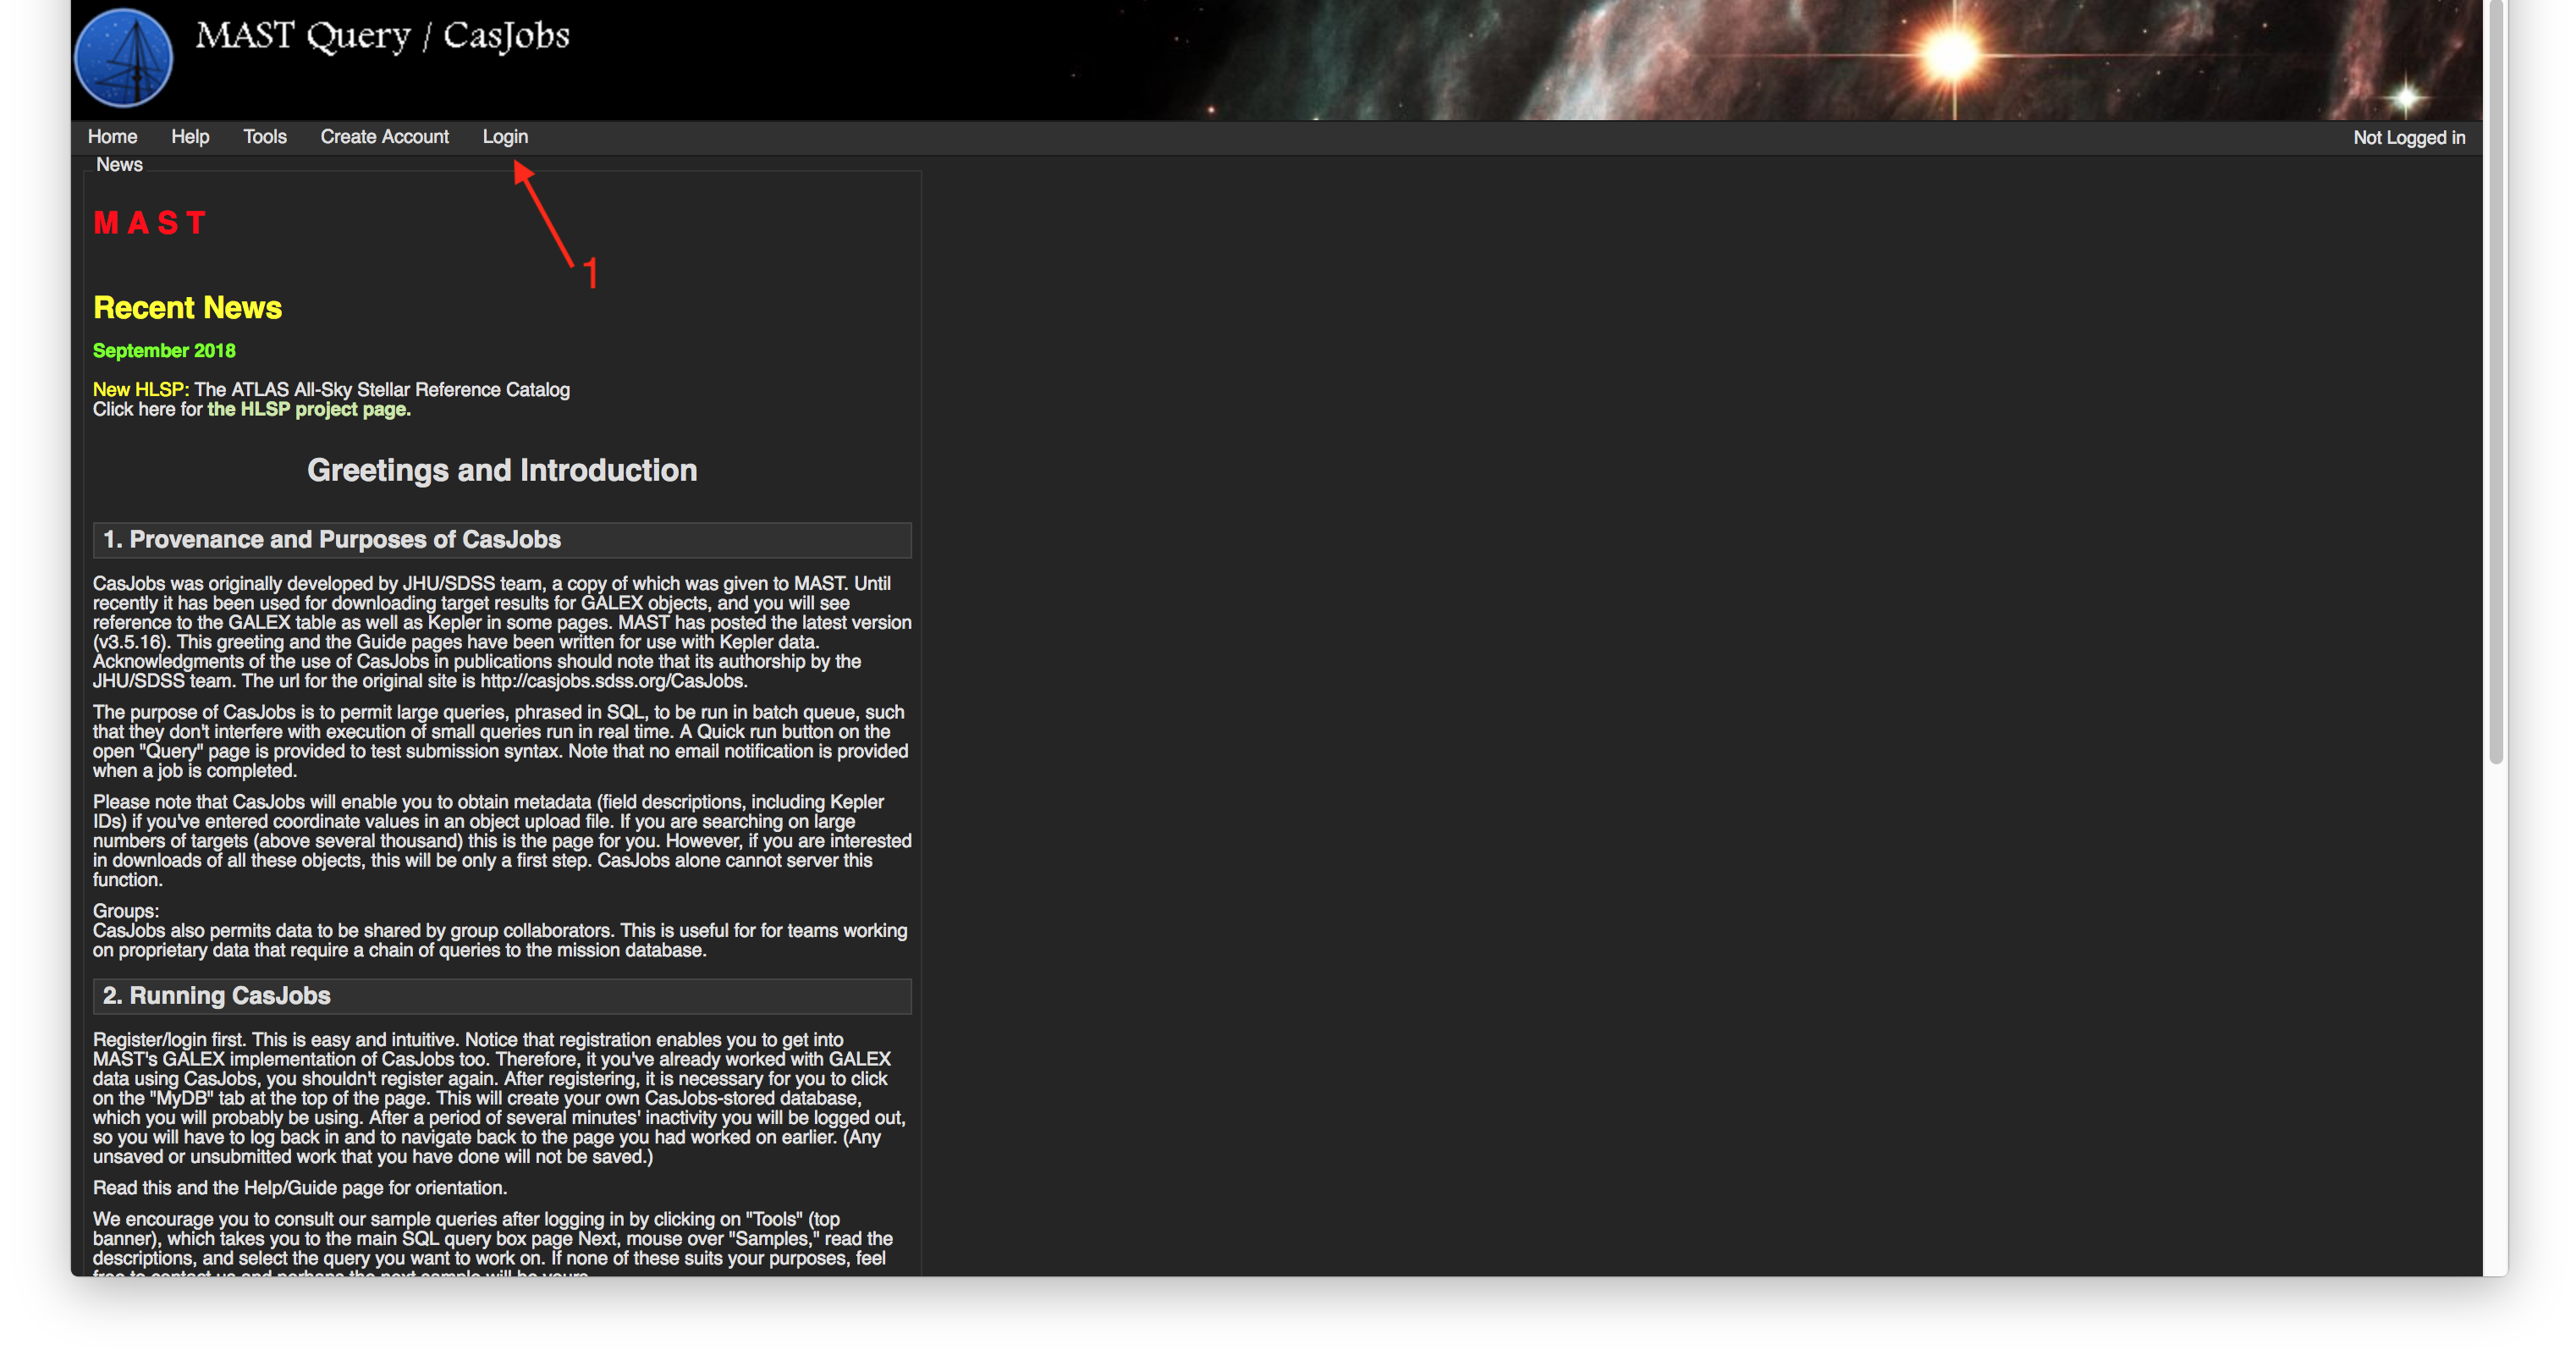
Step 1 - Sign Into CasJobs: The first thing you'll need to do is sign into CasJobs. The Login button is located towards the top of the page (Item #1). |
| Divbox | ||
|---|---|---|
| ||
 |
| Divbox | ||
|---|---|---|
| ||
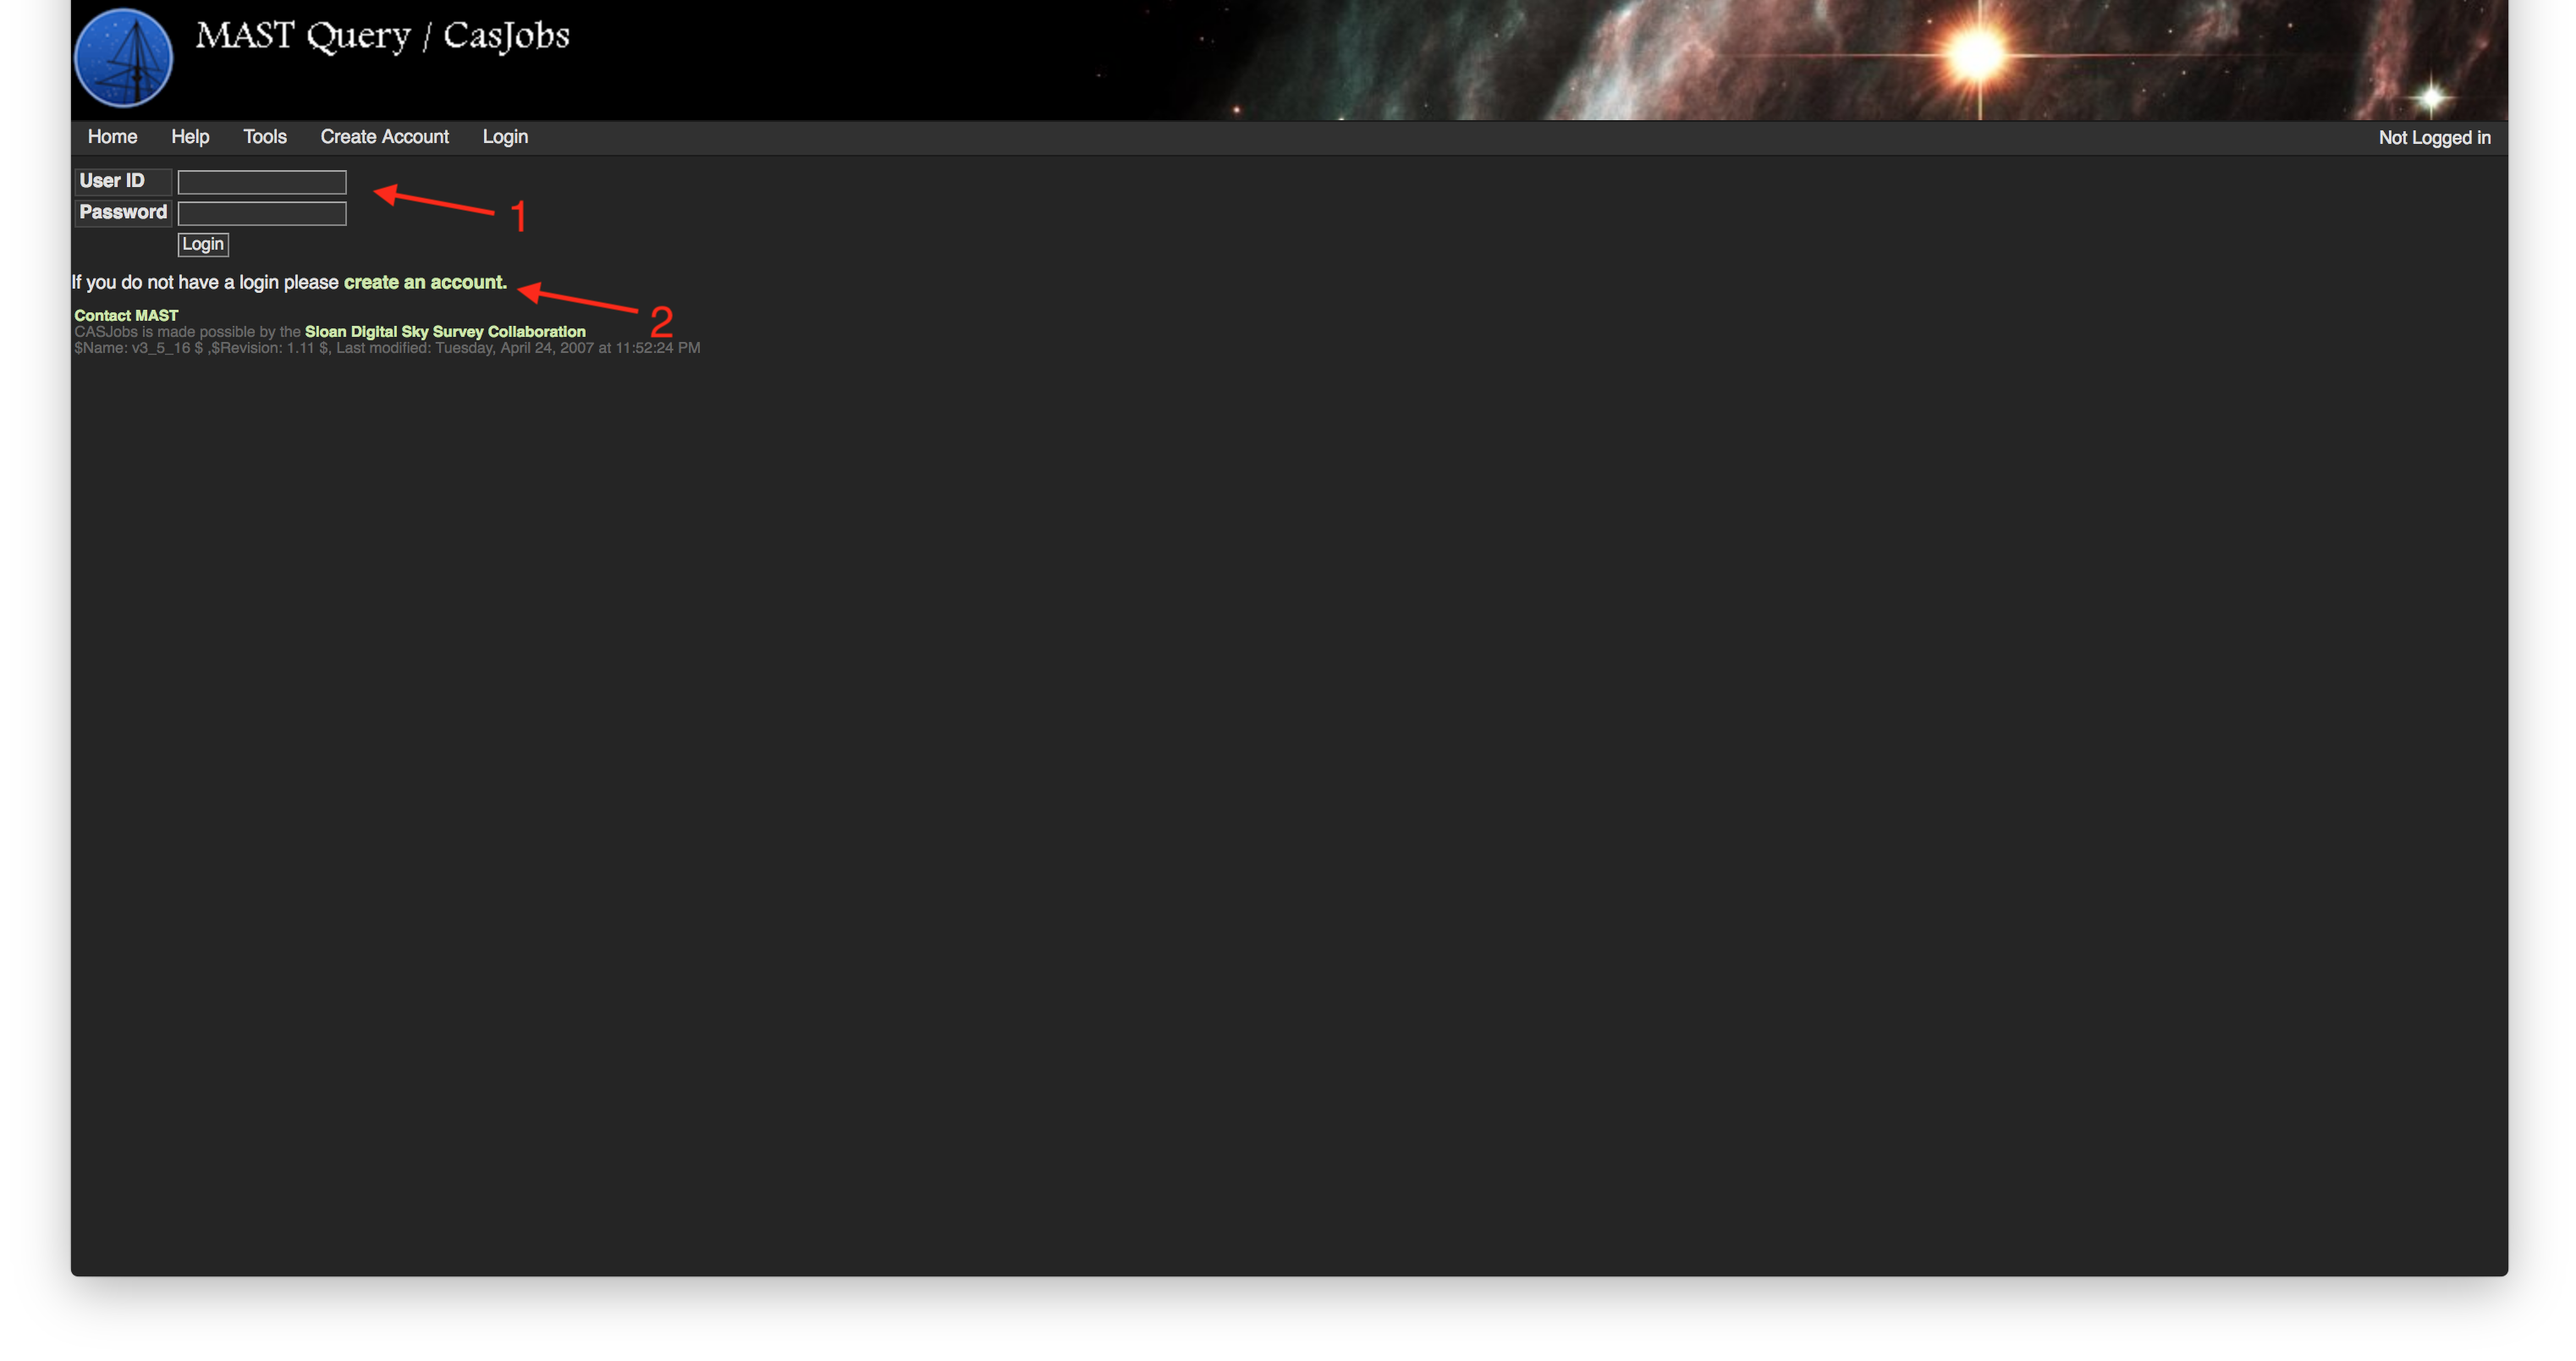
Step 2 - Enter Account Info: On the login page, enter your user name and password (Item #1). Note that the MAST CasJobs account is not the same as your general STScI (MyST) account. If you don't have a MAST CasJobs account, you can register for one using the link towards the bottom of the page (Item #2). |
| Divbox | ||
|---|---|---|
| ||
 |
| Divbox | ||
|---|---|---|
| ||
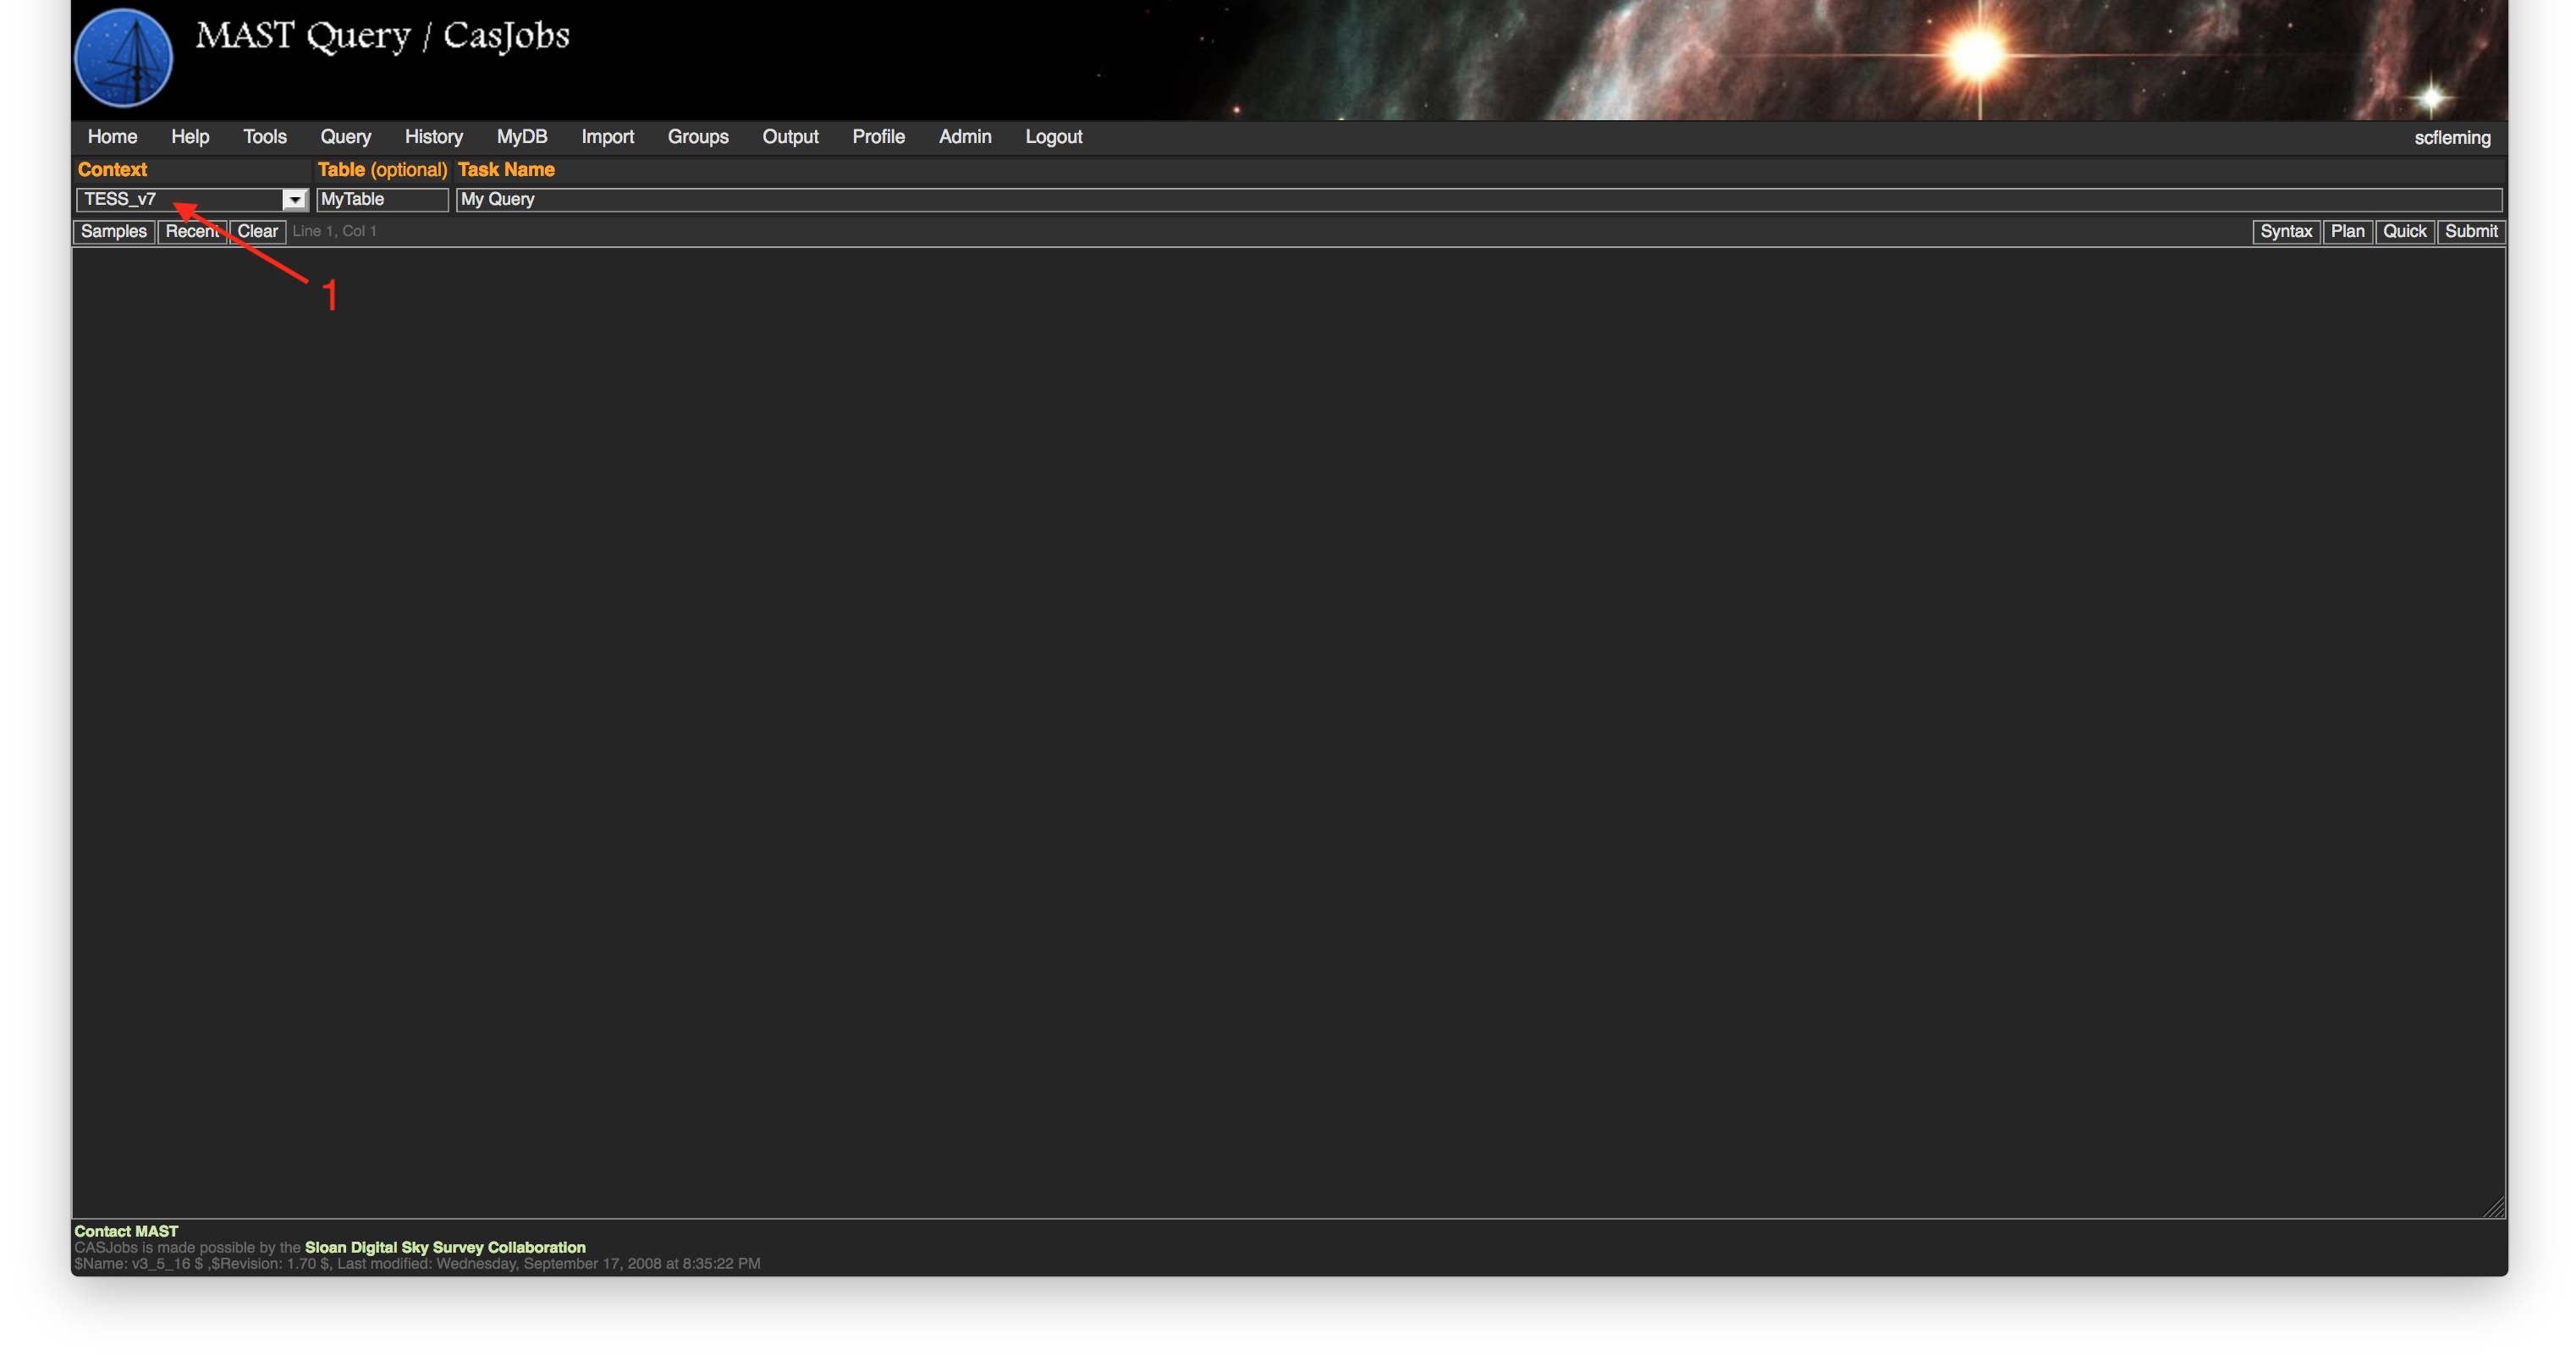
Step 3 - Select "TESS_v?" Context: After you sign in, you'll be on the Query page. The first step whenever you want to run a SQL query on a TESS table is to make sure the Context drop-down menu is set to the current version of the TESS catalog (Item #1). If you want to query other tables from other missions, or from output tables you create, you can change the Context using this menu before you execute your query. |
| Divbox | ||
|---|---|---|
| ||
 |
| Divbox | ||
|---|---|---|
| ||
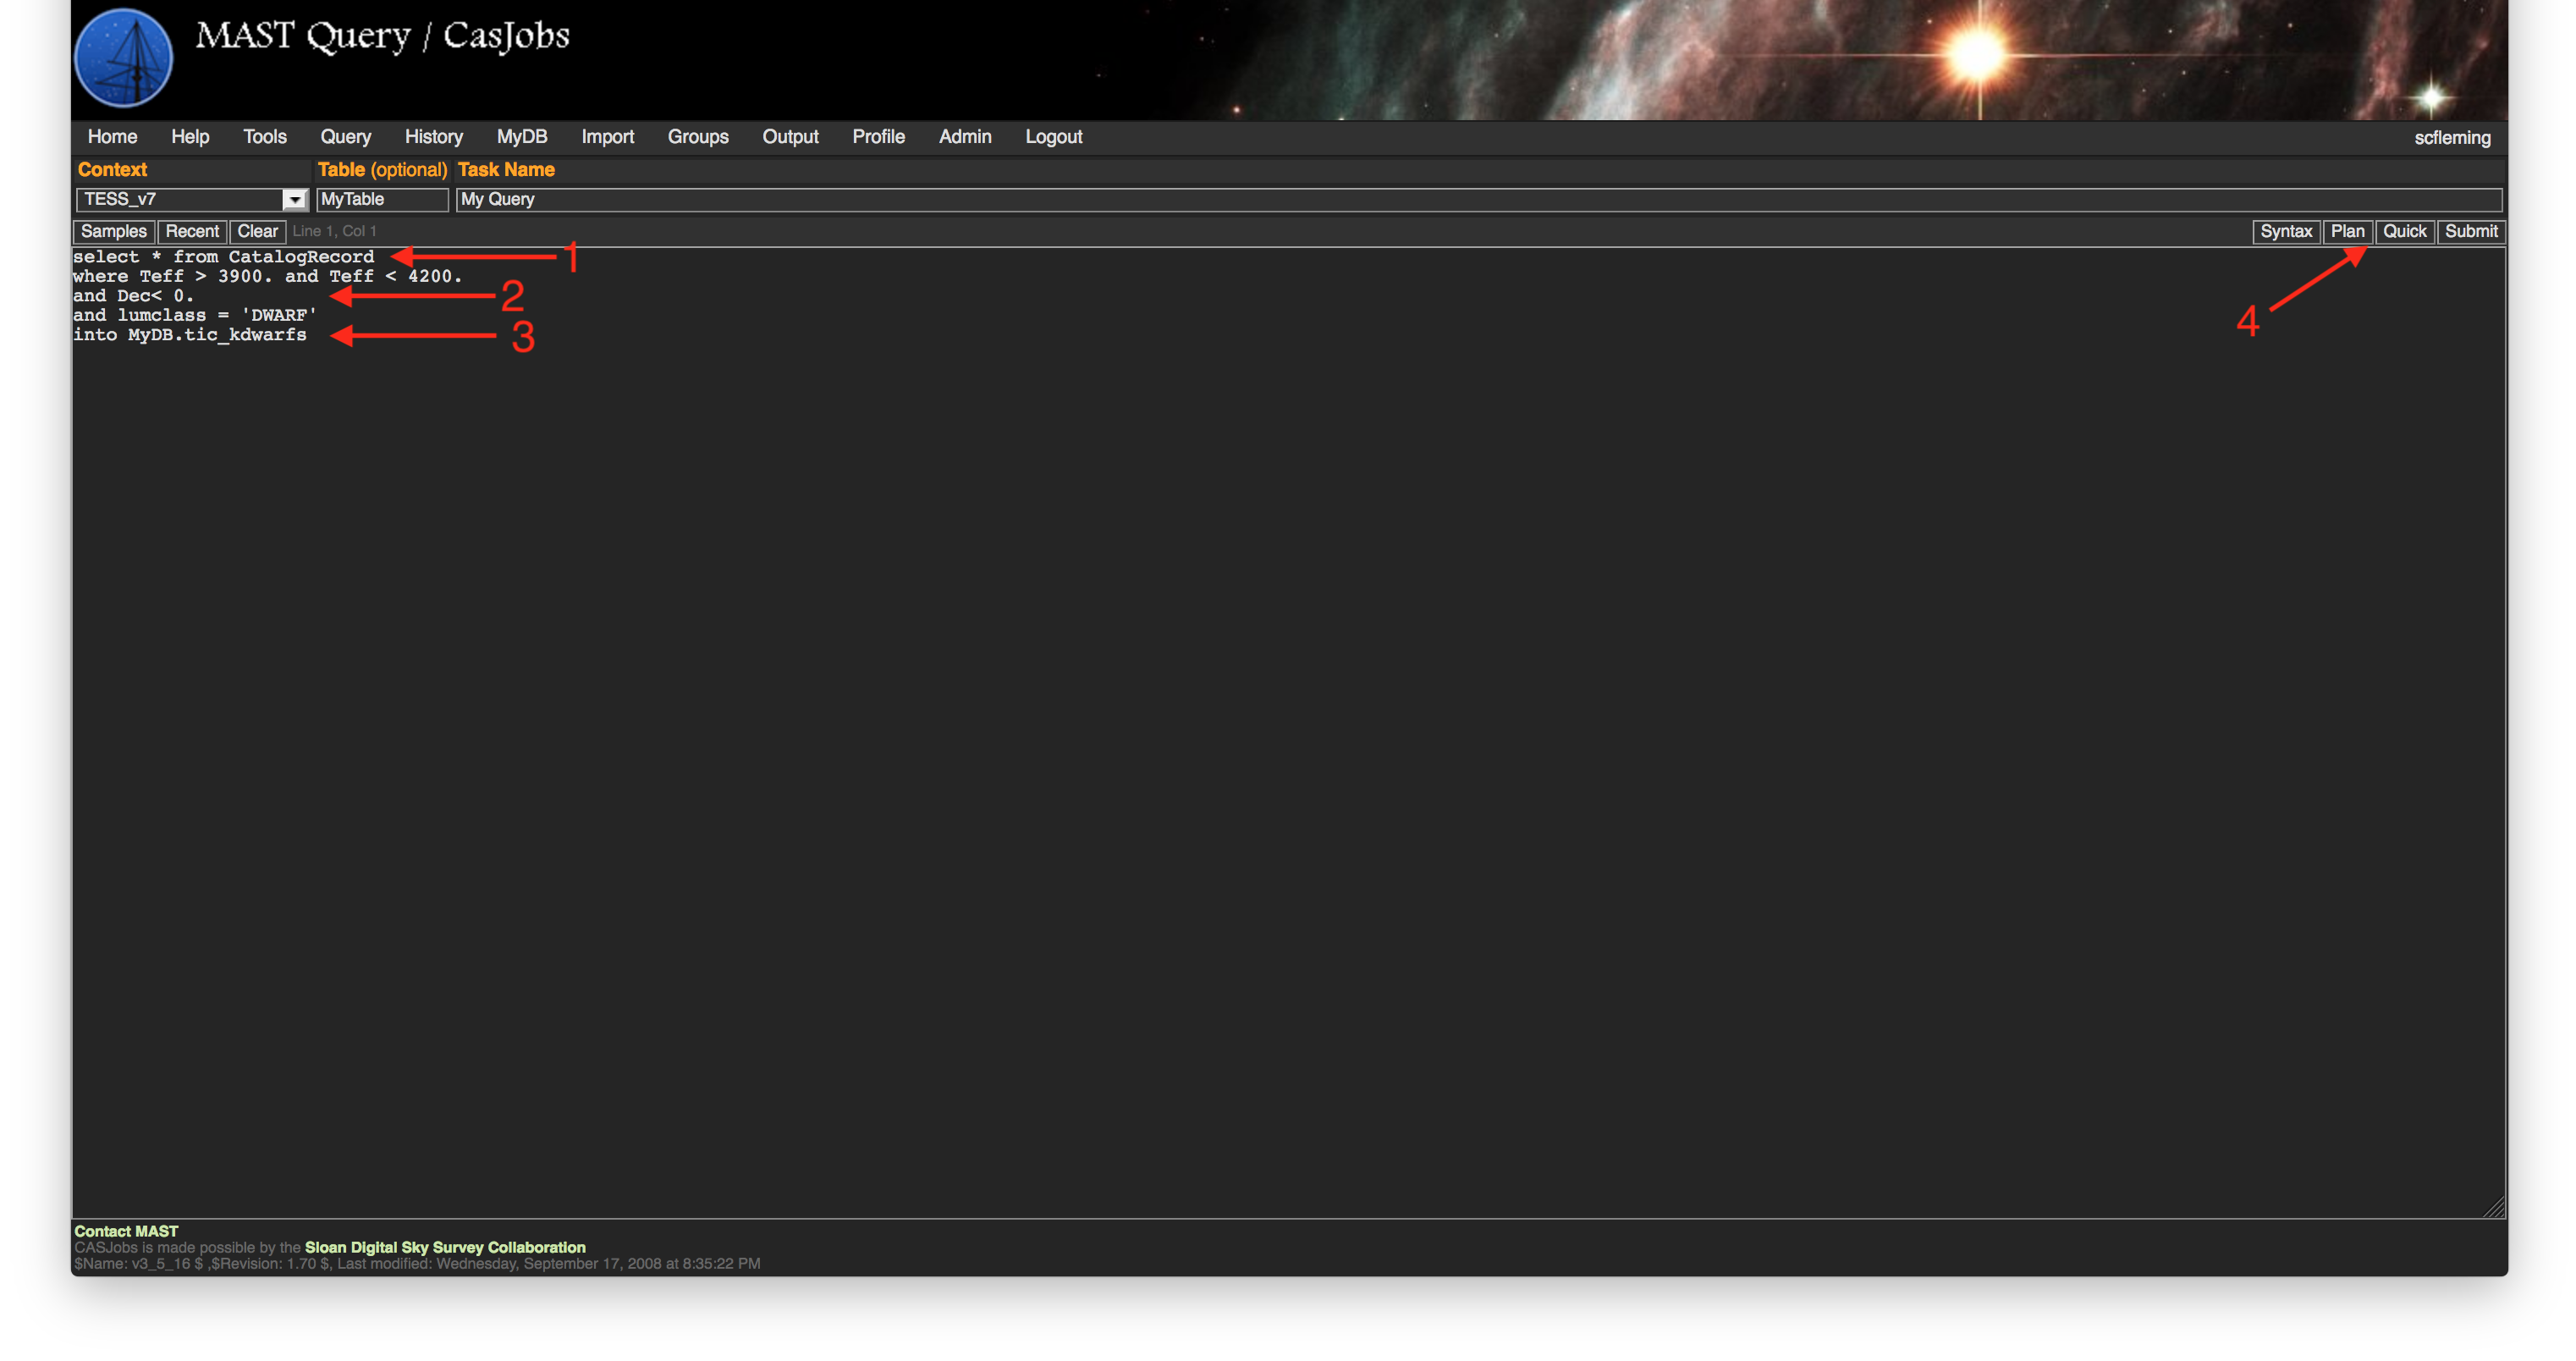
Step 4 - Enter Your Query: Once we have selected TESS_v? as our Context, we can write our query in the space below. This tutorial is not designed to give you a full introduction on how to write SQL queries, but we will explain our basic query. The first line selects all columns from the TIC, which is stored as a table called catalogRecord inside CasJobs (Item #1). The next three lines apply some conditions to our query, namely, we want all stars that have temperatures between 3900. and 4200. K, are in the southern hemisphere, and are classified as a dwarf based on their reduced proper motion (Item #2). The last line tells CasJobs to store the results of our query as a table called tic_kdwarfs into MyDB (Item #3). MyDB is the Context that holds any output tables you make using CasJobs, and is your own personal workspace where you can write (create) and drop (remove) tables. On the upper right (Item #4), you can check that your syntax is valid SQL before running a job with the Syntax button. The Quick button allows you to run a SQL query directly on this page, provided the job takes less than 60 seconds to run and doesn't use too much memory. Finally, the Submit button will send a query to the job manager, allowing you to submit any query to the processing queue. Even if the job takes a long time to run, once submitted to the queue, you can exit CasJobs and return at any time to check on the status or get your output table once finished. This query must use the Submit button, since it won't finish in less than 60 seconds. |
| Divbox | ||
|---|---|---|
| ||
 |
| Divbox | ||
|---|---|---|
| ||
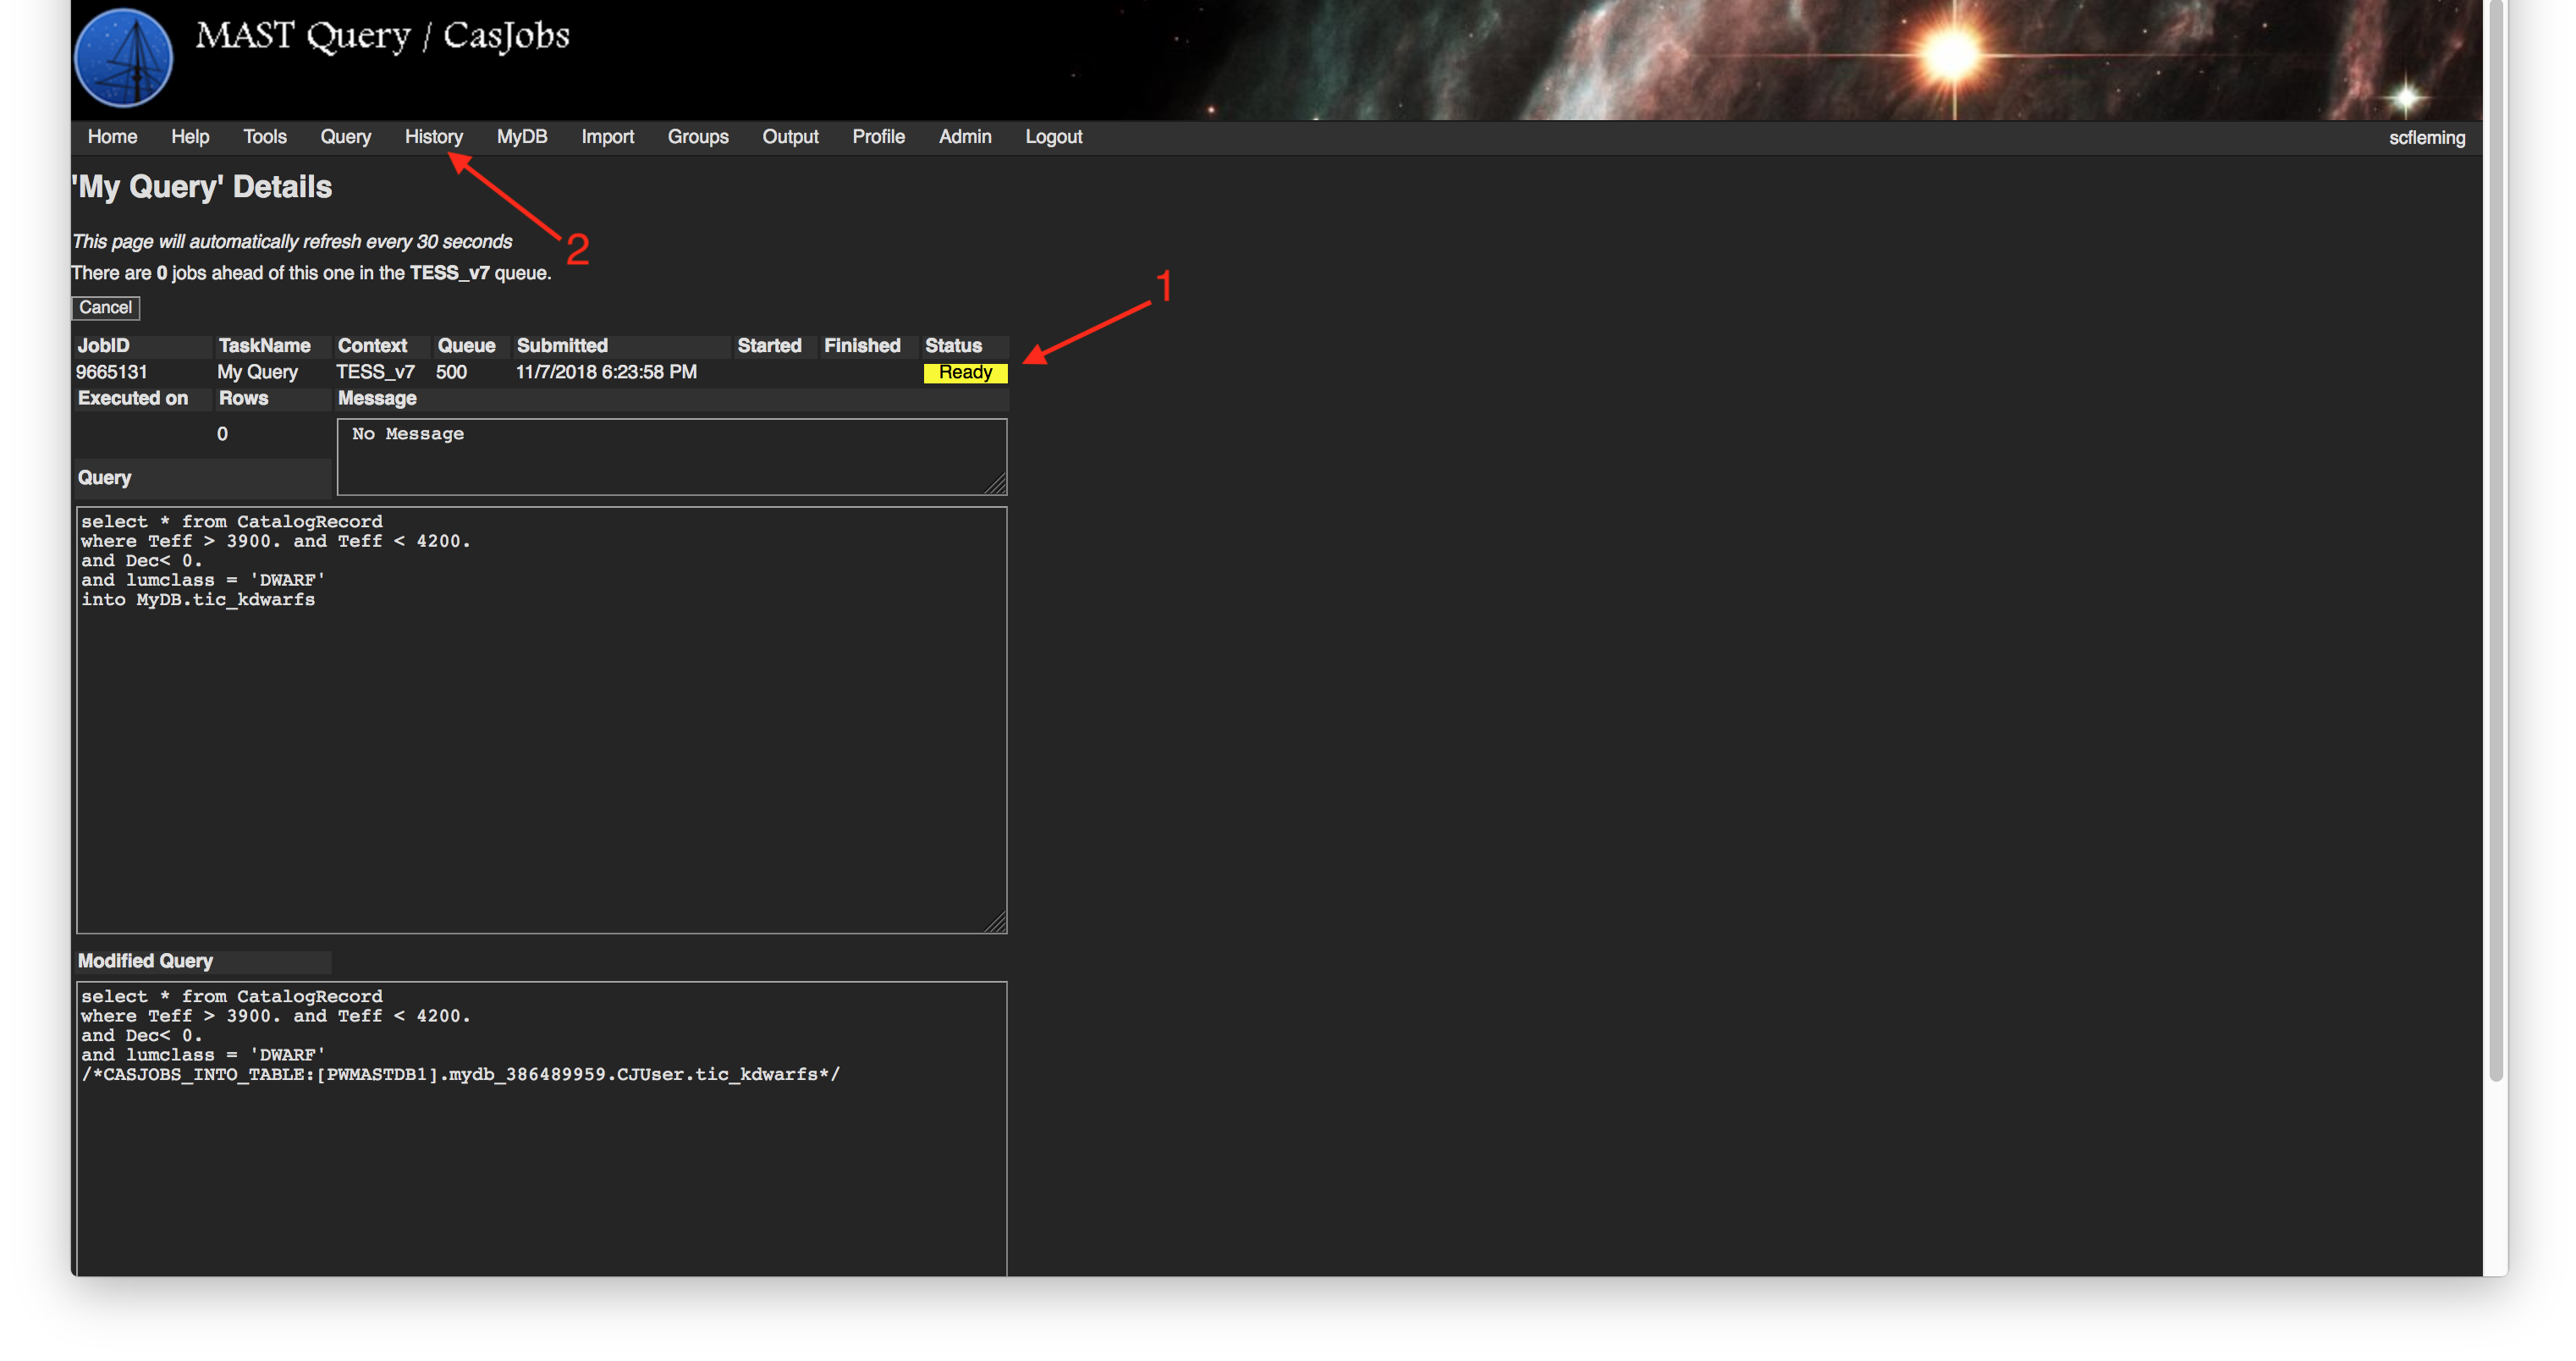
Step 5 - Monitoring Job Status: After you Submit a job to the queue, you will be brought to this page, which will continuously refresh every 30 seconds, allowing your to monitor the status of your job (Item #1). You can also manually refresh this page if you want to get a status update faster, or visit the History tab at any time if you want to leave the CasJobs page and come back later. When a job is finished, it will show up in blue as Finished. If a job fails for some reason, it will show up in red as Failed. You can see your entire job submission history by visiting the History tab at the top (Item #2). |
| Divbox | ||
|---|---|---|
| ||
 |
| Divbox | ||
|---|---|---|
| ||
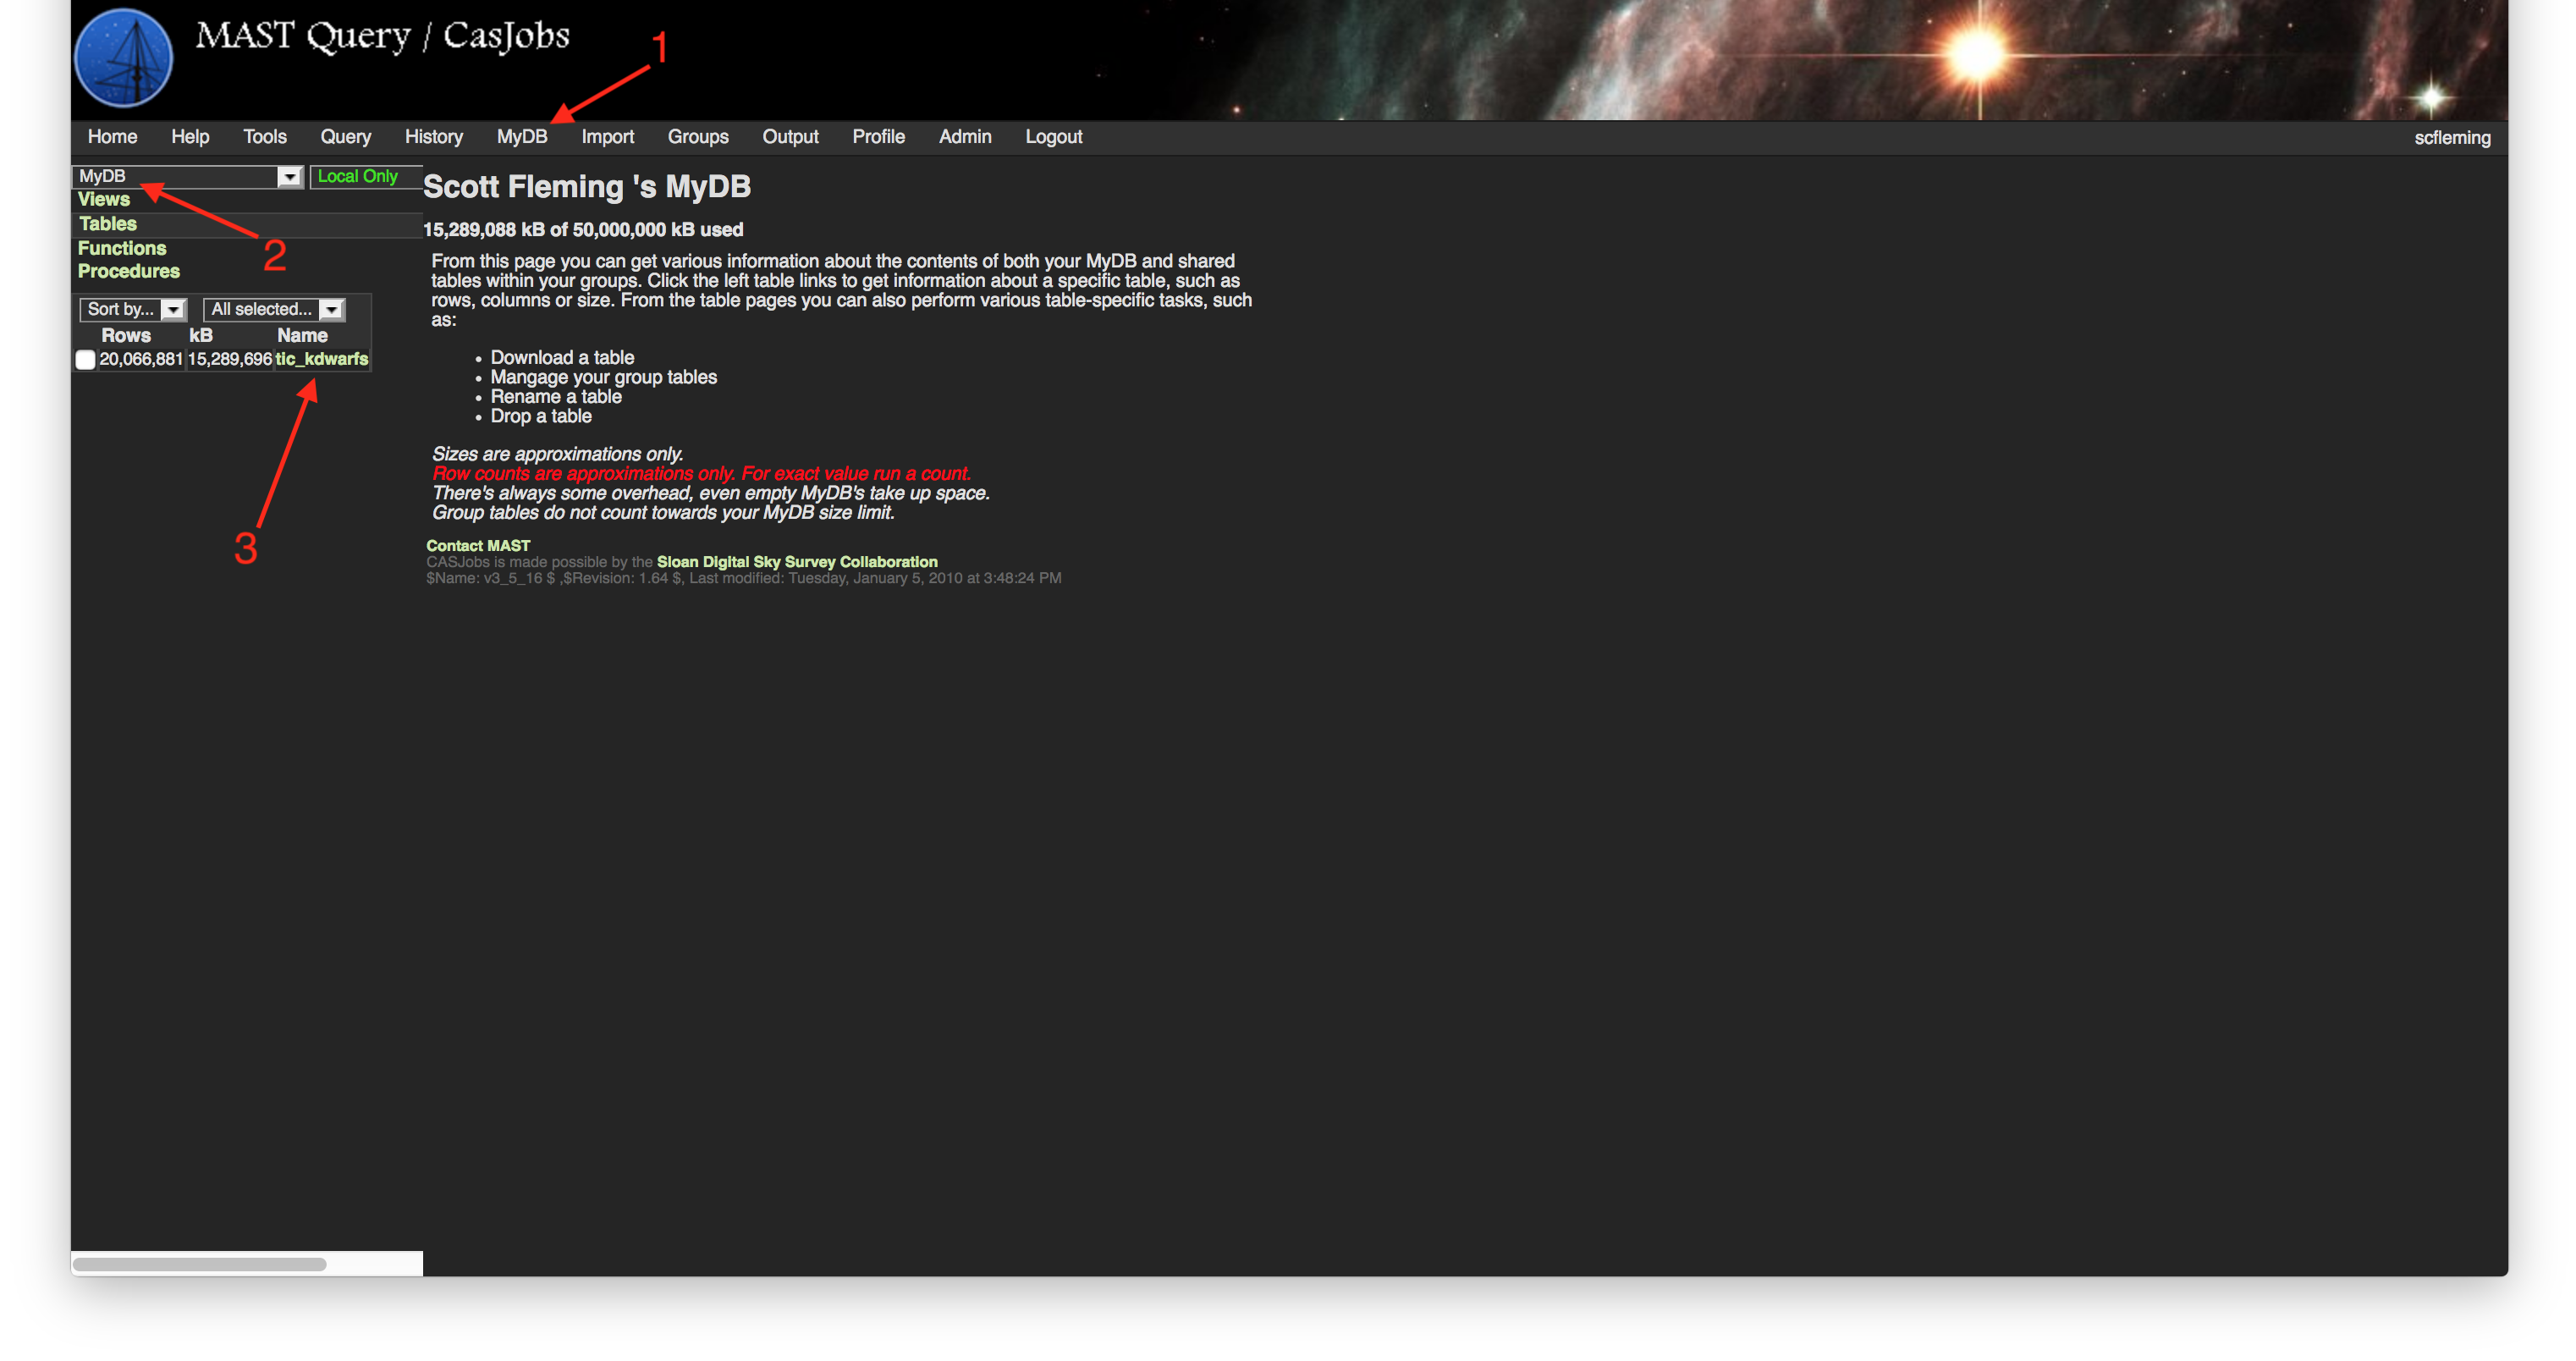
Step 6 - Accessing Your Output Tables: The MyDB tab (Item #1) is an important section of CasJobs, because it allows you to get to your output tables and see the available tables provided by MAST. Similarly to the Query tab, a drop-down Context menu allows you to swap between available Contexts (Item #2). In this example, we'll select MyDB from the drop-down menu, where we will see our output from the query we just ran (Item #3). If a table is "in progress", it will appear in blue, otherwise a table that is finished will appear in yellow. Our query has resulted in some 20 million K dwarfs in the catalog, way too large for other MAST interfaces. |
| Divbox | ||
|---|---|---|
| ||
 |
| Divbox | ||
|---|---|---|
| ||
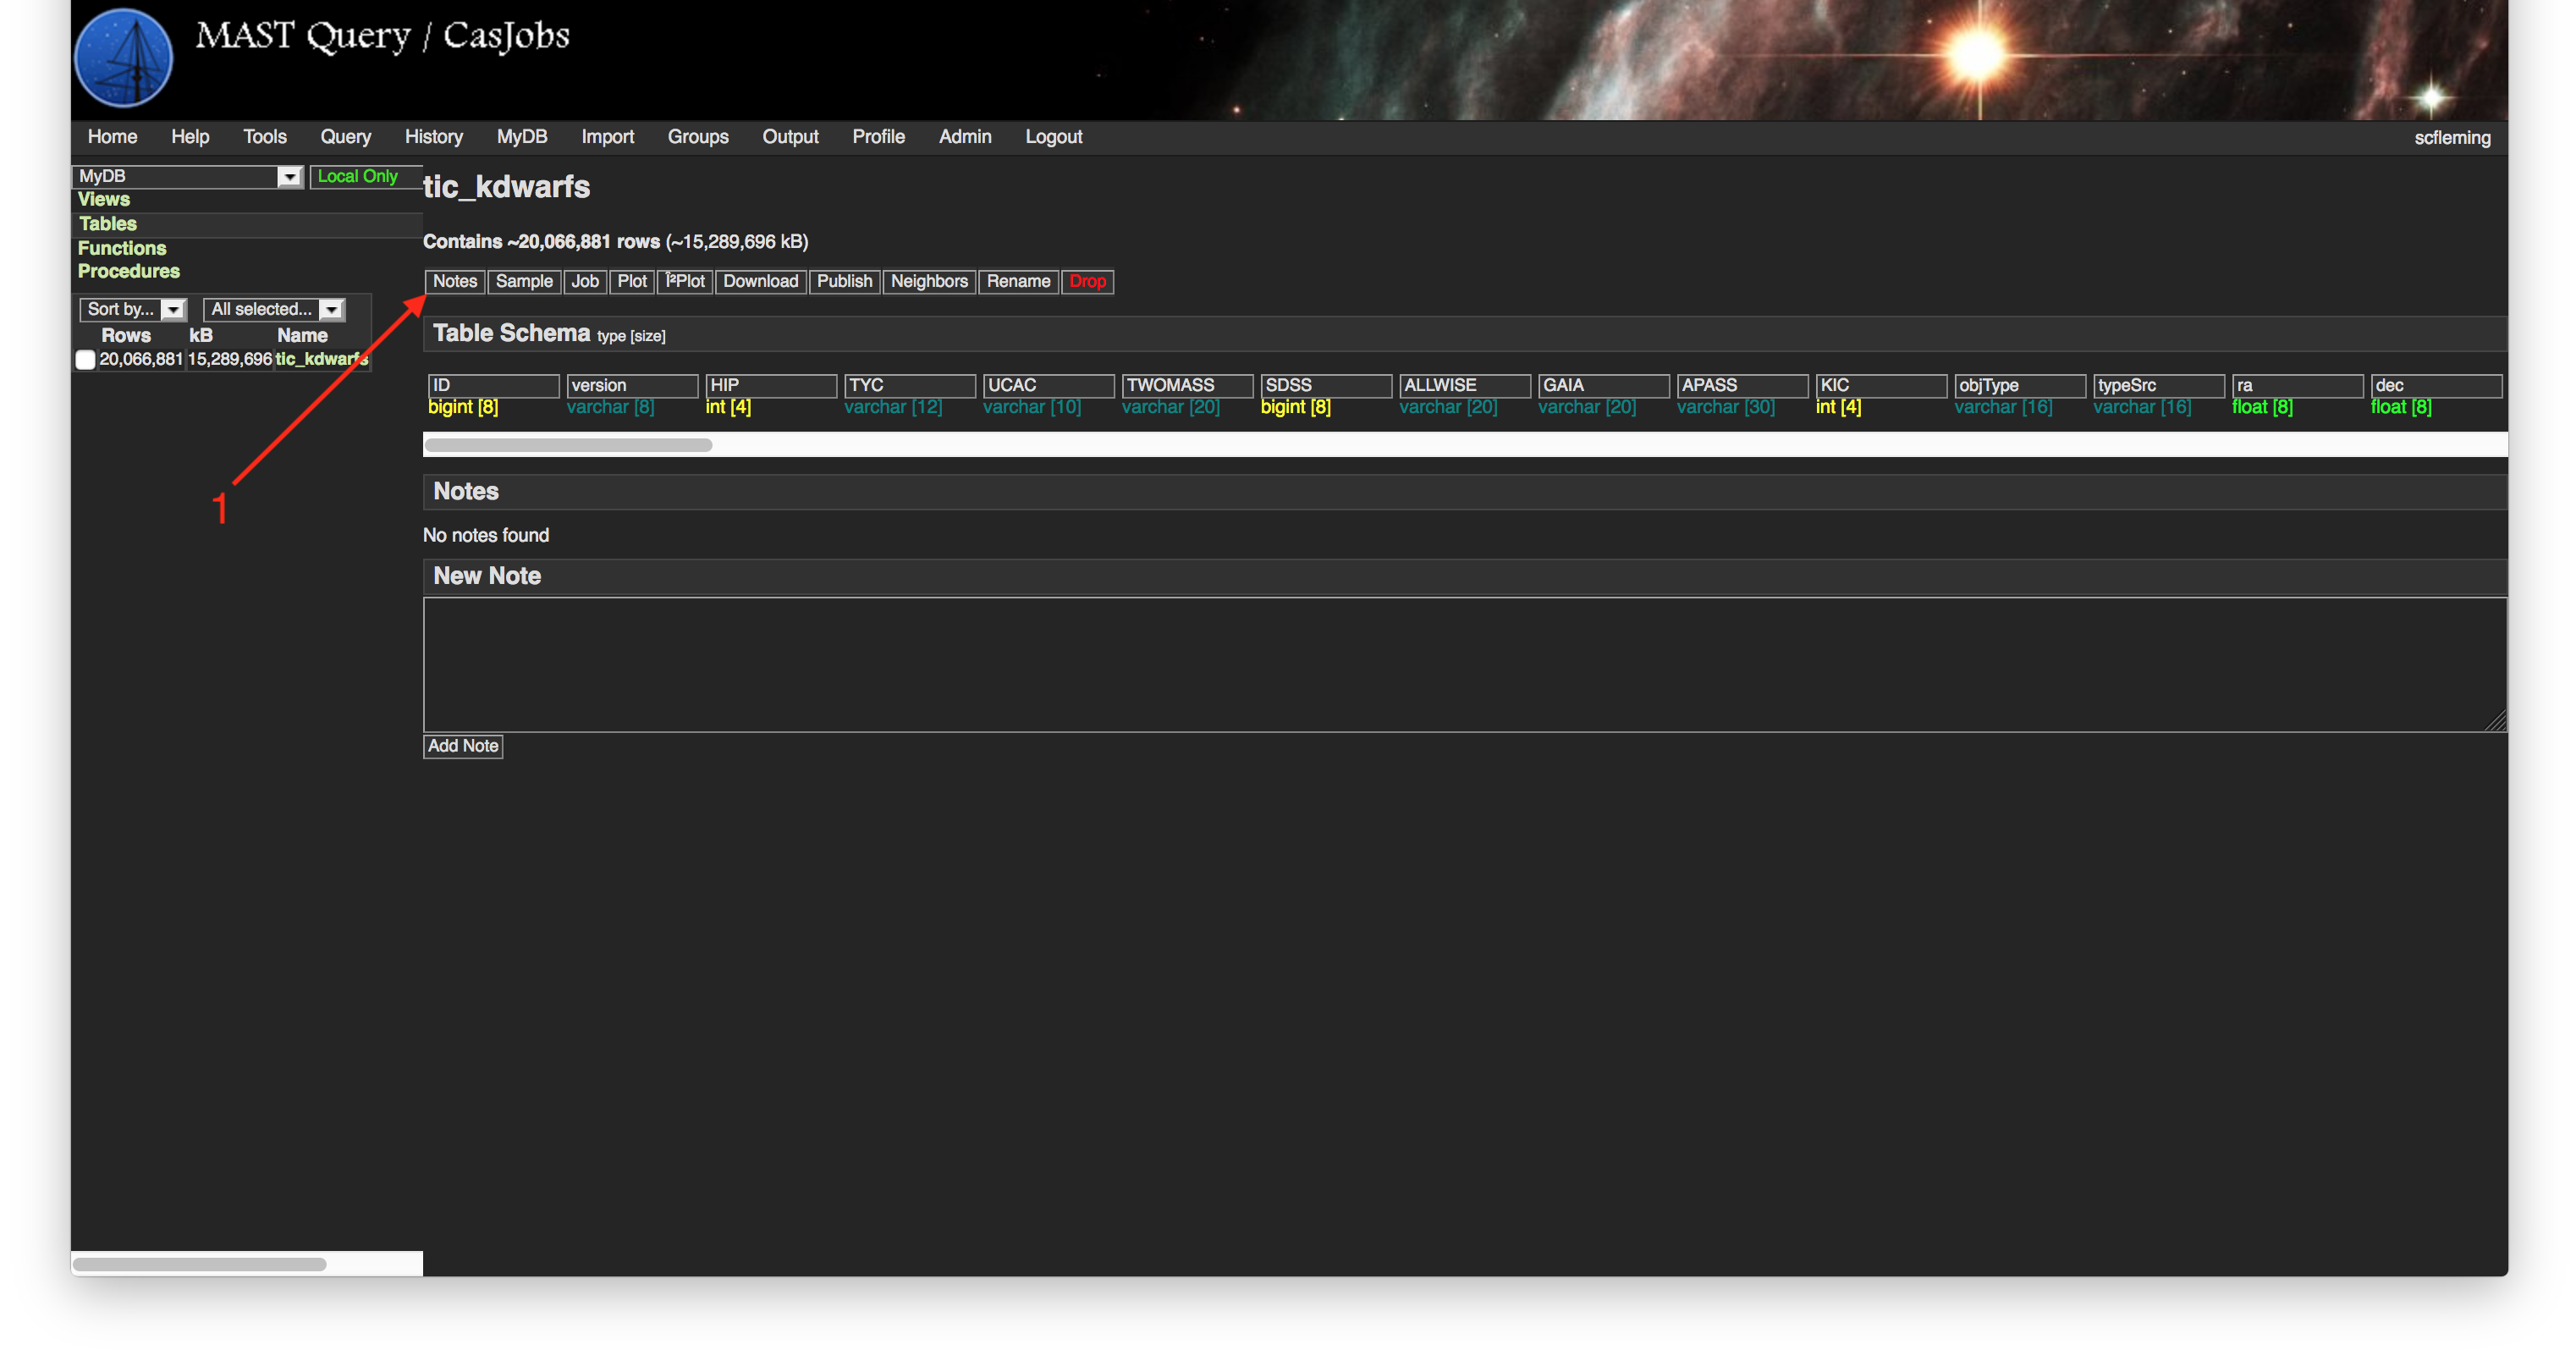
Step 7 - Examining Your Output Table: We can explore what's in a table by selecting it from the list. If we click on the tic_kdwarfs link, it will load the table in the Explore section (Item #1), where there are several further options available to us. |
| Divbox | ||
|---|---|---|
| ||
 |
| Divbox | ||
|---|---|---|
| ||
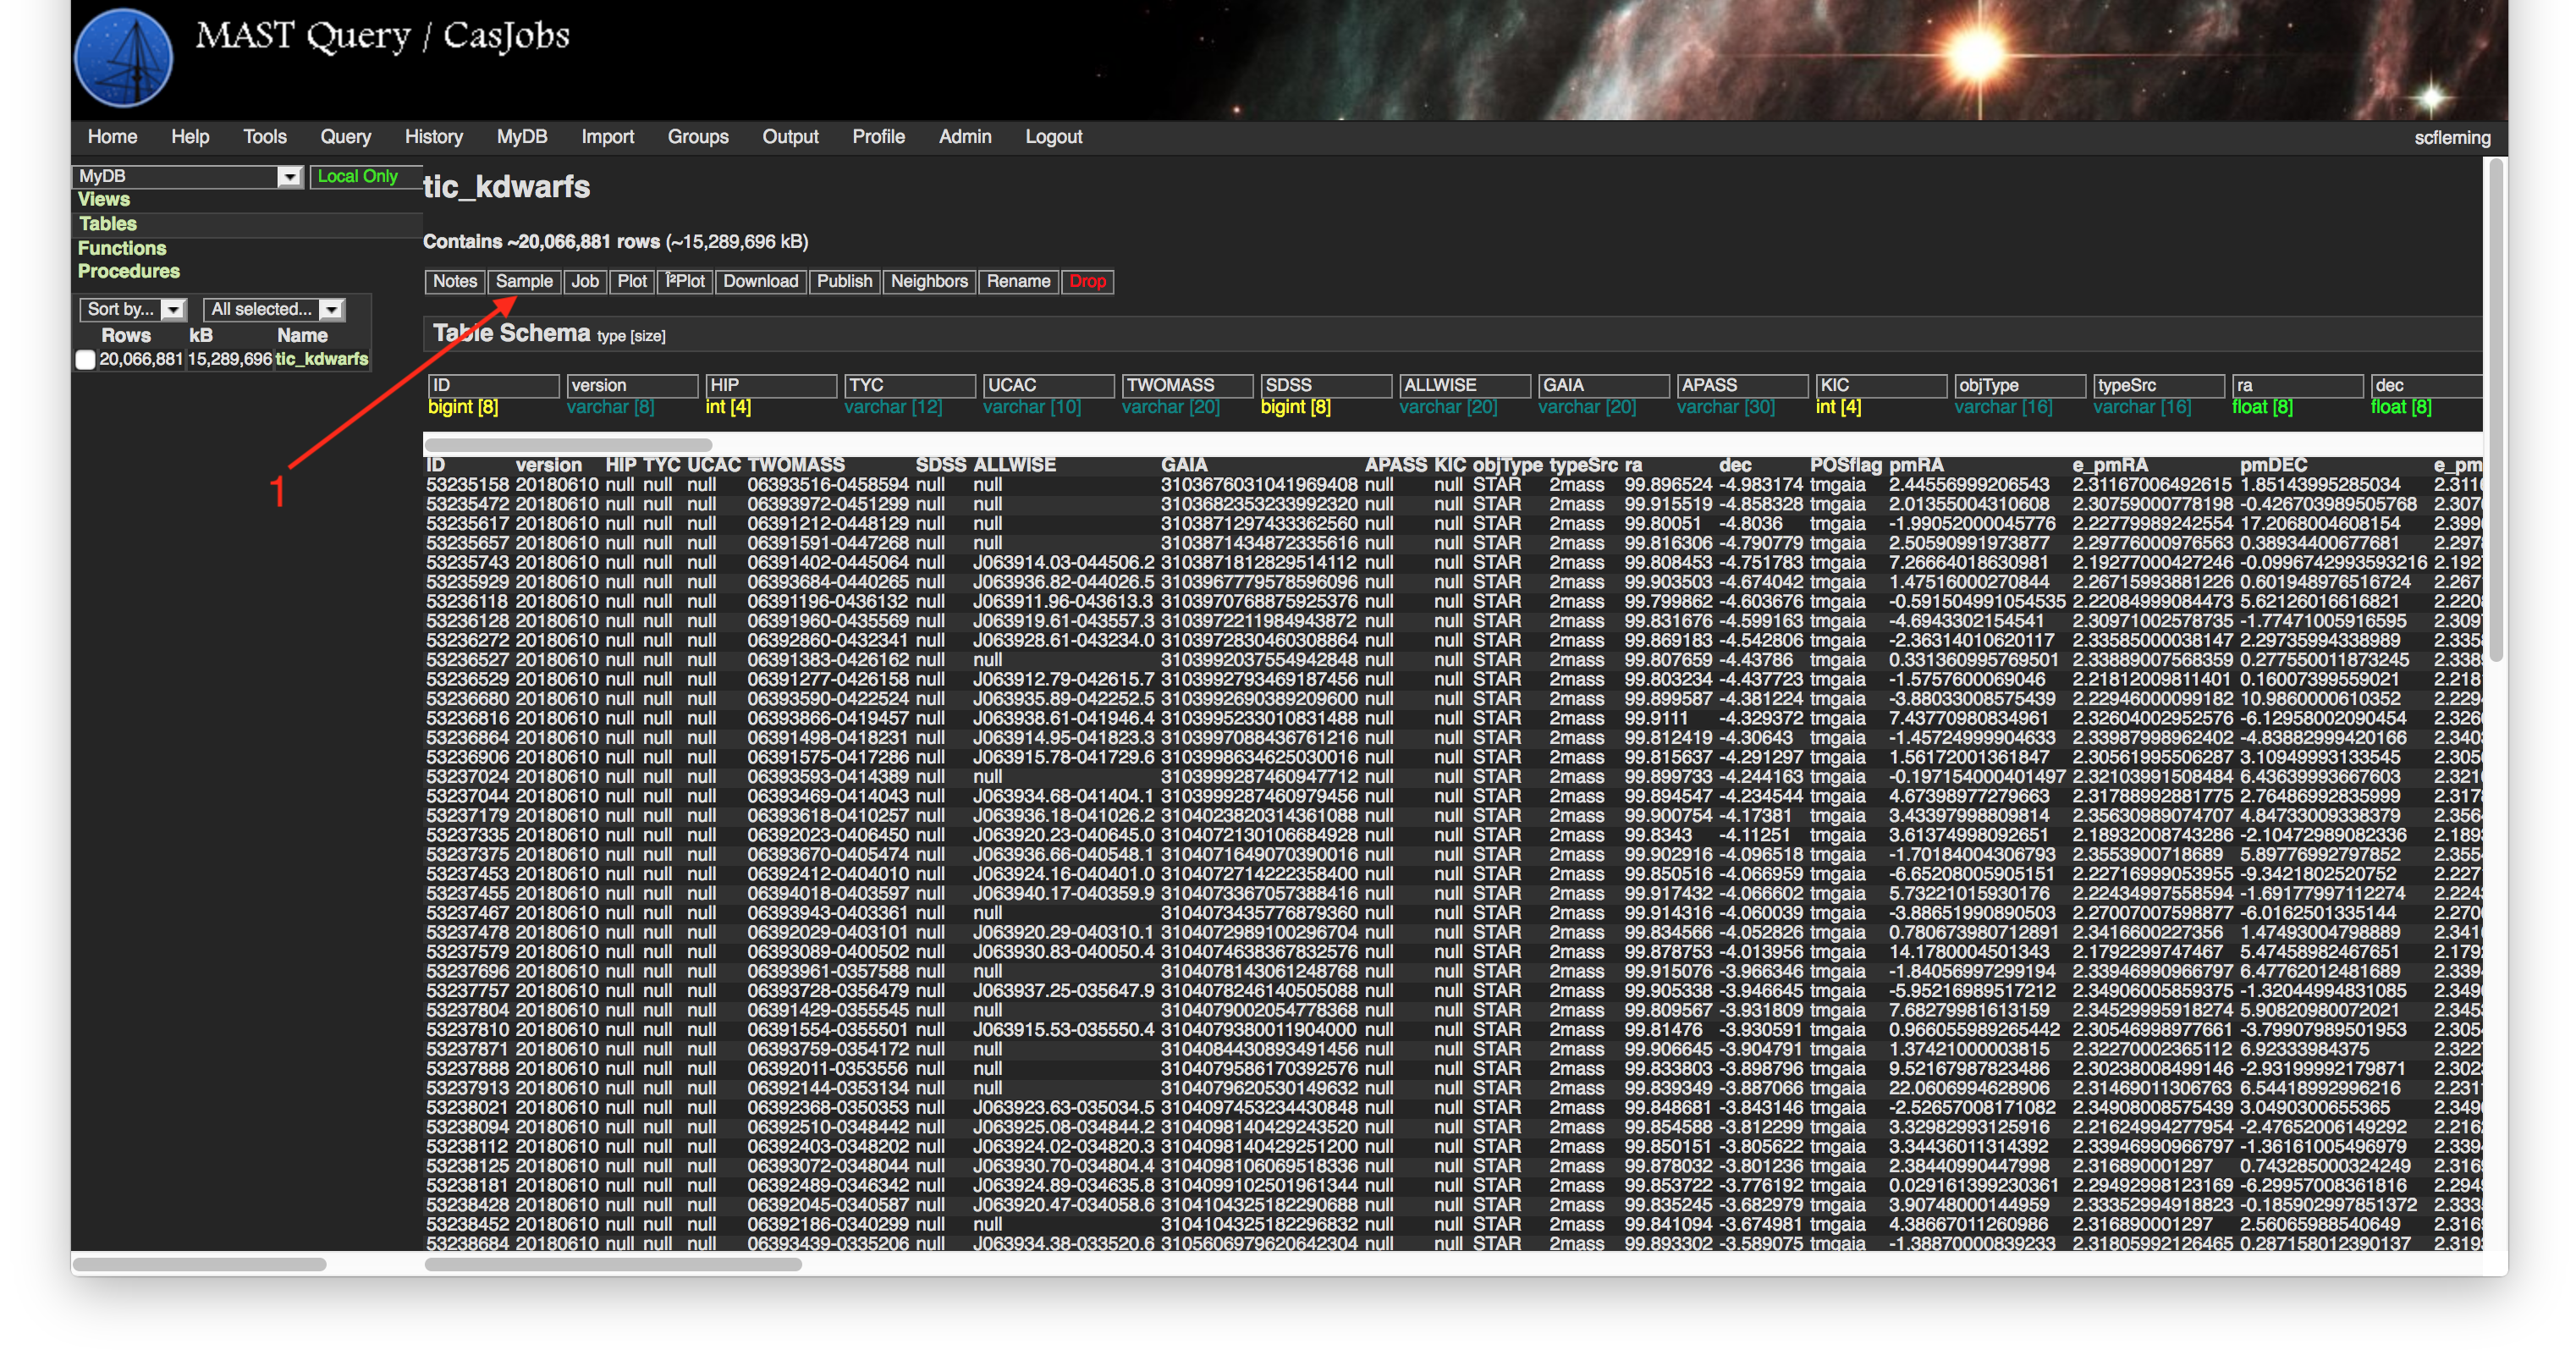
Step 8 - Displaying A Table Sample: If we click on the Sample link, we will be able to see the table schema (column names and data types) as well as a few random rows to get a sense of what the table contains (Item #1). |
| Divbox | ||
|---|---|---|
| ||
 |
| Divbox | ||
|---|---|---|
| ||
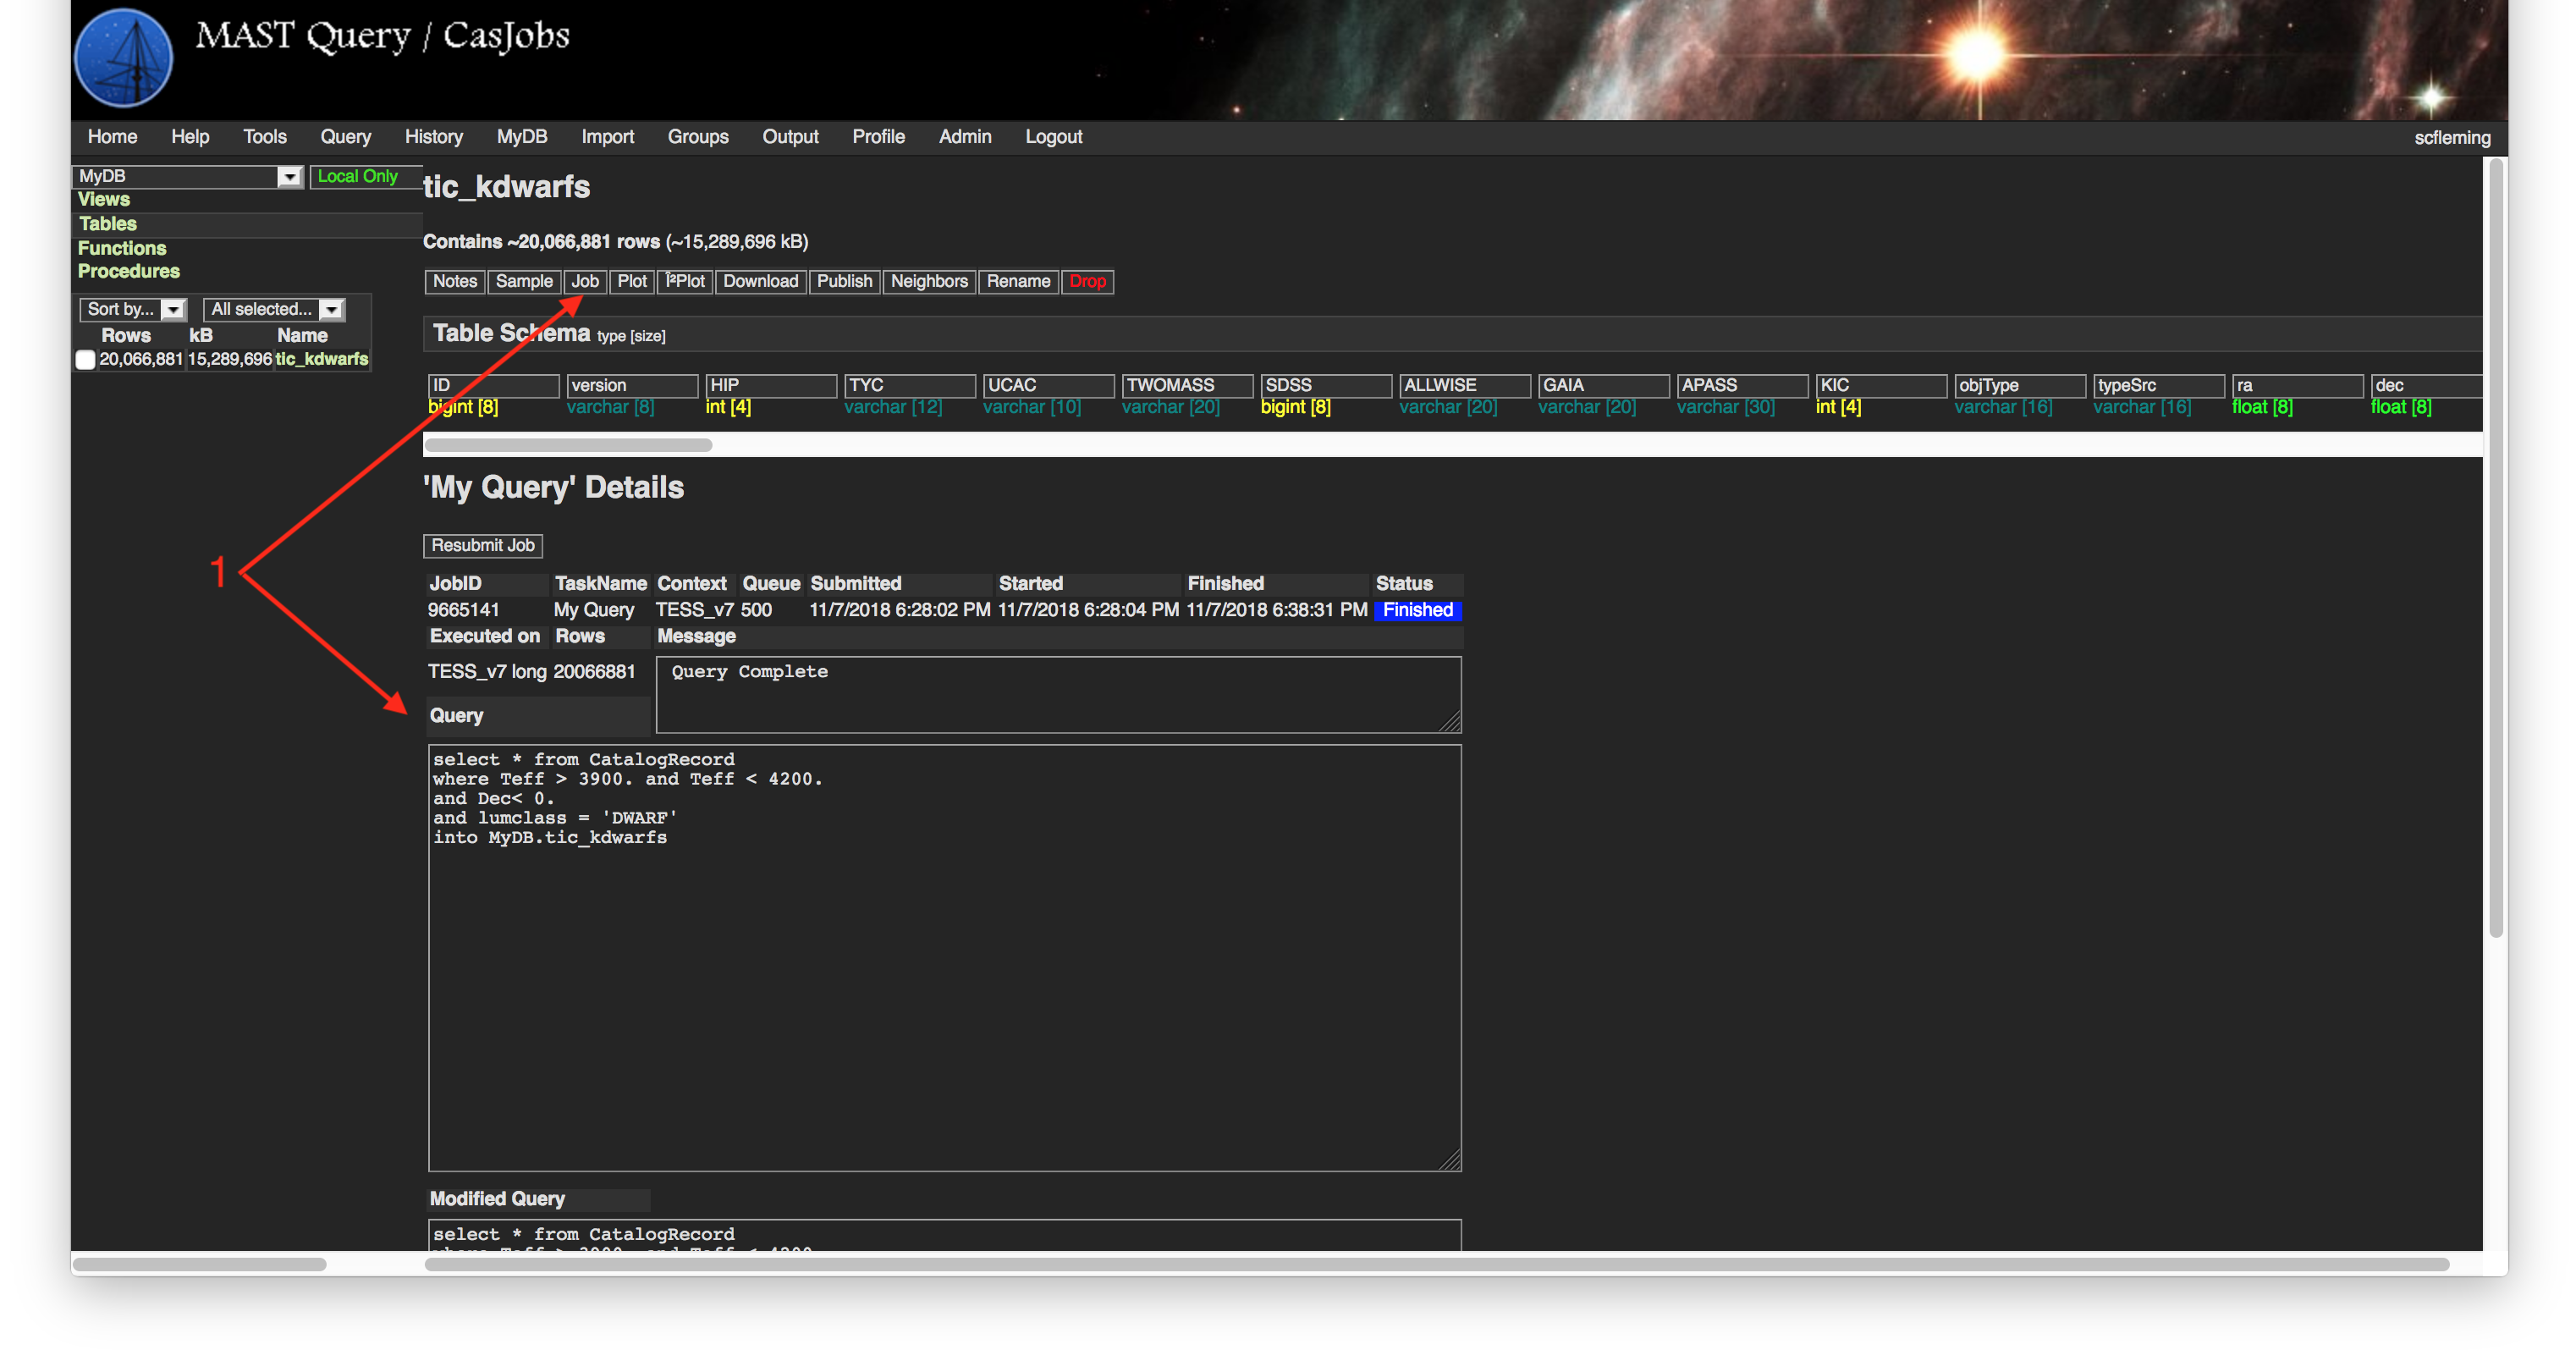
Step 9 - Job Information: If we click on the Job link, we will be able to see information about the query used to create the table. In particular, the exact query used is located at the bottom (Item #1), along with the ability to re-submit this query back to the Query tab, making it easy to regenerate or update a query at any time in the future! |
| Divbox | ||
|---|---|---|
| ||
 |
| Divbox | ||
|---|---|---|
| ||
Step 10 - Exporting Your Results: If we click on the Download link, we will be able to export our table of results in a variety of formats, including CSV text files and FITS binary tables (Item #1). Once you hit Go, you'll be sent to the Output tab, where your file will be prepared for downloading. Note you may need to periodically refresh the page until your file is ready for downloading. |
| Divbox | ||
|---|---|---|
| ||
 |
| Divbox | ||
|---|---|---|
| ||
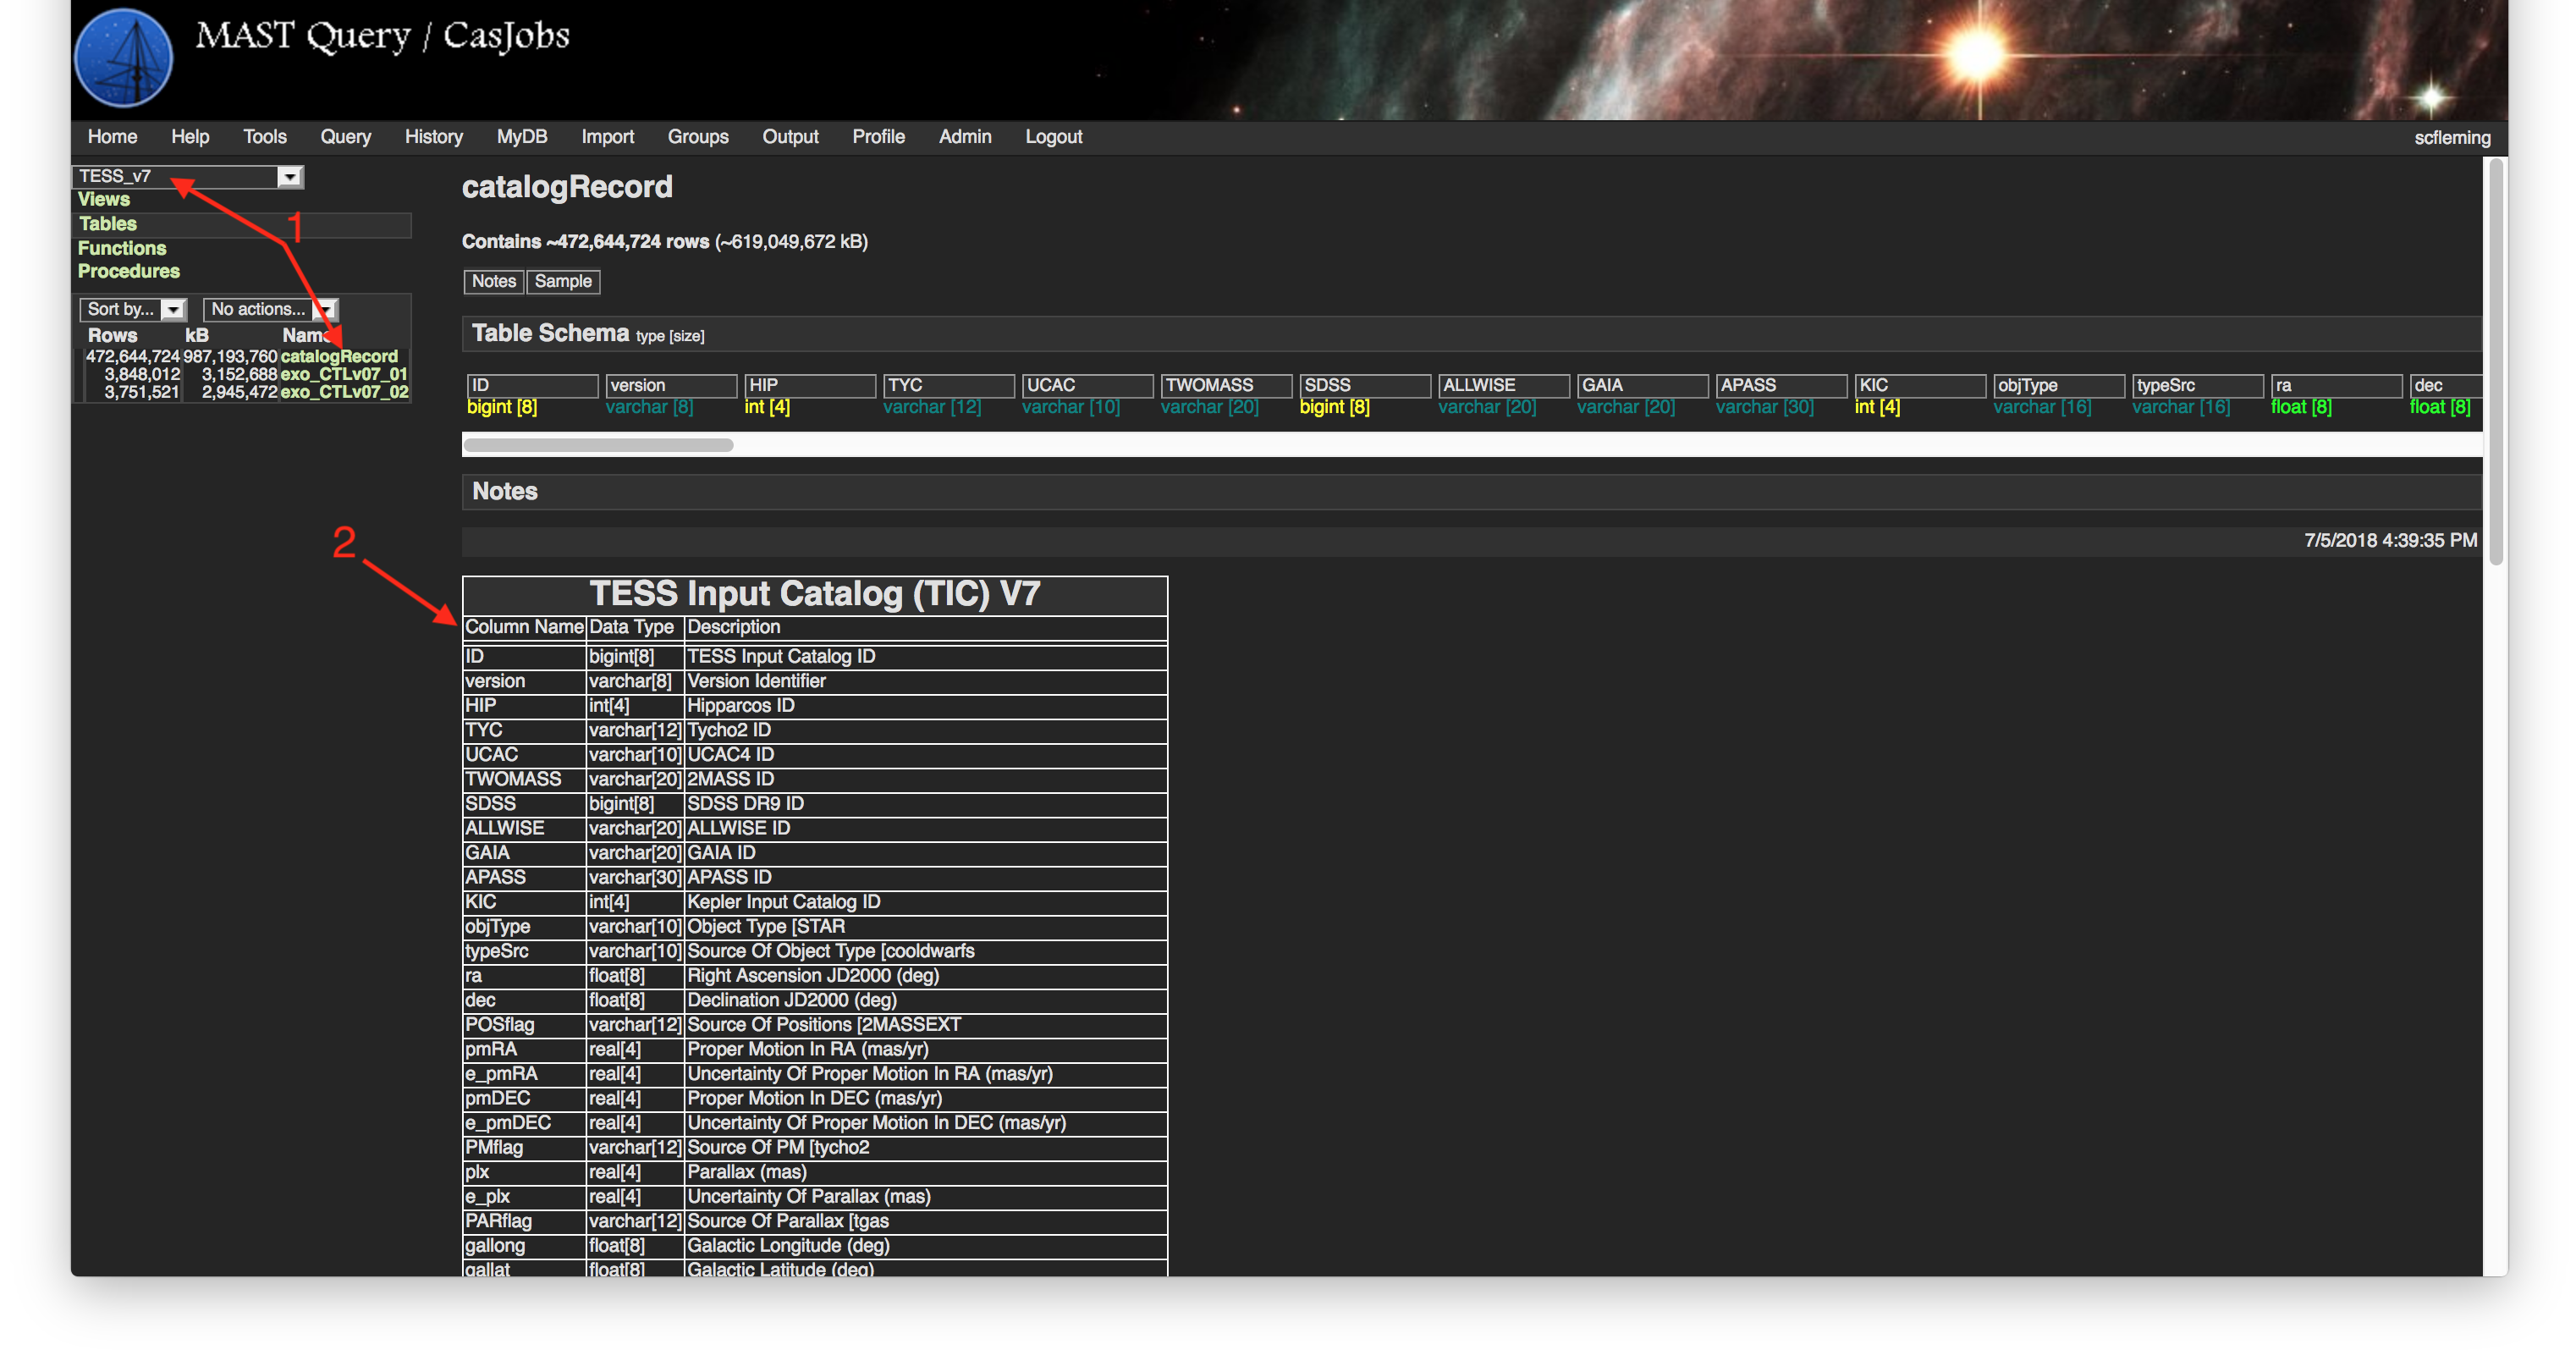
Step 11 - Viewing Other Tables In CasJobs: As mentioned previously, you can also see the content of MAST-provided tables by changing the Context drop-down menu (Item #1). If we change it to the TESS_v? Context, we'll see the available TESS mission tables, including the TIC (listed as the catalogRecord table), and versions of the exoplanet CTL. If we click on any of these links, we can further explore these tables on the right side of the page. If we click on the Notes link, we can see a description of the table and a summary of the table schema (Item #2). You can even download the catalogs in .csv or .fits format if you want, using the same export function used to save our query results table. |
| Divbox | ||
|---|---|---|
| ||
 |
| Divbox | ||
|---|---|---|
| ||
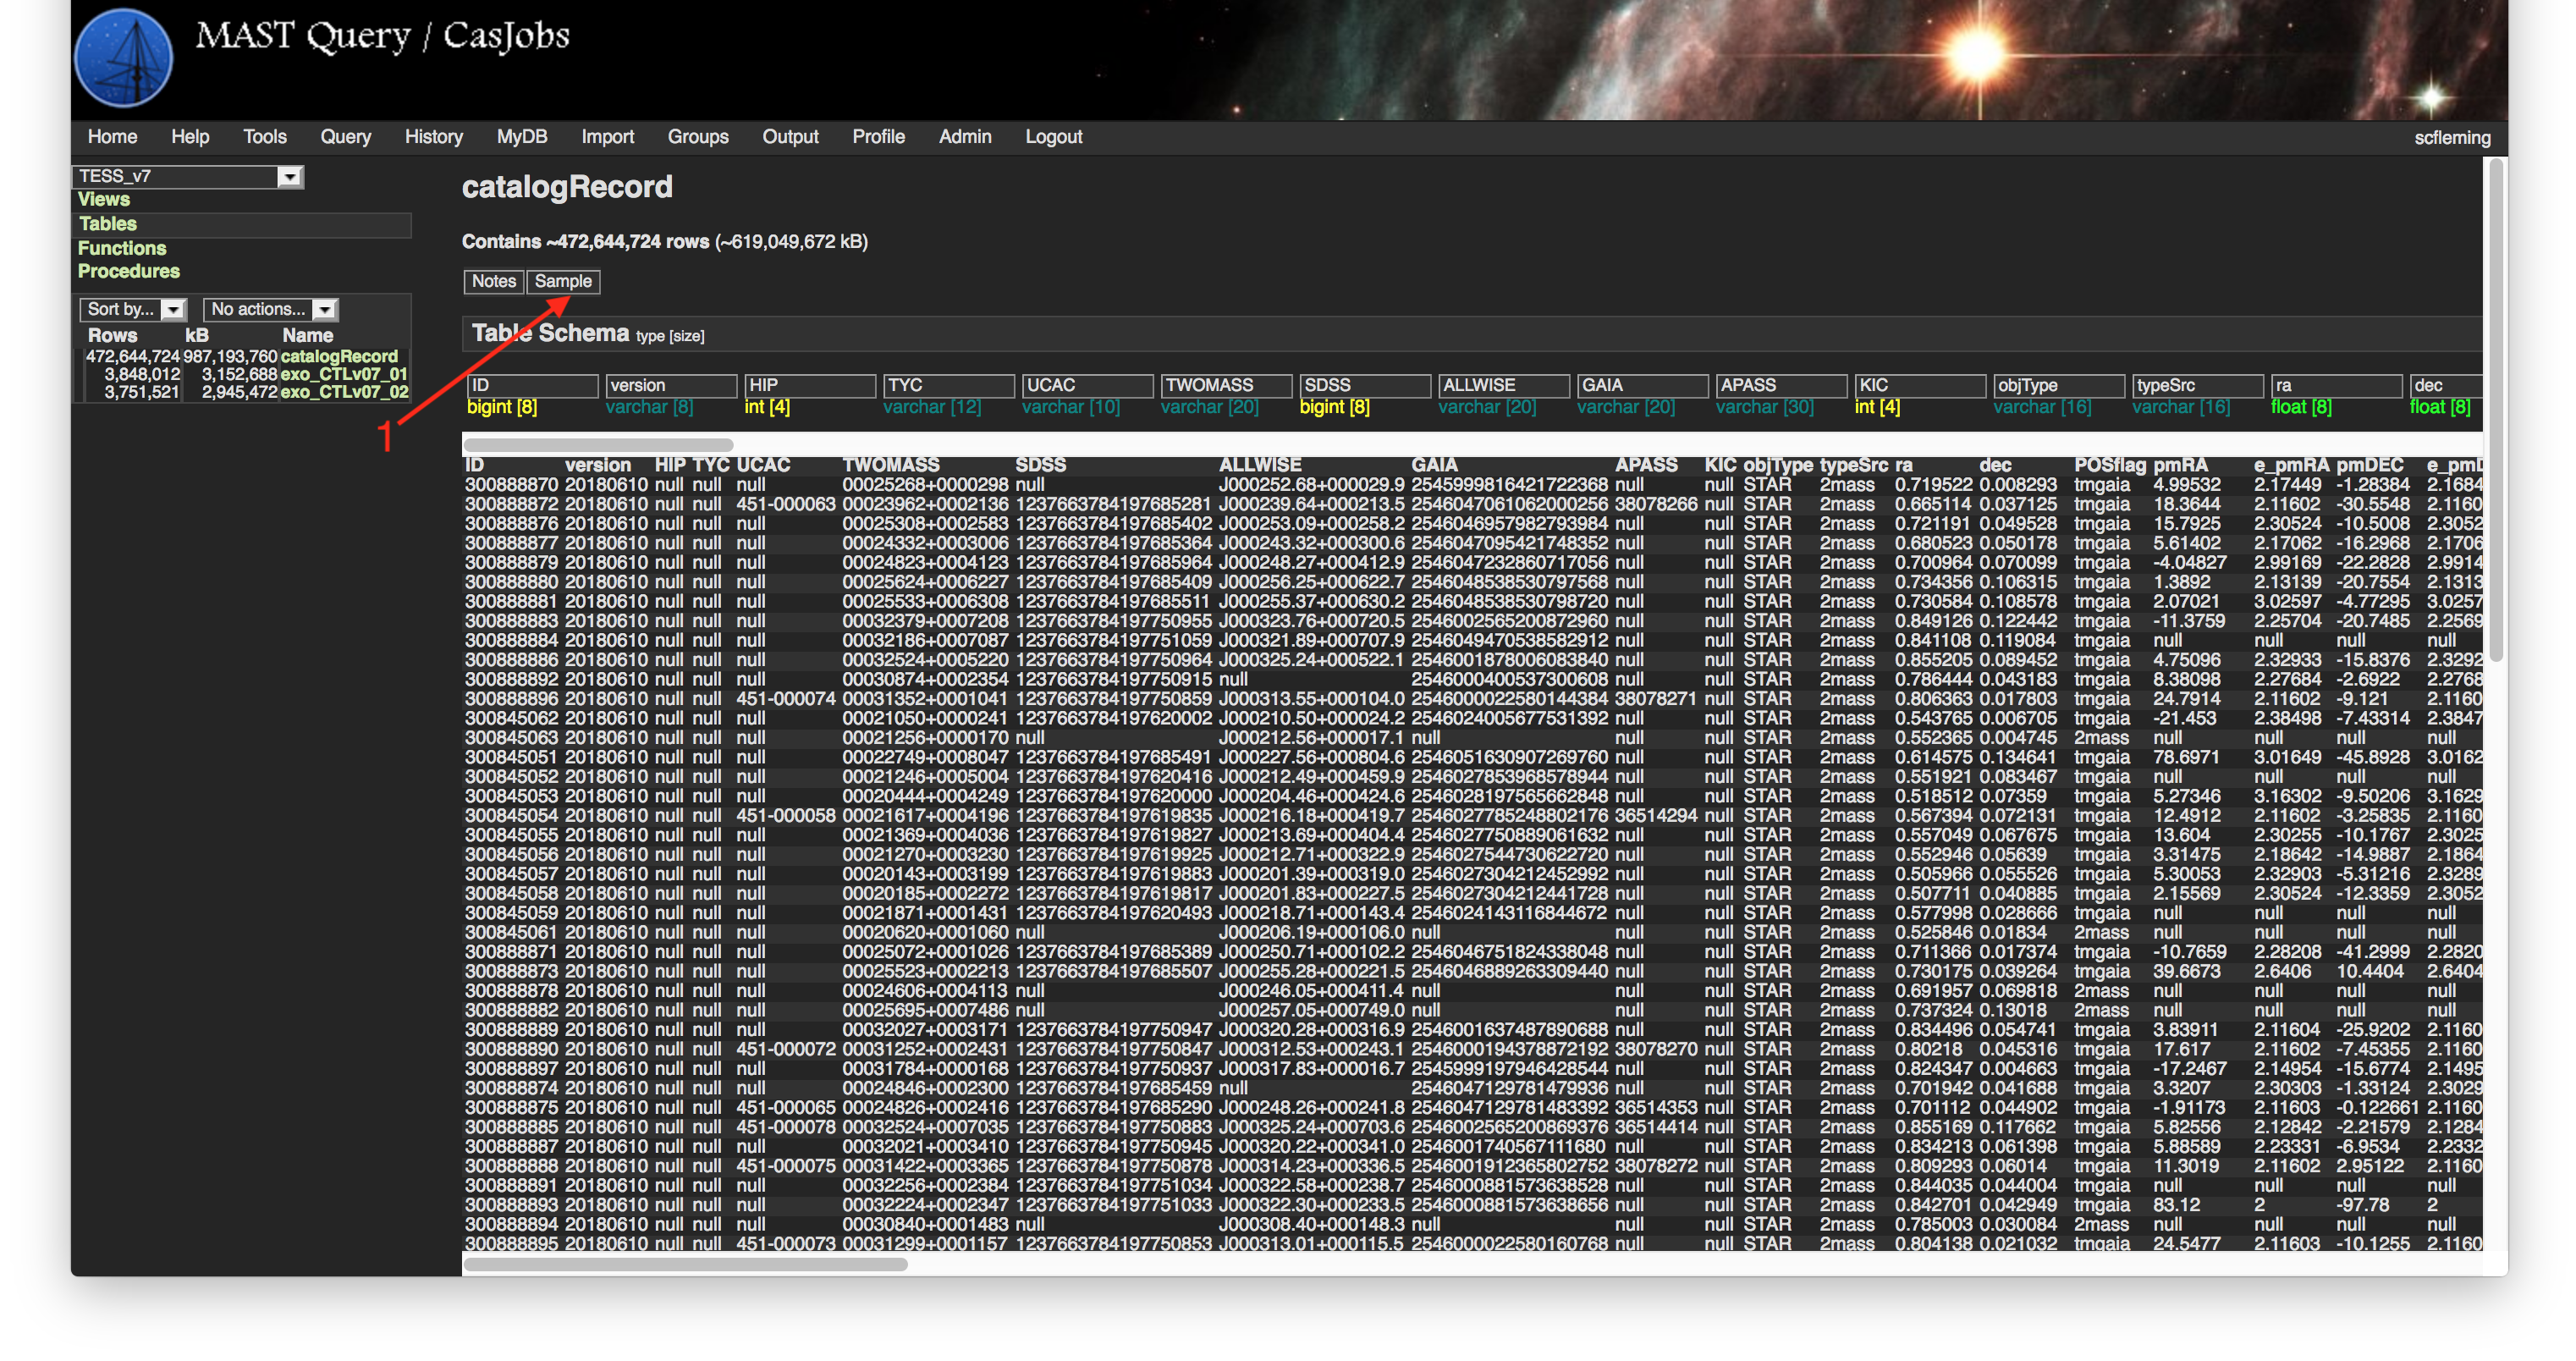
Step 12: Similarly, we can use the Sample link to see a few random rows of the table (Item #1). This is a great way to get a quick look at a table, even a very large one, before writing any queries. |
| Divbox | ||
|---|---|---|
| ||
 |