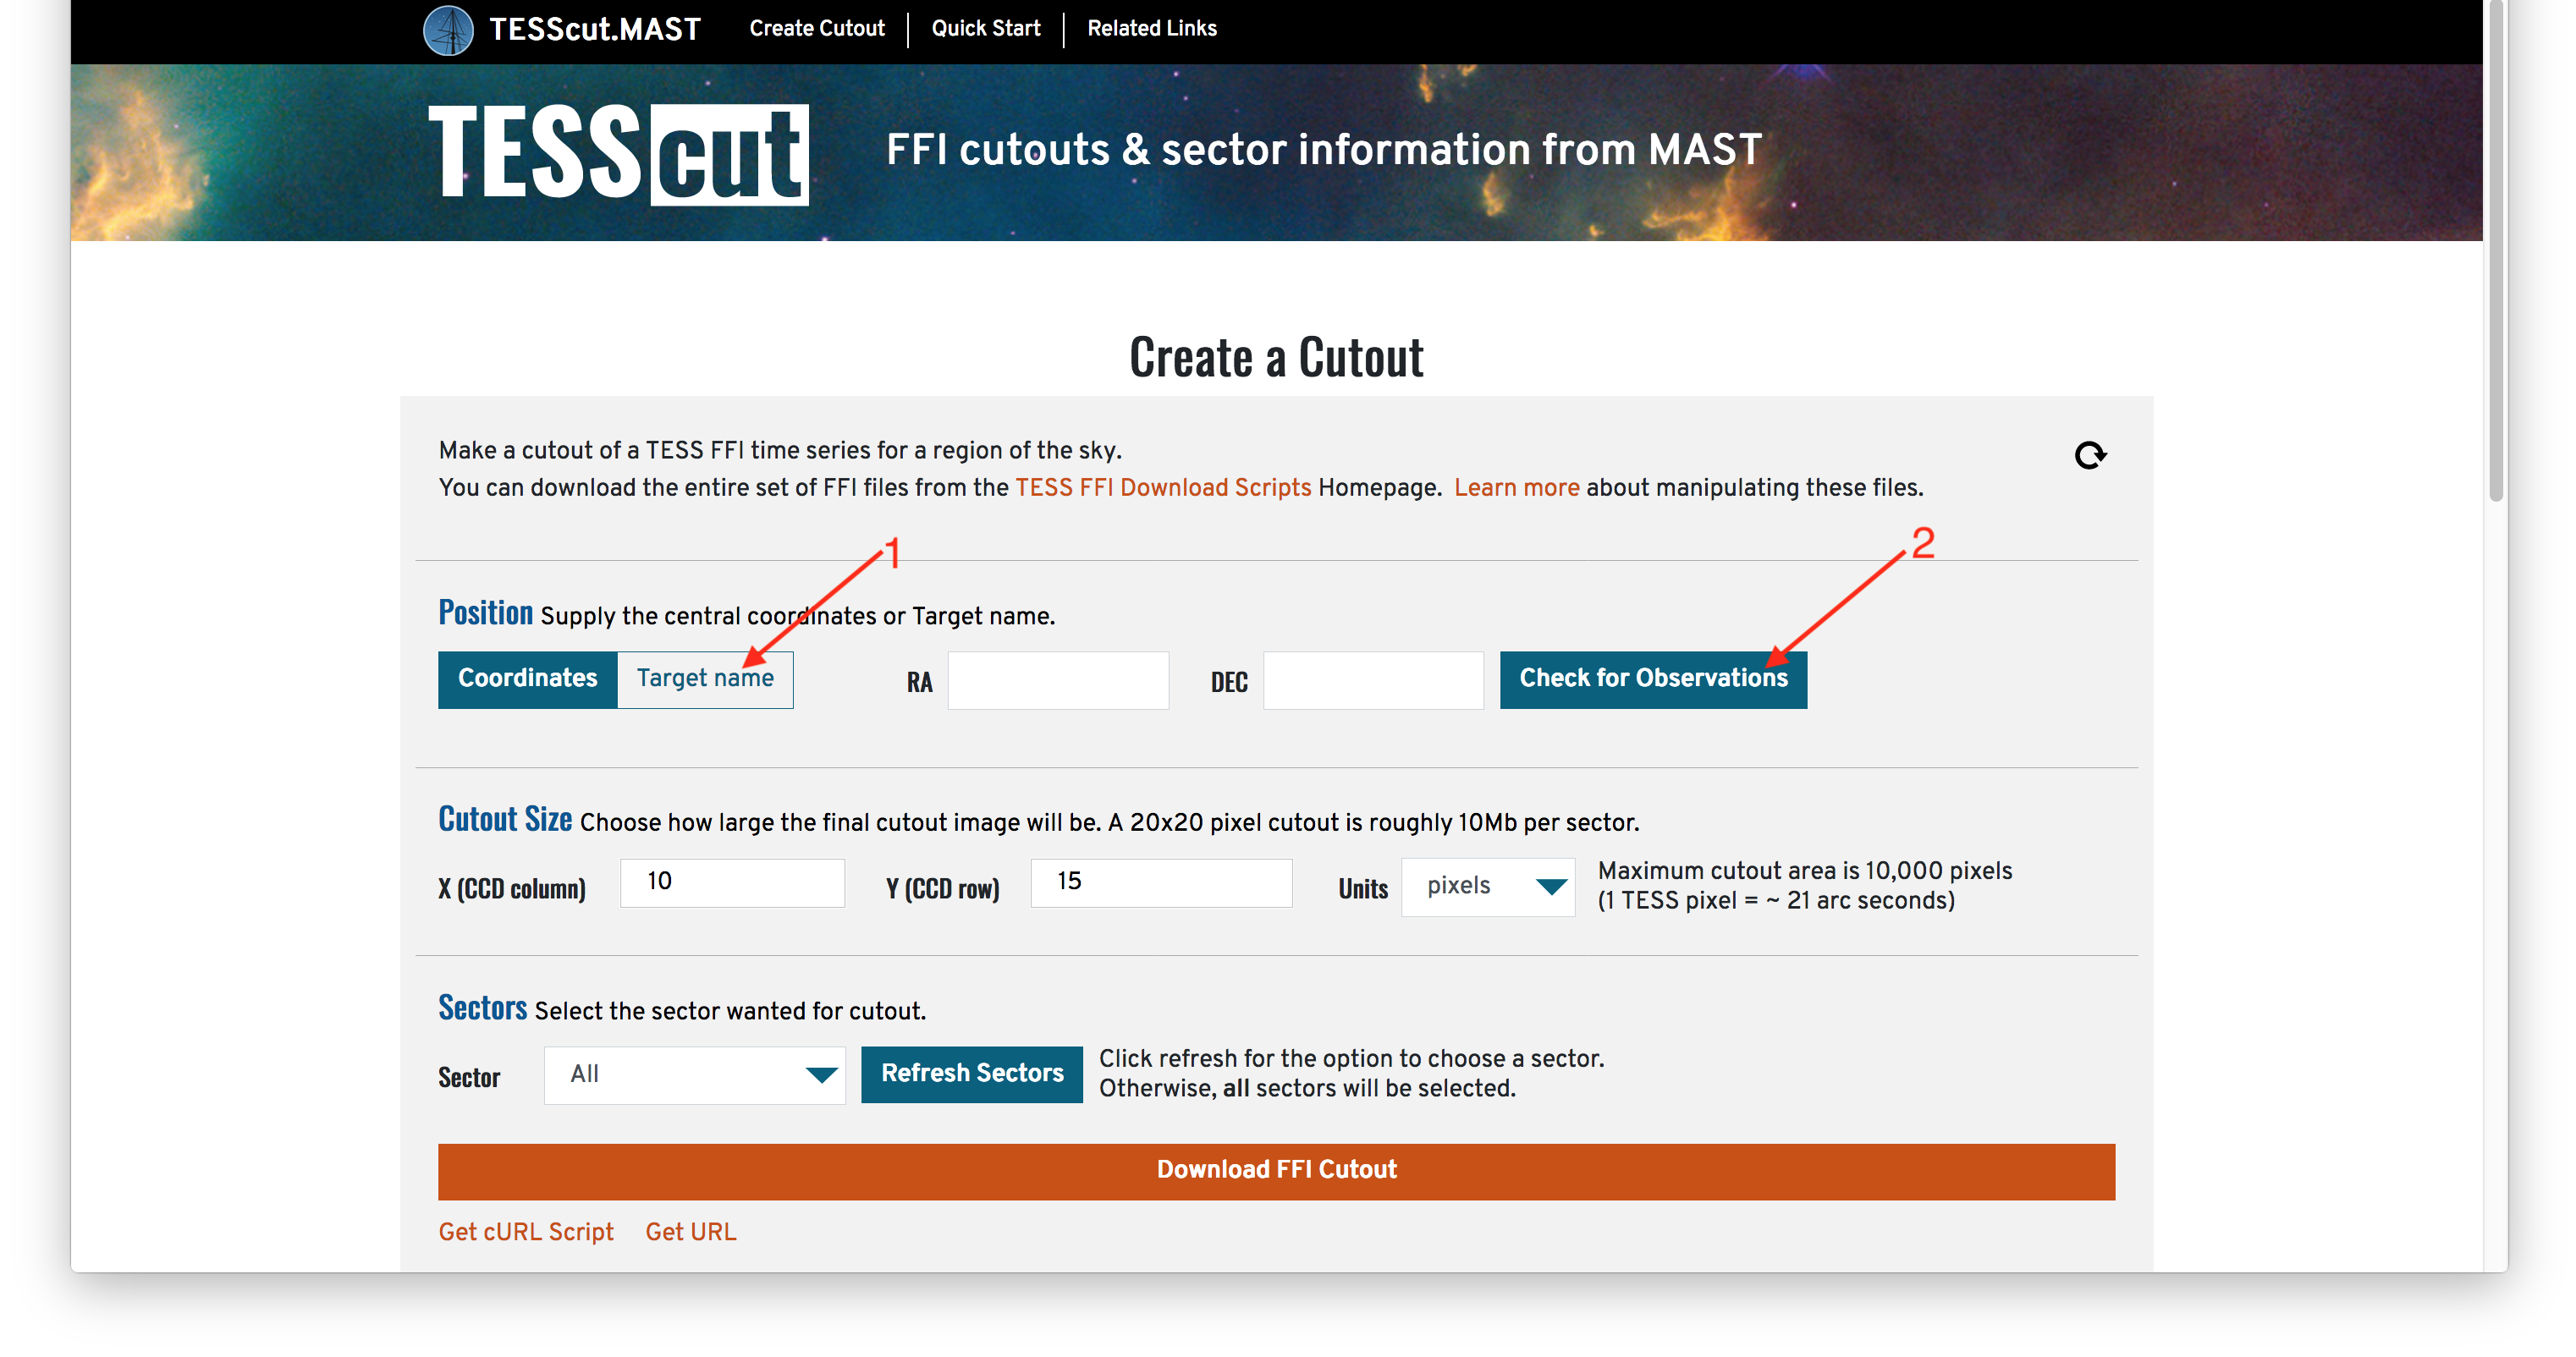
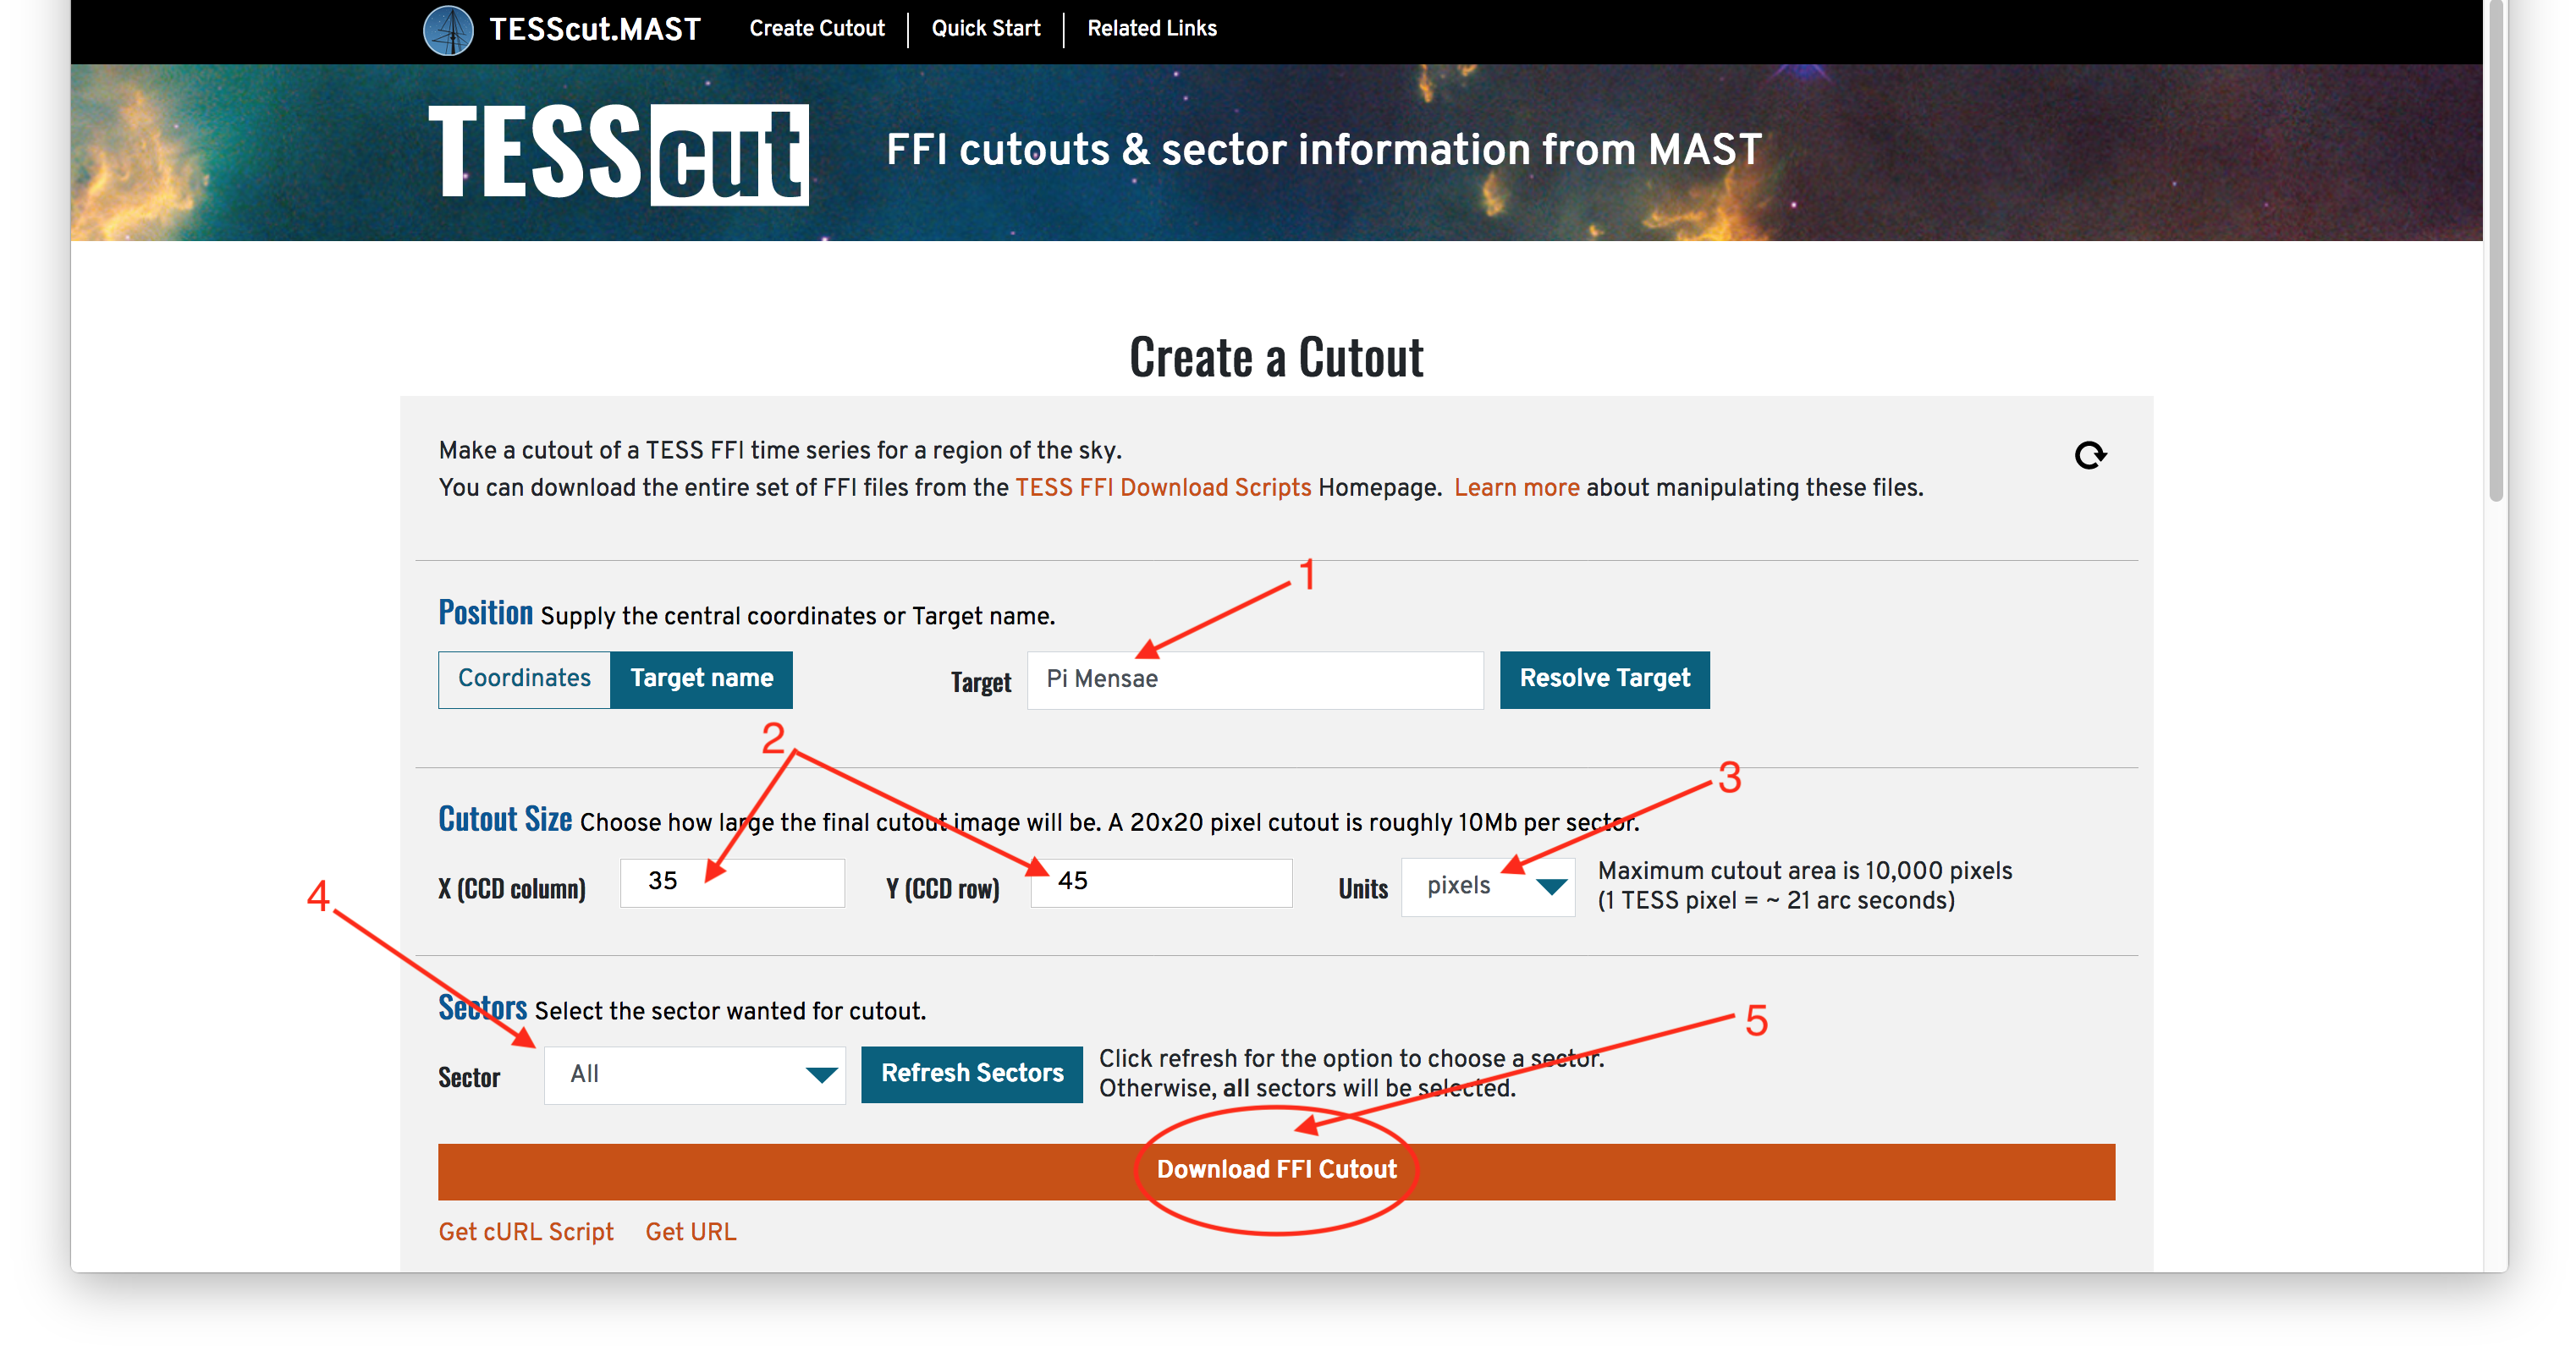
Step 2 - Specify Cutout Parameters And Download The Bulk Download Script: The link at the top of the table Cutout(s): First we will enter the name of our target (Pi Mensae) in the Target box (Item #1) points to the Approved Programs list at the TESS Science Support Center (TSSC), which includes all approved programs across all Sectors. The links in the first column (Item #2) will take you to a target list table (text file) at the TSSC, which includes the title, principal investigator, and abstract of the proposal. The links in the third column (Item #3) will download a shell script containing all the cURL commands needed to download the target pixel, light curve, and data validation files for the program across all Sectors. If you'd like to make sure the name resolver is converting your target into correct coordinates, you can always press the Resolve Target button to see what coordinates will be used before asking for a cutout. Next we will specify the size of our cutout (Item #2). Note that you can specify the size in several units (Item #3), including pixels or arcseconds, but be careful that you have selected the units you want because there is a limit on how large of a cutout you can make! If your cutout spans multiple sectors, cameras, or CCDs you will get a separate cutout FITS file for each region as a zip file. If you know you only want cutouts from a specific Sector, you can specify that in the Sectors area (Item #4), otherwise the default is to cutout across all available Sectors. Once you have all the parameters of the cutout filled in, you can use the Download FFI Cutout button (Item #5) to initiate the request and download the zip file containing your cutouts. Note that if you'd like to see what your cutout request would look like as a cURL command or URL request, perhaps to use and modify in the future, you can use the Get cURL Script and Get URL links below to see the corresponding calls that would result in the same cutout you asked for using the browser. |