This tutorial will show you how to create a cutout of TESS full frame images using the web-based TESSCut interface. We will be creating a cutout of the target Pi Mensae using the target name resolver available in the interface. This is a companion to the Python notebook that shows how to conduct a similar cutout request using URL Requests.
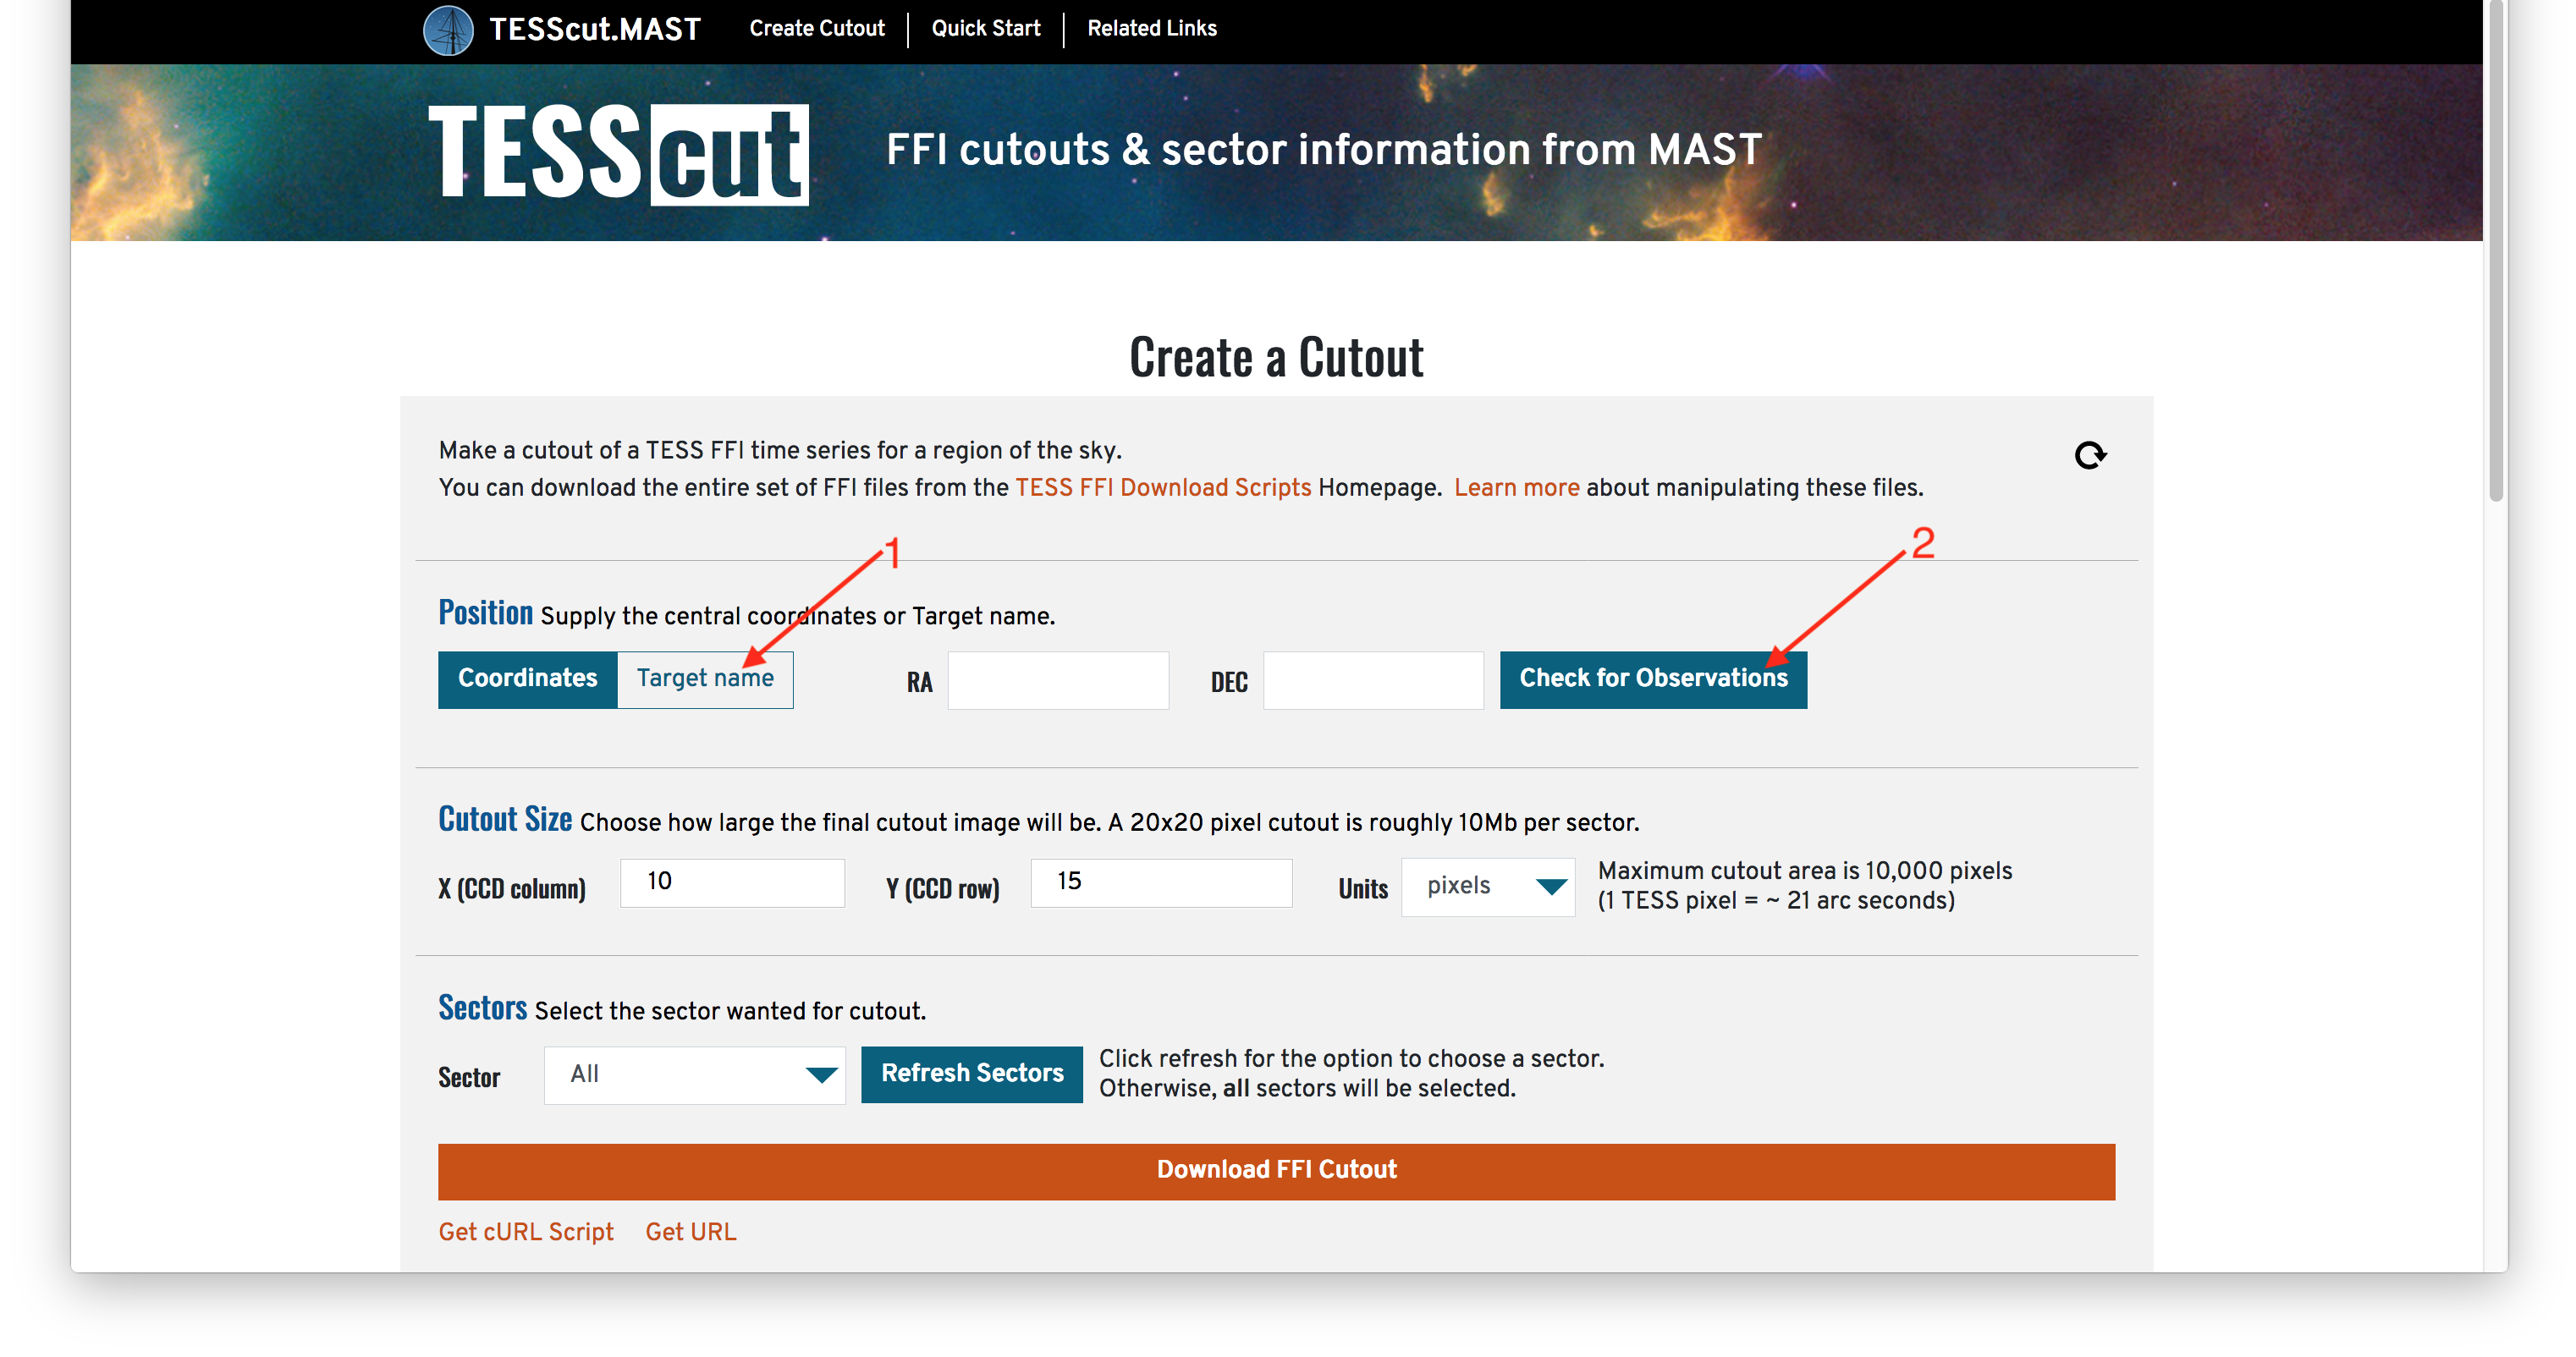
Step 1 - Visit The TESSCut Webpage: The first step is to visit the TESSCut Web UI. Note you can specify a central coordinate in two ways: by entering a celestial coordinate or by entering a target name to resolve into coordinates. In this example, we will use the Target Name resolver option by clicking on that button (Item #1). Note that you can enter a coordinate and hit the Check for Observations button to make sure the TESSCut UI understands your position before you ask for cutouts. (Item #2).
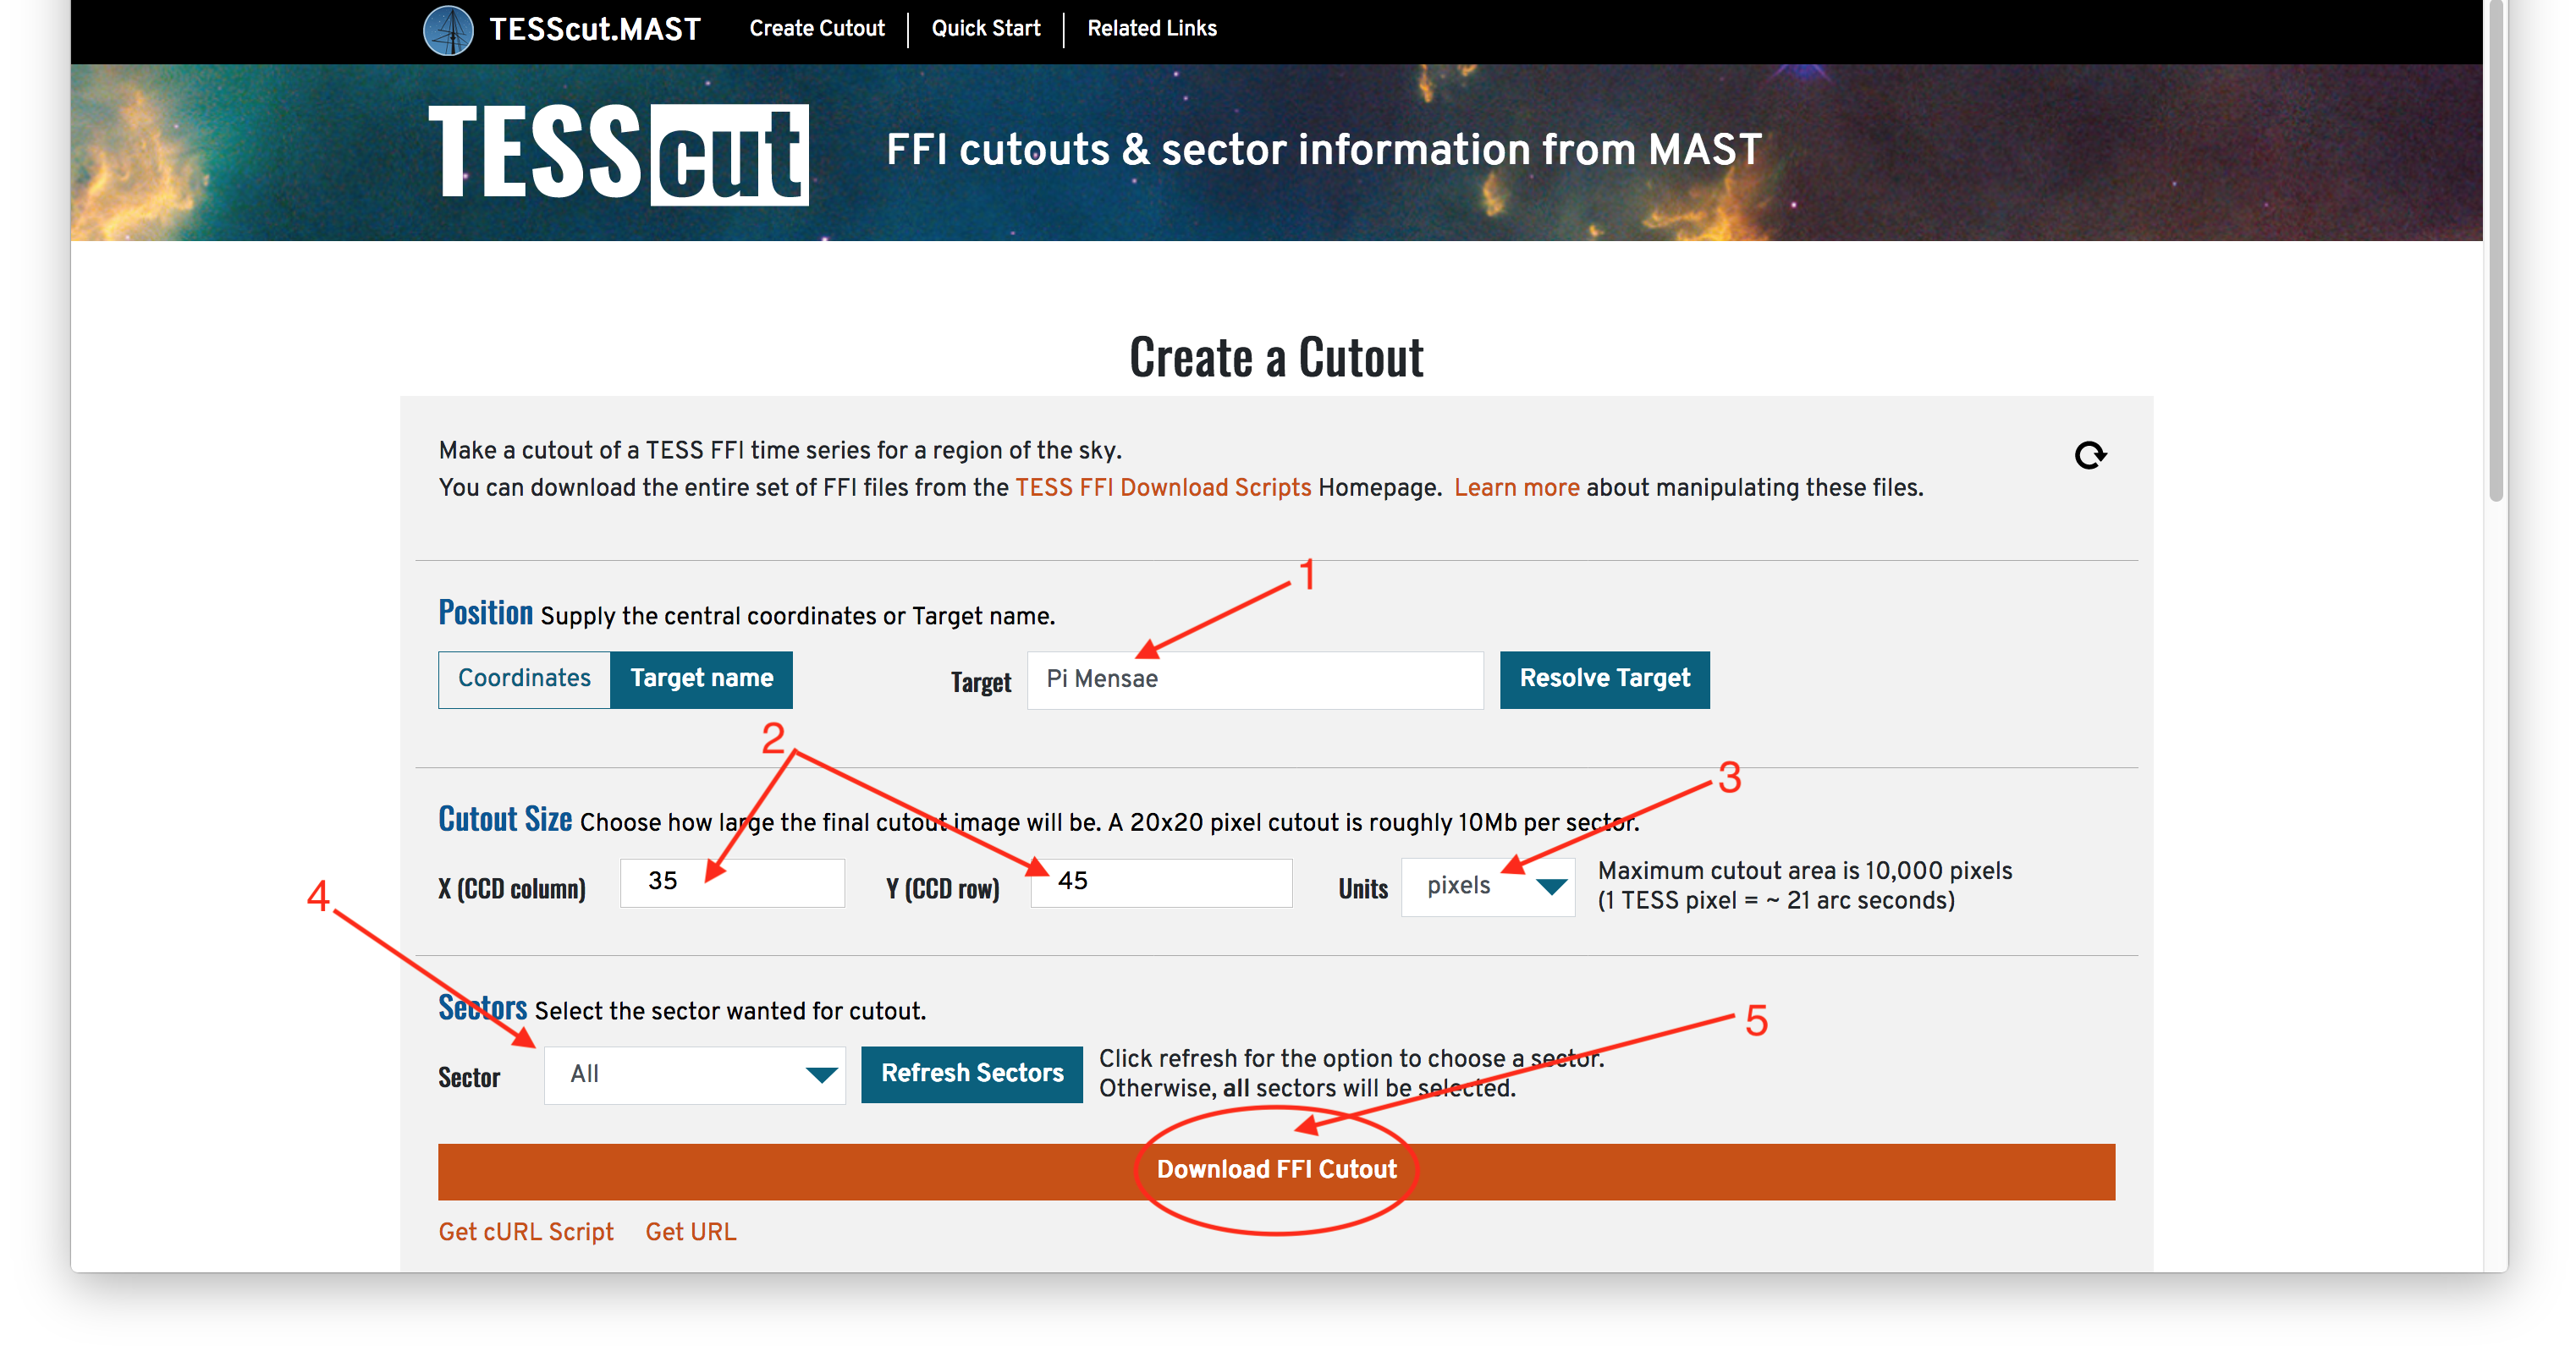
Step 2 - Specify Cutout Parameters And Download The Cutout(s): First we will enter the name of our target (Pi Mensae) in the Target box (Item #1). If you'd like to make sure the name resolver is converting your target into correct coordinates, you can always press the Resolve Target button to see what coordinates will be used before asking for a cutout. Next we will specify the size of our cutout (Item #2). Note that you can specify the size in several units (Item #3), including pixels or arcseconds, but be careful that you have selected the units you want because there is a limit on how large of a cutout you can make! If your cutout spans multiple sectors, cameras, or CCDs you will get a separate cutout FITS file for each region as a zip file. If you know you only want cutouts from a specific Sector, you can specify that in the Sectors area (Item #4), otherwise the default is to cutout across all available Sectors. Once you have all the parameters of the cutout filled in, you can use the Download FFI Cutout button (Item #5) to initiate the request and download the zip file containing your cutouts. Note that if you'd like to see what your cutout request would look like as a cURL command or URL request, perhaps to use and modify in the future, you can use the Get cURL Script and Get URL links below to see the corresponding calls that would result in the same cutout you asked for using the browser.