Page History
| Excerpt | ||
|---|---|---|
| ||
| Panel | ||||||
|---|---|---|---|---|---|---|
| ||||||
On this page...
|
Prerequisites
To work on any of the platforms, you'll first need to make a MyST account. If you don't already have an account, please visit the MyST Account Home to create one.
You'll interact with the platform via JupyterLab. For an overview of all the features available, see the written JupyterLab Documentation or the video from the creators attached below. We also summarize the essential elements in the "Getting Started" section below.
| Panel | ||||||||
|---|---|---|---|---|---|---|---|---|
| ||||||||
|
Getting Started
Home Directory
When you log into a Notebook session, the active directory is your $HOME directory, which will look similar to Fig 1 below. These pre-populated files include documentation to help you use the system and Notebook tutorials demonstrating various science use cases. This directory is unique to you: edits and uploads are not visible to other users.
| Panel | ||||||||
|---|---|---|---|---|---|---|---|---|
| ||||||||
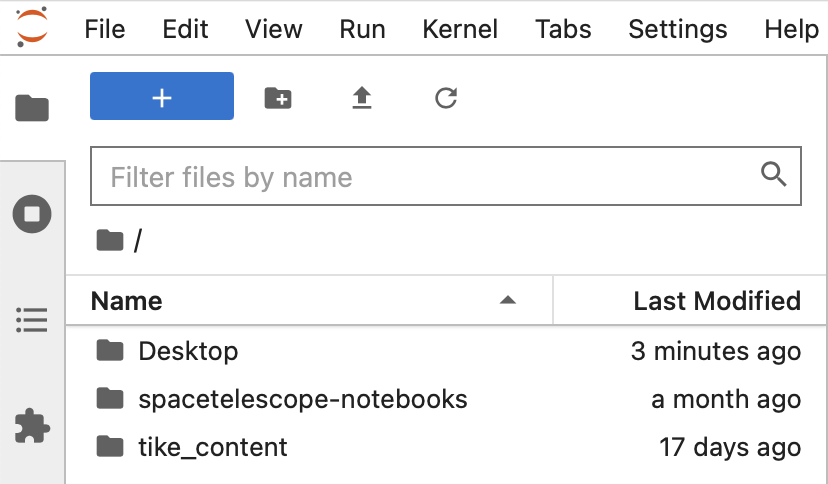 Figure 1 - The Navigation Panel shows a default file list in the home directory. |
Files in this directory are saved on AWS storage and will persist between sessions. In addition, STScI creates backups every two weeks. However, it is always prudent to back up any critical files. Storage limit varies depending on the platform but is typically on the order of 25-50 GB; upload large files sparingly.
| Warning | ||
|---|---|---|
| ||
If you exceed 90% of quota usage, a warning announcement will be sent, and you will be prompted to conserve storage and delete files. If you exceed 100% quota usage, you will be logged off the hub and locked out until administrators can assist you with reducing your storage consumption. |
Opening & Creating Files
To open a folder, Notebook, or other files, double-click the desired item in the Navigation Panel. Clicking the blue plus sign at the top left of the window will open the launcher window seen below in Fig 2.
| Panel | ||||||||
|---|---|---|---|---|---|---|---|---|
| ||||||||
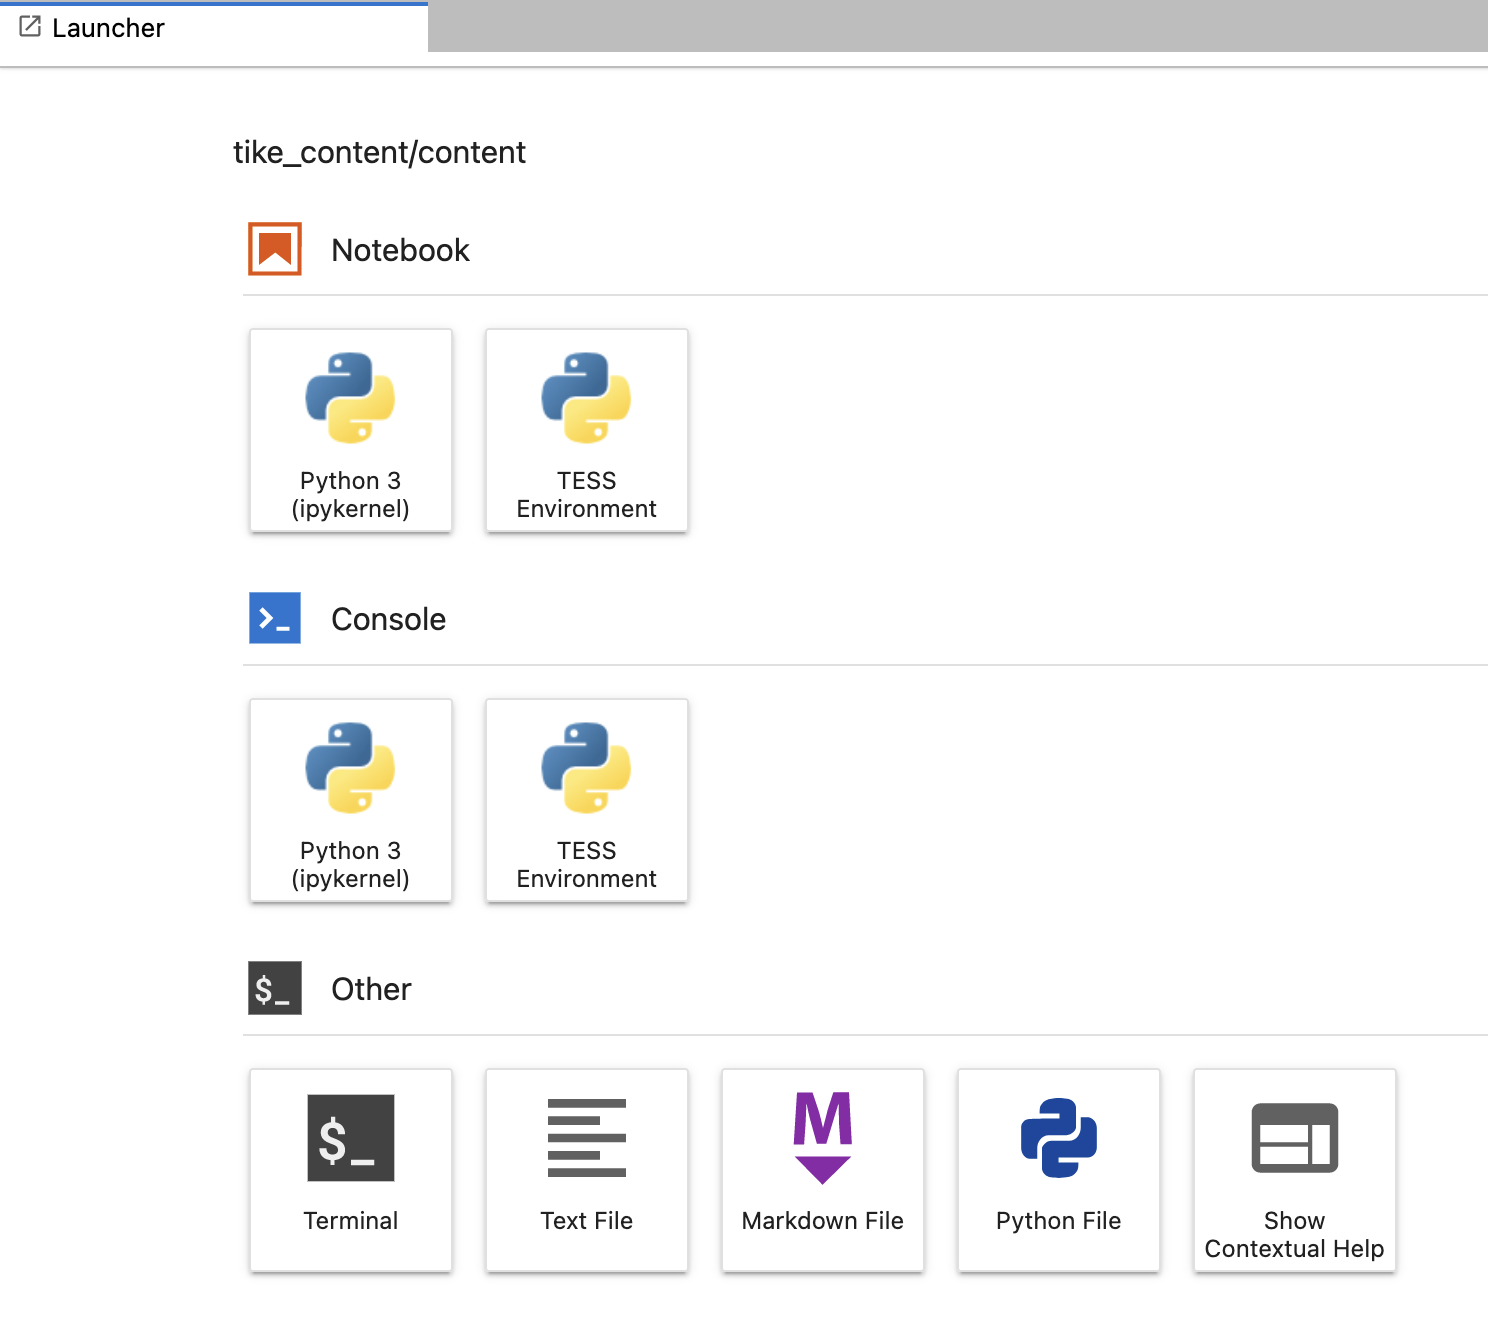 Figure 2 - The Launcher Window, a method of opening new Notebooks, Python files, Markdown files, and terminal windows. Figure 2 - The Launcher Window, a method of opening new Notebooks, Python files, Markdown files, and terminal windows. |
Clicking on a Notebook icon will open an empty JupyterLab Notebook window running in its corresponding kernel. The same is true of clicking on a Console icon. Read more about kernels and available software in the Managing Software section below.
The Terminal window launches a UNIX / Ubuntu shell window located at your $HOME directory. This can be used to enter any typical UNIX commands to tar or zip files, compile code, pip install additional software, etc.
Uploading, Downloading, and
DownloadingCaching Files
If you're transferring many files, consider creating a zip or tar archive first.
Uploading
Data can be uploaded into the Notebook environment using the up-arrow located at the top of the navigation panel, to the right of the blue + button:
| Note | ||
|---|---|---|
| ||
Be mindful of the storage limit when uploading files! |
| Panel | ||||||||
|---|---|---|---|---|---|---|---|---|
| ||||||||
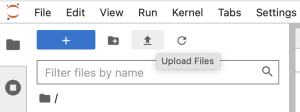 Figure 3 - The file upload button is located in the window's upper left. |
Downloading
You can download data from your Notebook environment by navigating to a file, right-clicking on it, then selecting Download:
| Panel | ||||||||
|---|---|---|---|---|---|---|---|---|
| ||||||||
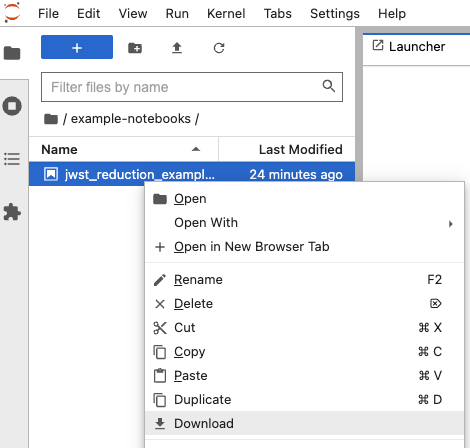 Figure 4 - Download a file by right-clicking on it and navigating the drop-down menu. |
Automatic Data Cache Clearing
Many tools and packages implicitly cache data files that are fetched from the internet during program execution. Like any files stored in your $HOME directory, these cached files consume storage space and incur monthly costs to retain. Consequently, upon logout, selected data caches are purged, deleting downloaded files to avoid storage fees. At this time, the packages involved include:
- Astropy (and many/all client packages of astropy downloads and caching)
- Lightkurve
Although the system will automatically clear your data caches when your session ends, the utility scripts used are also accessible to you via a terminal window or Notebook "!" escape. These may prove useful for rapidly reducing storage consumption should you approach or exceed quota limits:
| Terminal Command | Example | Description |
|---|---|---|
| cache-size | $ cache-size | prints out a human-readable total of your data caches in bytes. |
| cache-clear | $ cache-clear | deletes all data files in your data caches but leaves behind directory structures. |
Automatically Synced Notebooks
Every Science Platform automatically clones a selection of tutorial Notebooks from GitHub and places them in your $HOME directory. These Notebooks are updated regularly, which poses an issue: the Platforms shouldn't overwrite your progress on a tutorial, but it's essential that the code in the tutorials be kept up to date as software is modified. To resolve this conflict, the tutorials are read-only. You will always have access to the latest version of tutorials, at the expense of not being able to edit them. Instead, to make changes or run a Notebook, you must:
- Open a read-only Notebook from its original location.
- Use File → Save as... to save a writable copy in a different location.
- Make changes to the original example Notebooks manually as desired.
Announcements
The bottom right corner of the Notebook display has an Announcements button. A new message is indicated by the status . High-priority messages, such as warnings, errors, and critical announcements, will automatically open in your display.
| Panel | ||||||||
|---|---|---|---|---|---|---|---|---|
| ||||||||
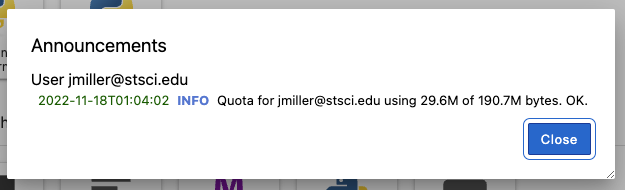 Figure 5 - An announcement about current storage usage. This user is within their quota and has an "OK" status. |
Internet access
Notebooks sessions have full access to the internet. You can download data and software packages into the Notebook environment using Notebook code and standard network tools like wget, curl, pip, and npm. See more in the 'Managing Software' section below. Installations will likely be fast, as the session runs in a data center with a > 1Gbps connection.
| Note | ||
|---|---|---|
| ||
Downloading data from a Platform session to a local machine is discouraged. Egress from cloud storage incurs additional costs; we limit downloads so that we can continue to provide this service for free to all users. |
You can only access your session through a browser window. Despite full internet connectivity, it is not possible to remotely access (e.g., ssh into) your session.Anchor
Managing Software
Python Environments
The JupyterLab environment supported by the JWST Hosted Environment is based on miniconda. Like Python, miniconda can have multiple virtual environments, each containing its own isolated software versions. Our JupyterHub system typically has at least two pre-installed environments, which conceptually are:
- generic analysis
- generic analysis + astronomical packages
In general, you will want to use the environment customized for astronomy. The generic option is a "basic" installation of Python, which may not be suitable for your analysis.
JupyterLab Kernels
In Jupyter, kernels are the background processes that execute cells and return results for display. Conda environments can be used to create a kernel, automatically providing all of the packages needed to run a Notebook. If a Notebook fails to import a package you expected, it may be a sign the wrong kernel is running. To select the kernel on which you want to run your Notebook, go to the Kernel menu and choose Change Kernel. You can also click directly on the name of the active kernel to switch to another.
| Panel | ||||||||
|---|---|---|---|---|---|---|---|---|
| ||||||||
 Figure 6 - Switching kernels. The active kernel is boxed in red in the upper right corner. |
When the kernel is idle, the circle to the right of the kernel name is unfilled. When the kernel is actively running the Notebook, the circle is filled.
Each kernel maintains the Python state for the currently executing Notebook. This saved state includes imported packages and the values of variables. Consequently, the Kernel menu has numerous options for clearing the state and restarting or continuing Notebook execution.
Managing your own JupyterLab Kernel and Packages
The pre-installed software environment is part of the JupyterLab container. While it can be changed – and software can be installed or removed – the changes do not persist between sessions, and users cannot affect one another. Creating a more personal and persistent environment can be done by creating a new conda environment under your $HOME and making a JupyerLab kernel from it. The TIKE project has instructions on installing extra software following this recommended process.
Getting Help With...
Jupyter
Within the menu bar at the top of JupyterHub, the 'Help' option contains excellent reference documentation. From there, you can access full JupyterLab overview FAQs, Markdown tips, and the forum. This is not limited to text-based help: video tutorials are also available.
Science Platforms
To send feedback, report bugs or problems, or request additional pre-installed software, contact the MAST help desk.
Additional Resources
- Markdown Cheat Sheet, to learn about formatting text in Jupyter
- Jupyter Forum