This tutorial will show you how to do a search on a single target, based on a target name, within the TESS Input Catalog in the MAST Portal. Specifically, we will do a search centered on the exoplanet host star HD 209458.
Step 1 - Select Collection: From the MAST Portal homepage, the first step is to change the collection of data we are searching in from the Collections menu (Item #1) at the top left.
Step 2 - Select TESS Input Catalog: From the Collections drop-down menu, select MAST Catalogs, then, in the Mission drop-down menu that appears (Item #1), select the TESS Input entry for the TIC, e.g., "TESS Input v6". Note that only the most recent version of the TIC and CTL will be available to search in the Portal.
Step 3 - Enter Target For Query: We are now ready to do a target search by entering text into the Target Search Box (Item #1). The Target Search Box uses a name resolver that accepts a wide range of text values, including any name that is resolvable by NED or Simbad, any catalog entry from the Kepler Input Catalog (e.g., "KIC nnnn"), the K2 EPIC Catalog (e.g., "EPIC nnnn"), and the TESS Input Catalog (e.g., "TIC nnnn"), as well as some special areas of the sky, such as "GOODS-N", "GOODS-S", "HUDF" for the Hubble Ultra Deep Field, etc. In this example, we'll do a search centered on the exoplanet host star HD 209458.
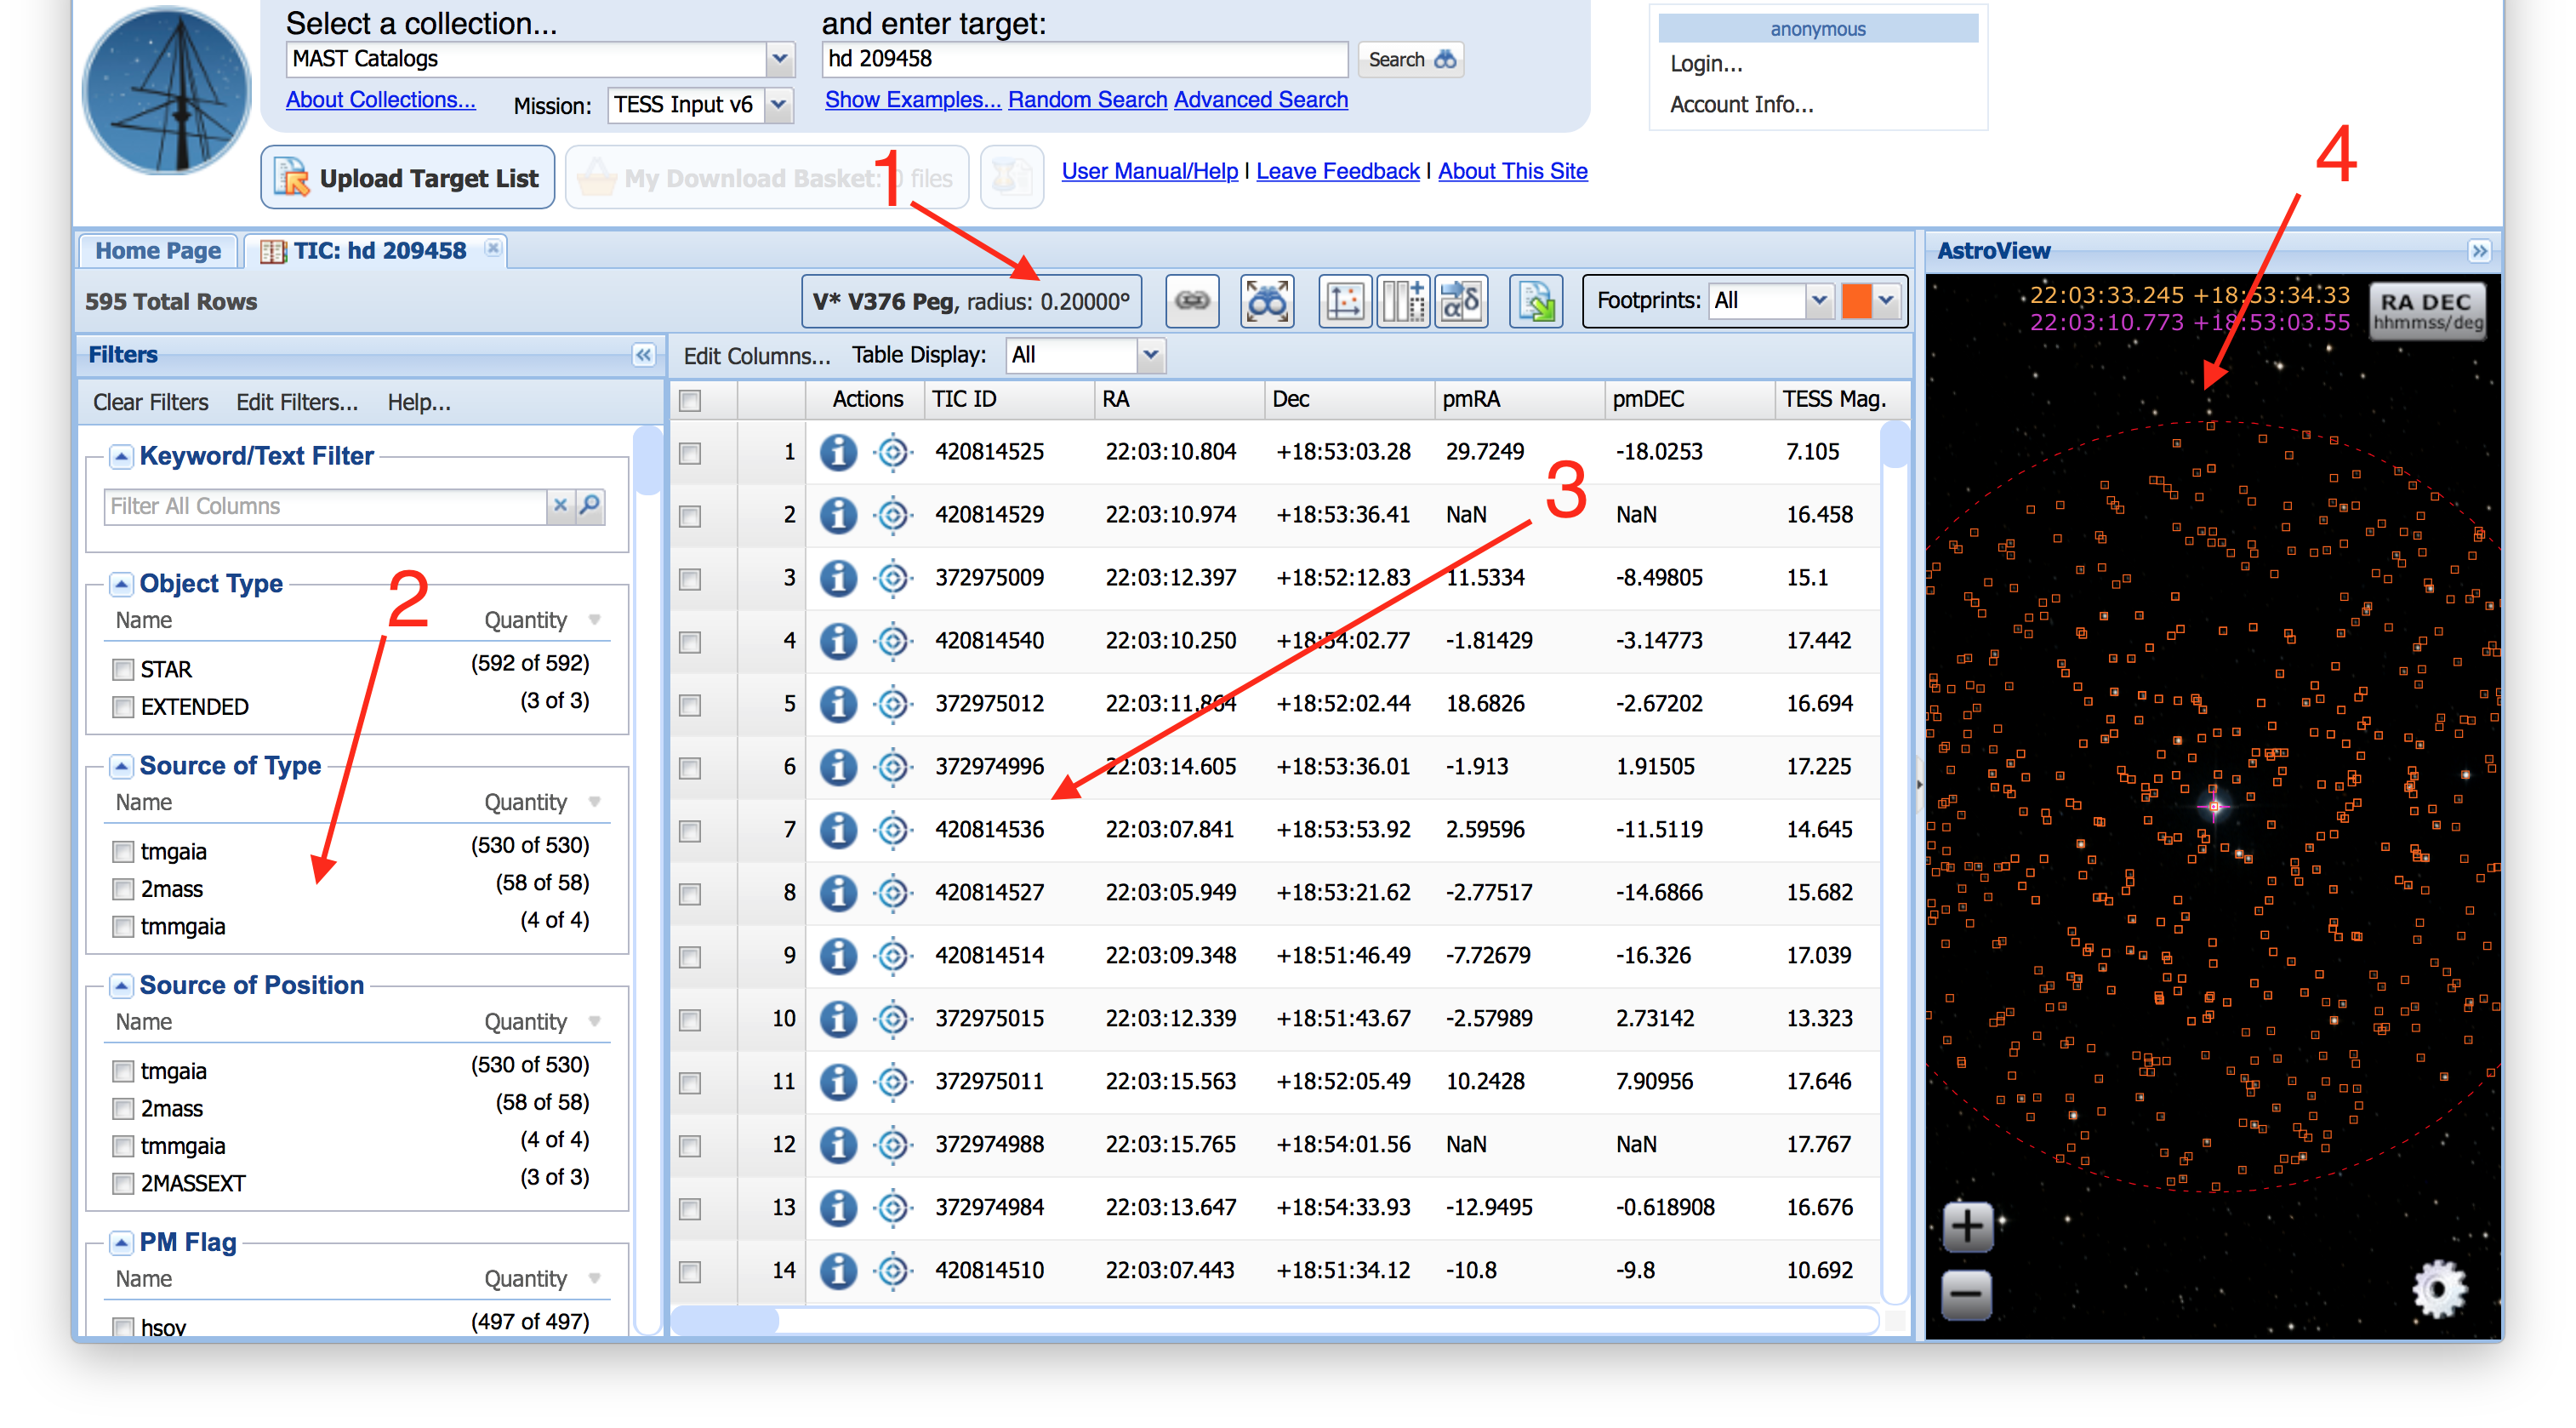
Step 4 - Understanding The Search Results: We now see the results of our search. First, note that the default search radius is often assigned to be a 0.2 degree radius (Item #1). Exceptions are for any objects resolved by external services (like NED) that have object radii defined for them, e.g., extended objects like galaxies or clusters. These can always be changed by specifying your search radius (see the Show Examples link below the search box for examples).
The search results area has three main panels, on the left is the Filters panel (Item #2), where you can select subsets of your returned rows by filtering column values. In the middle is the Search Results Grid (Item #3), which contains the table of results itself (hint: columns can be sorted by clicking on the headers). On the right is the AstroViewer (Item #4), which is a sky map that will overplot the footprints of observations or catalog objects from your search results, and offers a wide range of background images from surveys that span the electromagnetic sepctrum from X-rays to the radio. We can see all the TIC sources in our 0.2 degree search radius are highlighted by small orange footprints in the AstroViewer and listed in the Search Results Grid.
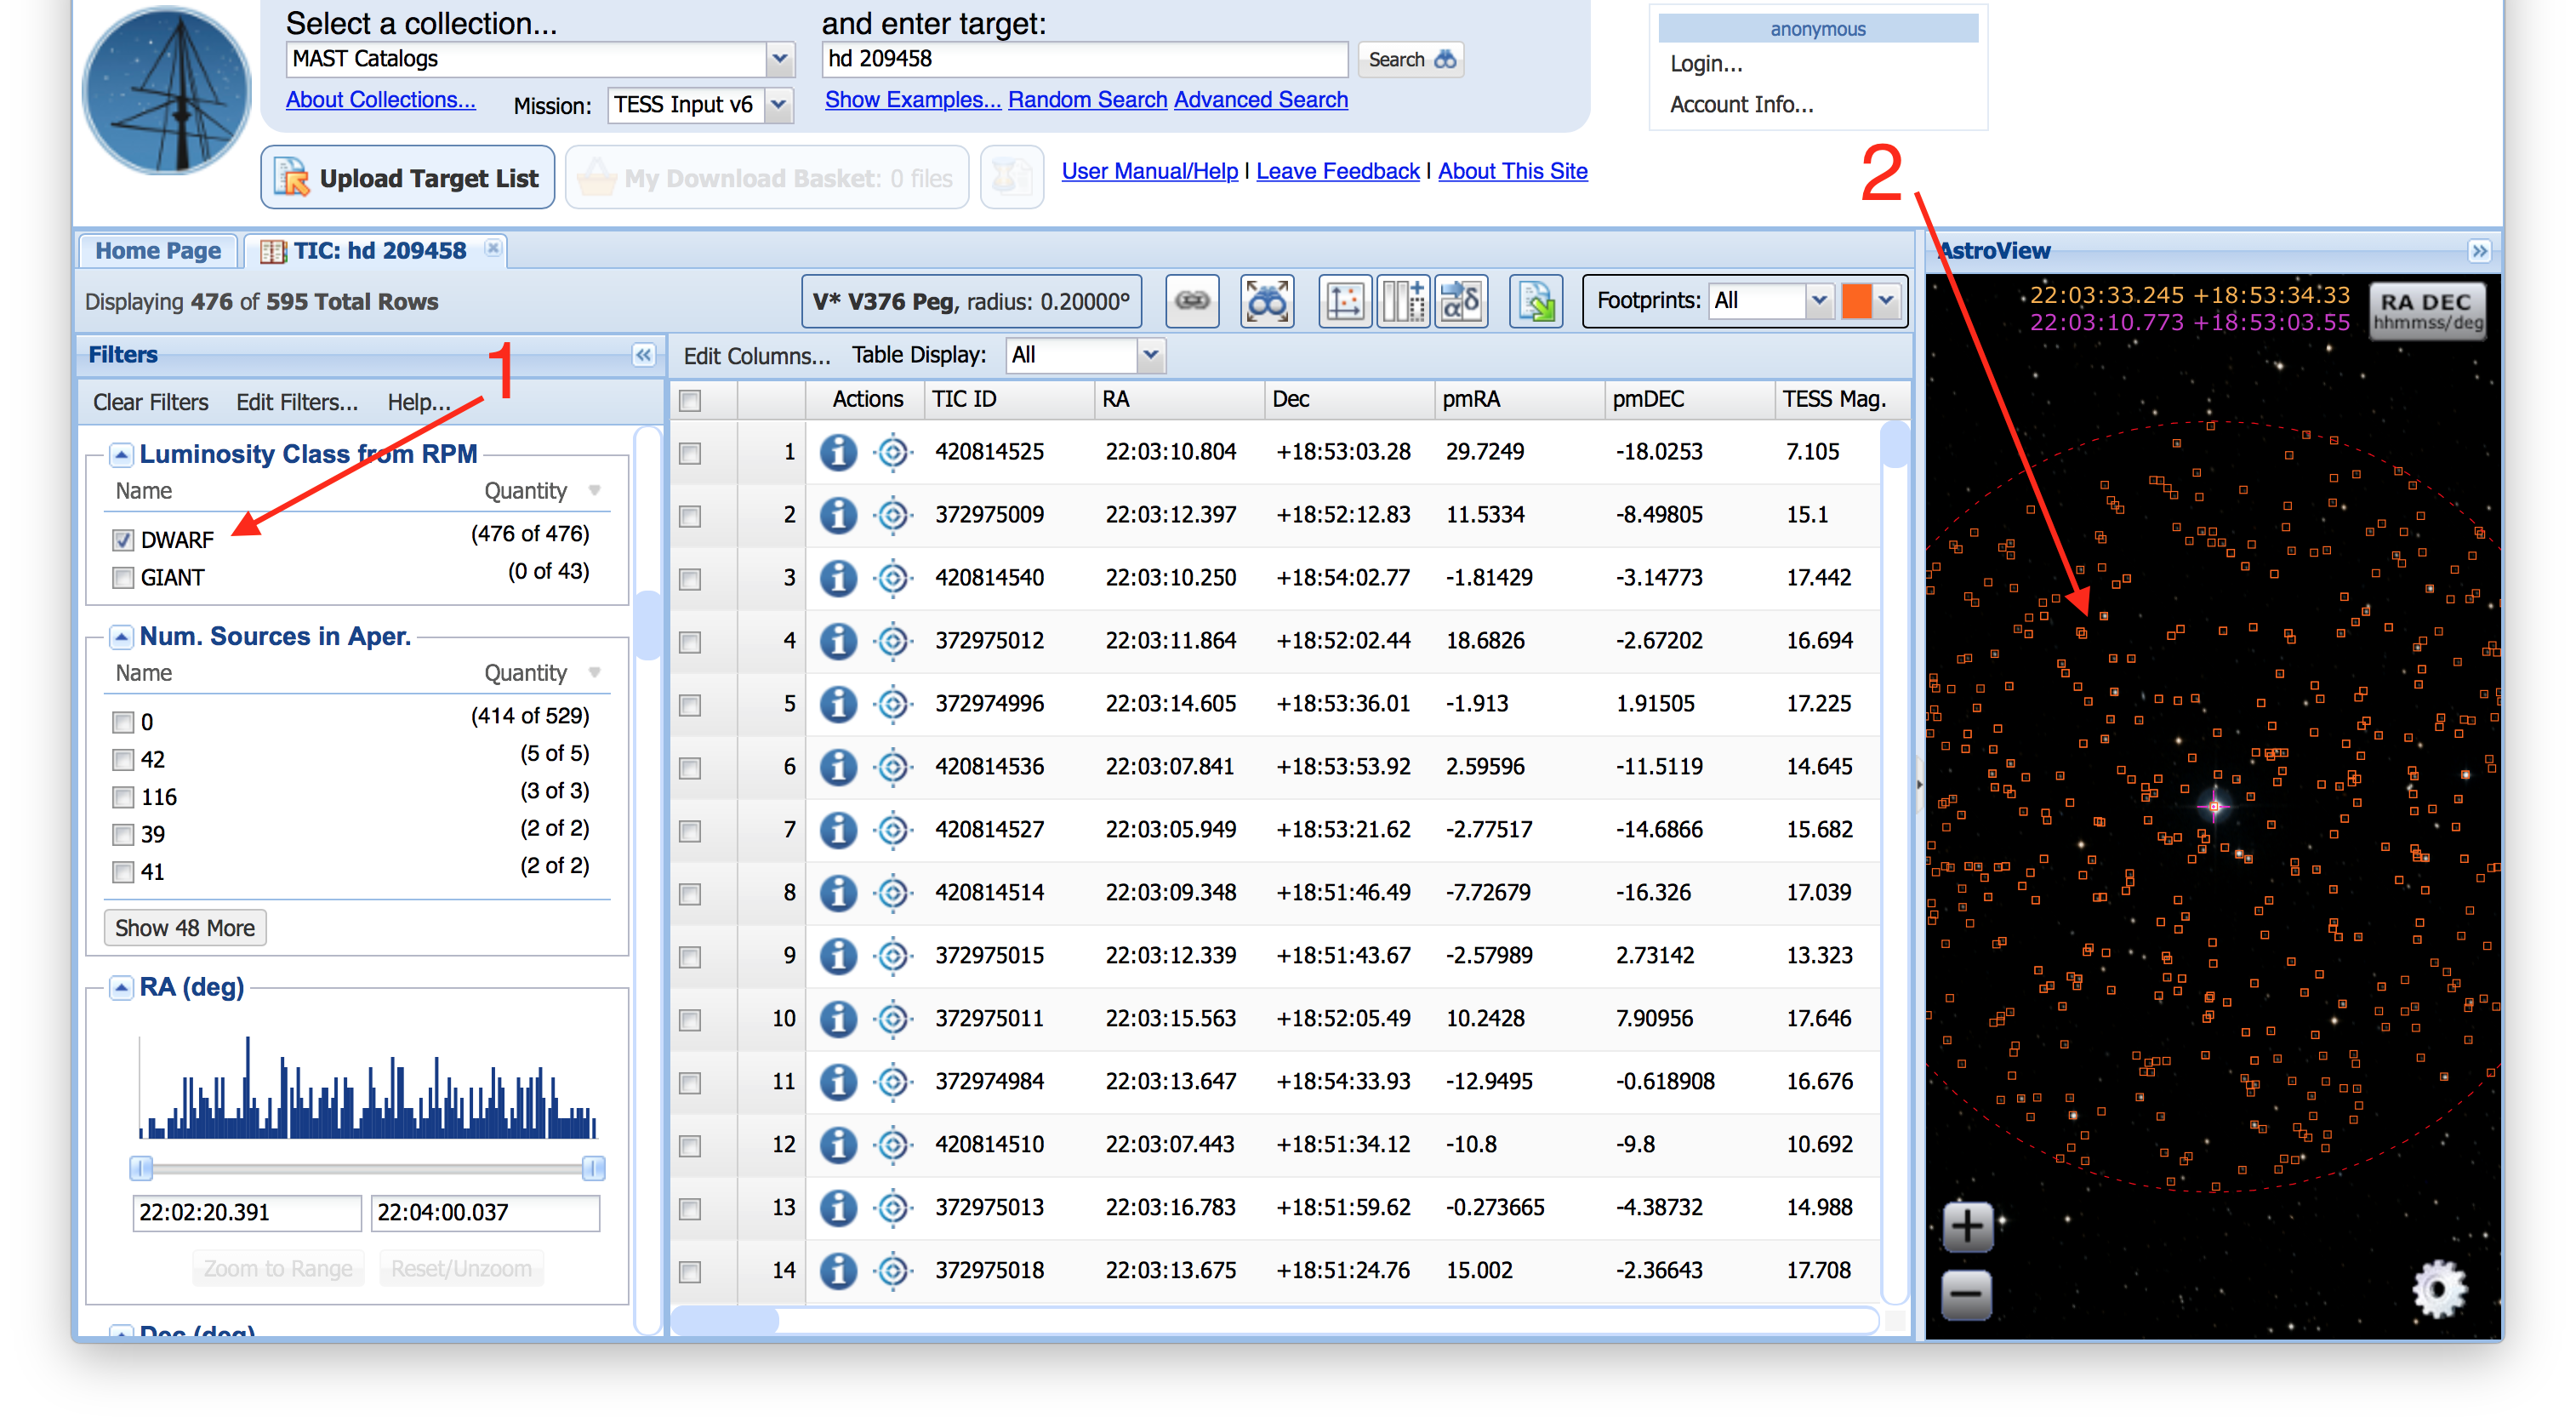
Step 5 - Filter The Results: We'll do a quick filter to demonstrate how to select subsets. In the Filters panel on the left (Item #1), we'll scroll down to the Luminosity Class From RPM subpanel (tip: use your browsers "search" to locate the text on your screen quickly), and check the box to only select those targets identifed as dwarfs by the reduced proper motion diagram. Note: you can use the Edit Filters... link at the top of the Filters panel to add or remove any columns from the Filters panel, not every column will show up by default in the Filters panel. You can see in the AstroView the results of selecting only these targets (Item #2).
Step 6 - Save Your Results: You can save the search results at any time using the Export Button (Item #1). From the dialog menu that appears, you'll be able to select the format of your output file and whether you want to export all the available columns in the catalog, or only those that are currently displayed in the Search Results Grid.


